Category: Deliciousness

All things food related

It’s Chili Weather

It’s in the air.  You’ve no doubt felt it, as have I.  I’ve been waiting for it since it left last spring.  You know what I mean, right?  The CHILL in the air.  It was 37 degrees in the Queen City yesterday morning.  The leaves are turning.  Football is in full swing.  The jeans and light sweaters have been resurrected from the back of the closet.  It’s officially CHILLY outside.  That means…

It’s time for CHILI inside!

Here’s how to make My Momma’s Chili…which just happens to be the best EVER!

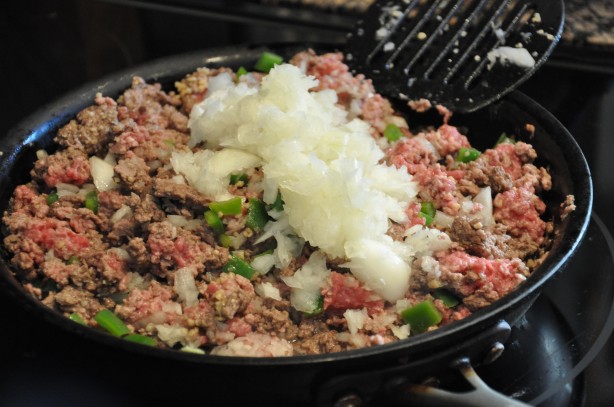
First you start browning the beef

If that looks like a lot it’s because I double the recipe.  (It’s always better the next day because the flavors really mesh.  So I like to make sure we’ve got a few days worth prepared.) Meanwhile chop the bell pepper and the onion

(I hate chopping onions and I don’t like big chunks of onion in anything so I cheat and use the Cuisinart Food Processor)

When about half the beef is browned add peppers, onion, and minced garlic and continue to cook until all the beef is browned, then drain.

My mom always cooked this recipe in a soup pot on the stovetop.  In recent years I have found that a slow cooker works just as well…if not better.  So, next transfer the drained beef and veggie mixture to a slow cooker or soup pot, whichever you have or prefer.

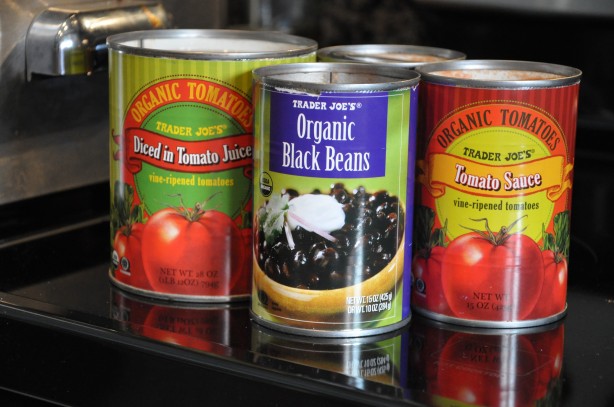
Next up are the canned ingredients

(I have dreams of going all Martha, starting a community garden and eventually using my own canned tomatoes for this, but for now TJ’s will do.) First the diced tomatoes

Then the tomato sauce

Then the beans

My mom’s recipe calls for kidney beans, but I am just not a fan of those.  I much prefer black beans so I substitute those.   (I also think that the contrast of the black against the red of the chili base looks prettier.  So it’s really a win-win.)

Next up are the spices

the water (remember, I’m doubling the recipe.)

and the tomato paste.

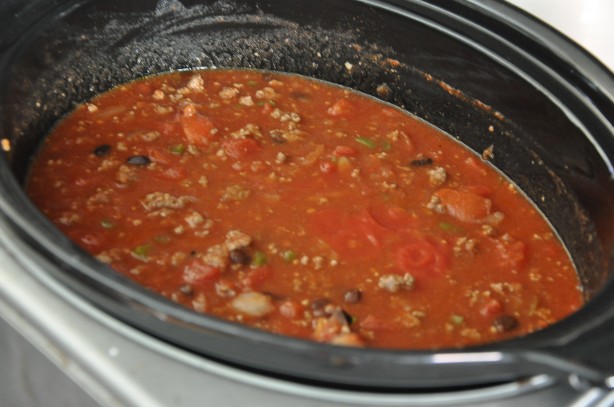
Then give it a good stir, cover it, and let it cook.  If you are using a slow cooker, put it on the low heat setting.  If you are cooking it on the stovetop, then simmer.  Either way it needs to cook for a couple hours, stirring occasionally, so that all the flavors meld together.  You’ll know it’s ready when it smells fantastic and all the ingredients look homogenized rather than separated in the pot…like this

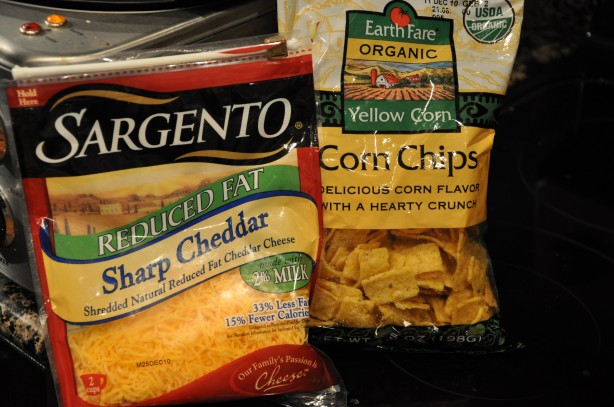
To serve it you’ll need corn chips and cheese.  I realize that the addition of corn chips is a little “low brow,” but, trust me, it’s worth it.

Cover the bottom of your bowl with the chips, top with a couple ladles of chili, then sprinkle with the shredded cheese.  Personally, I like a few corn chips on the side for added crunch.

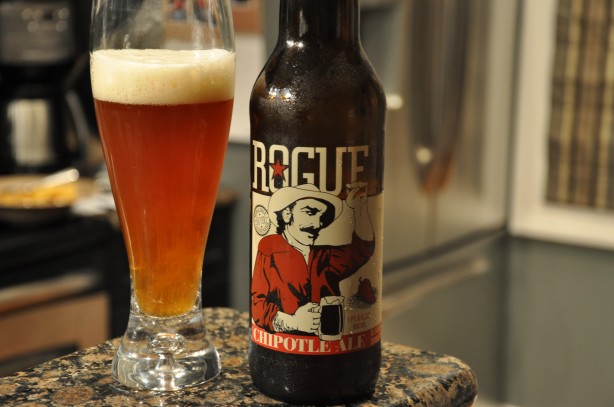
Of course you’ll also need a good brew to rinse it down.  I sent the Beer Guy on a beer run and he came back with this deliciousness – Rogue Chipotle Ale.

Many of our favorite beers are from the Rogue Brewing Company and this one has just been added to the list.  I must say, it’s smoky flavor, crisp mouth feel, and slightly heated finish were the perfect accompaniment to the Chili Dinner and the Chilly Weather.

Go ahead make this dinner for yourself and look for this great beer in your area.  Here’s the full recipe

My Momma’s Chili

  • 1lb ground beef
  • 1 can crushed or diced tomatoes
  • 1 can tomato sauce
  • 2 tsp chili powder
  • 1 tsp salt
  • 1/8 tsp cayenne red pepper (or more for spicier chili)
  • 1/8 tsp paprika
  • 1 medium onion (chopped)
  • 1 green bell pepper (chopped)
  • 1 clove garlic (minced)
  • 1 1/2 c water
  • 1 small can tomato paste

Brown meat, onion, pepper, and garlic in a skillet.  Drain.  Add all ingredients into a soup pot or slow cooker one at a time.  Mix well.  Bring to a medium boil. Stir often.  Turn down to low heat.  Simmer.  Cook until all tastes have blended together.  This can simmer all day, just make sure that it is not too fast or too high or it will scorch.  Add salt and pepper to taste.

Enjoy the warm chili in your tummy while the weather is chilly outside!

Cheers, y’all!
Wine Girl

Permanent link to this article: https://kitchendoesnttravel.com/archives/401

A Farmer Chic Lunch

We left the DC area in a bit of a fog this morning, literally…

Doesn’t it look like we are about to drive out into an unknown void?  Crazy! But, thankfully, it was not a “void.”  We had a very specific destination today. Well, two actually.  Ultimately we were headed for Colchester, CT to spend some time with dear friends.  But from the moment I awoke this morning my mind was focused on one thing and one thing only – LUNCH!

How is that different from any other day, you may ask?  Truthfully, not much.  The difference today was that I was fixated on WHERE I was going to eat lunch, not WHAT I was going to eat.  We routed our trip through Westport, CT specifically so we could have lunch here

I saw the chef, Bill Taibe, on The Martha Stewart Show months ago and have been plotting this lunch ever since.  This is me being SUPER EXCITED about our lunch plans…

Le Farm is what I like to call “Farmer Chic”… and this is one of my FAVORITE vibes!  BG asked me to define exactly what I mean when I say “Farmer Chic” and I had a hard time doing so.  I may not be able to articulate it, but I know it when I see it.  This was it and I LOVED it!

The first thing that I loved about Le Farm, a point that was discussed in depth on The Martha Stewart Show and one of the main reasons I wanted visit, is the philosophy behind it.  As listed on it’s website the restaurant’s goal is

“to support our local farmers here in Connecticut as much as possible, but sometimes we may have to cross state lines to find what we need.  One thing we can promise is that your dinner with us will be meticulously sourced and simply prepared.”

It is a farm-to-table restaurant, which www.wisegeek.com defines as

“a restaurant where the ingredients are sourced as locally as possible, which means that they tend to be very fresh, and they have been through a minimal series of middlemen, if any, literally going directly from the farm to the table. The farm-to-table restaurant trend is part of a larger movement to eat as locally as possible, taking advantage of seasonally available fruits and vegetables and focusing on the environmental and cultural impacts of farming.”

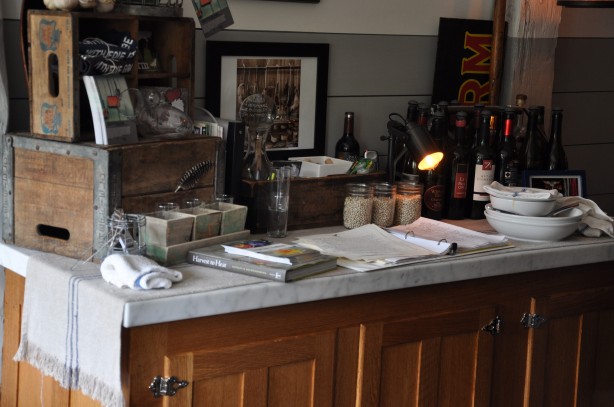
The restaurant is tiny. It only had 12 tables in the whole place.  Upon stepping inside my first thought was “This is perfect!”  No detail was over looked.  The interior and provisions were all a distinct farmhouse style, but elegant.  So very, very elegant.  You know… “Farmer Chic.”

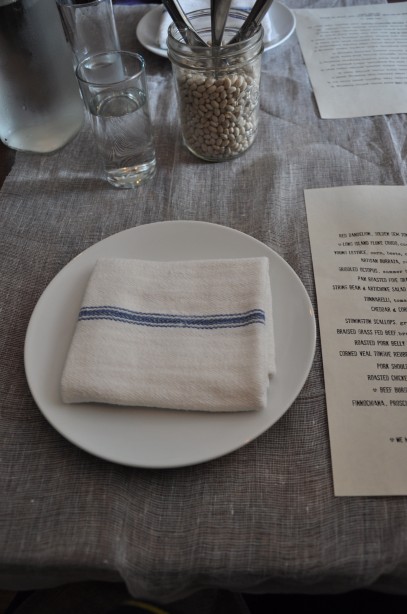
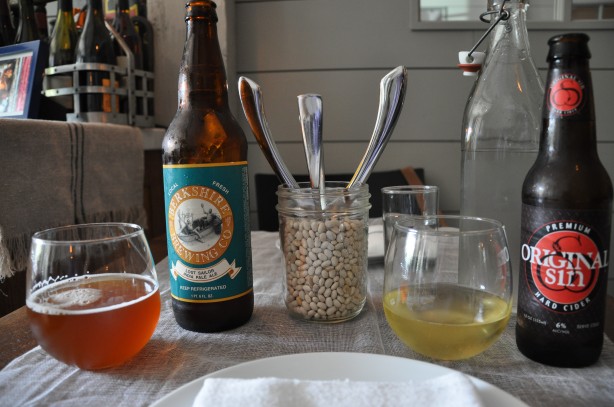
The gorgeous neutral grays color palate (neutral, but not boring), the rustic tables and chairs, the cheesecloth table runners, the dishtowel napkins, the utensils situated in a jar of dried beans, the table water in old fashioned milk bottles… Perfect!  Just take a look.

Sorry for the weird angles on the pics. We were trying not to be complete tourist dorks.  I mean, this lunch was “Martha Approved.”  I needed to be cool about it.  Plus, in such a tiny place, we were bound to draw some attention whipping out the D90.

Dorkiness or not, it all made me so very happy.  See…

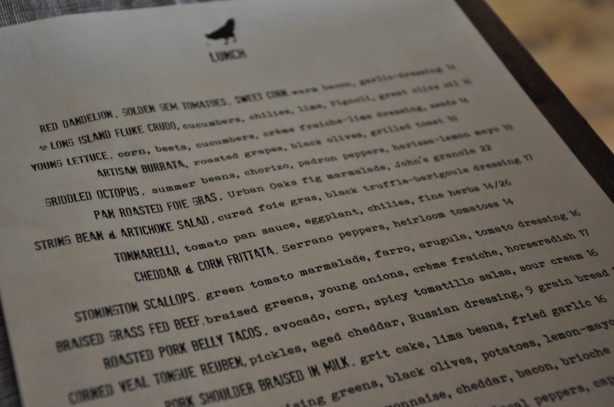
But more important than the ambience was the menu!

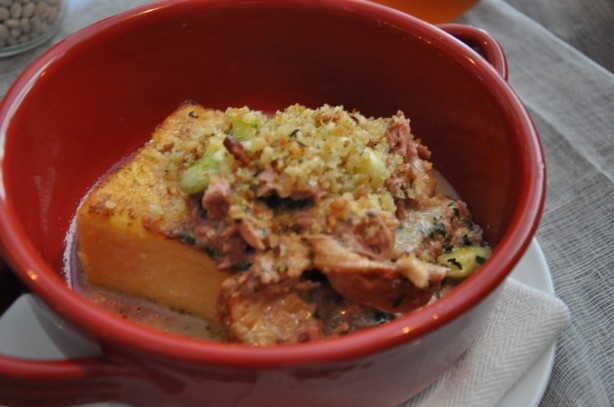
It was hard to choose.  Ultimately I went with the Pork Shoulder Braised in Milk

and BG had the Stommington Scallops

We shared, of course, and washed them down with these…

also shared.  I love that they served the beer in stemless wine glasses.  Lunch was SUPERB on both sides of the table, but it didn’t hold a candle to dessert…at least for me.

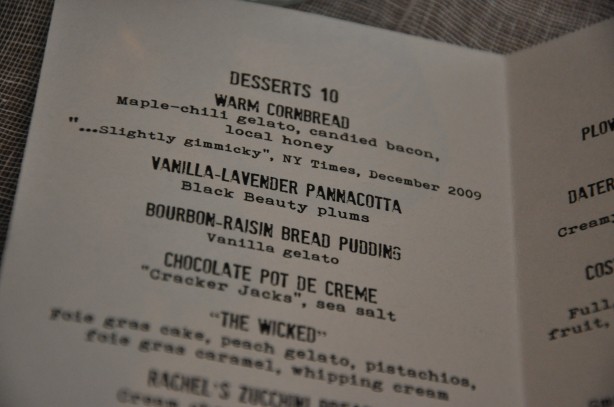
The dessert menu.

Any guesses as to which one I chose?

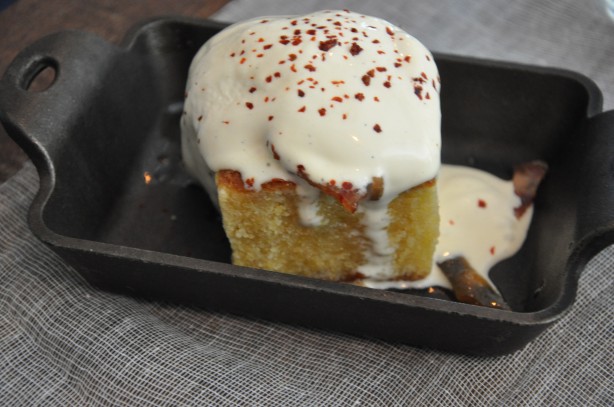
If you guessed the Warm Cornbread, you were right.  I ordered it because, as I told the waitress, how often do you get to have BACON in your DESSERT?  It sounds so weird, but it was so good. I’m really not a “sweets” eater, but I will almost never turn down cornbread… or bacon for that matter.  This had just enough sweetness to call it dessert, but just enough saltiness that it totally hit the spot.  It was such an interesting combination of flavors.

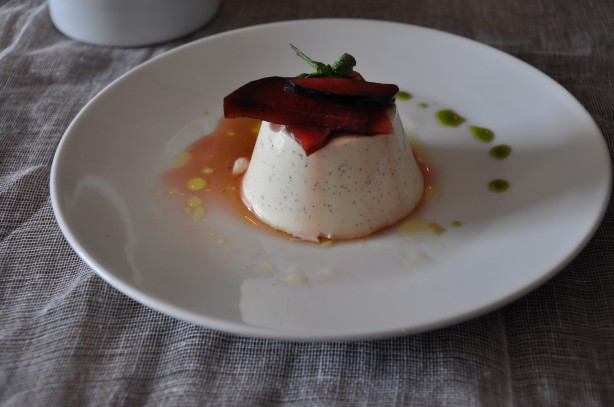
BG had the Vanilla-Lavender Pannacotta

You’ll have to ask him about that.

I have to say that lunch at Le Farm was, hands down, the best lunch experience I have ever had. What else would I expect from a lunch that is “Martha Approved?”  Nothing less than “Farmer Chic,” of course!

Cheers y’all!
Wine Girl

Permanent link to this article: https://kitchendoesnttravel.com/archives/320

Comfort Food

It’s official.  I’m becoming one of my patients who says “I never had sinus or allergy problems until I moved to Charlotte.”  Well, it’s taken about 5 yrs but I officially one of them.  I say “it’s official” now because these exact same issues have hit me at the exact same time for the past three years.  For the past 5 day’s I have had progressively worsening sinus problems.  It started with a dull sinus headache that lasted for about three days, then became sniffles and a scratchy throat for about a day, then culminated in me spending 80% of yesterday in the bed with a sore, scratchy throat, stuffy nose, more mucous than I care to think about, and a head that felt like it weighed about twice as much as the rest of my body.  (Some of that was TMI, I know.)  As of yesterday morning, I officially don’t feel good.

For a couple days I was sticking to the soup regimen, but today I felt like I needed something a little more substantial.  And what did I want?  Cornbread and a plate full of Southern vegetables.

(Sorry for the blah pic.  I was hungry and didn’t feel good so I didn’t bother with aesthetics.  I’m also aware this was not a balanced meal as most of the things on that plate are yellow and – I’m not gonna lie – covered in butter.) My grandfather had a big garden, so my family always had fresh veggies around – either right out of the garden, or garden veggies that my mother and grandmother had frozen or canned during the summer.   I know there are many other Southern veggies out there, but these are what feel like home to me.  Just looking at that plate takes me right back to my grandparents house where, when sick, my mother and grandmother would pamper me to no end.  So when I’m not feeling well but am sick of eating chicken soup, eating warm cornbread, sauteed squash, butter beans topped with corn, and green bean casserole hits the spot.

My throat is still scratchy and my sinuses are still throbbing, but my tummy sure is happy!  What about you?  What’s your comfort food?

Cheers, y’all!
Wine Girl

Permanent link to this article: https://kitchendoesnttravel.com/archives/295

Last Good Grilling of the Summer

Happy Labor Day, everyone!  I know that September 23rd is the official start to fall, but with the opening of college football and the Labor Day holiday falling on this weekend, I can’t help feeling like this was the official end to summer.  As such, I just couldn’t let this weekend pass without doing a little grilling.

What was on the menu, you ask?   That would be Sirloin and Summer Vegetable Kebabs with Chimichurri Sauce from the August issue of Martha Stewart Living and a side of grilled corn.

Doesn’t that just look like summer on a plate?  Of course, there’s nothing better to wash it down with than a tall pilsner glass full of barley pop like this one…

or this one…

In the interest of full disclosure, I should tell you that these beers were picked out by Yours Truly…not the Beer Guy.  But, I’ll let him do his thing and tell you about them later.

FYI – The kebabs and corn are a LOT easier to get grilled when there is actually propane in a grill gas tank and your fella doesn’t have to drive all over creation on a holiday evening looking for a place that’s open to replenish the gas.  Just saying…

Cheers, y’all!
Wine Girl

Permanent link to this article: https://kitchendoesnttravel.com/archives/284

$0.99 Well Spent

Do you ever get in a rut and feel like you make the same five things for dinner every week?  Well, if so, do I have a recommendation for you!  If you are a busy working girl like me, mom or not, and have an iPhone, iPod Touch, or iPad, then then Martha Stewart Everyday Food App is for you.

I already admitted to you that I am a Penelope and I believe it’s fairly obvious by the scope and title of this blog that I’m a foodie.  So in what warped alternate universe would anyone not assume that I watch Marth Stewart’s show, check her website, and read Martha Stewart Living like crazy?!  Add into the mix that second only to my MacBook Pro, my iPhone is my favorite material possession ever, and the Martha Stewart Everyday Food Fresh and Easy Recipes App is the best $0.99 I’ve ever spent.

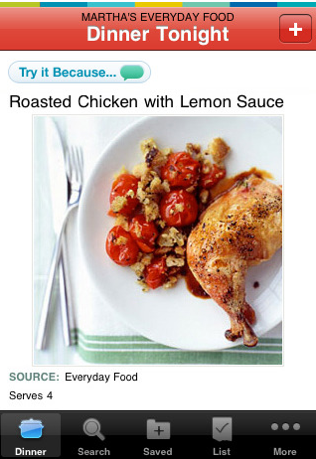
Ok, I hear you.  Enough about my craziness.  You want to know what this little piece of gadgetry does that is so spectacular, right?  Basically, with this app you have access to thousands of new quick, easy, and healthy recipes right at your finger tips.  Everyday around 3:30 pm I get a text (I like to think it’s from Martha herself) with a “Dinner Tonight” recipe.

Now, the fact that the text is titled “Dinner Tonight” is a little disappointing in that it confirms that Martha does not know me well and did not, in fact, text me herself.  If she did, she would know that I planned my meals for this week last week and don’t need a suggestion for tonight’s dinner.  As such, she would title her text to me “Suggestion for Dinner One Night Next Week.”  But I digress…

Each day I get text with a recipe suggestion in title only.  I then click on my app, which automatically pulls up the recipe.  I look it over, scroll down to the bottom to review the nutritional info, and decide whether I want to save it or not.  If I want to save it, I tap the little “+” in the top right hand corner and have the option to save it, add it to a shopping list, email it, tweet it, or share it on Facebook.

Beyond the texting, the app gives you options to

  1. Search and download  new recipes organized by main ingredient, holiday, cooking method, or course.
  2. Create shopping lists that are automatically sorted by store and aisle.
  3. Add all of a recipe’s ingredients to a shopping list in one click or  add ingredients to a list by name or bar code scan (iPhone 3GS and above only).
  4. Simplify your shopping trips by locating grocery stores near you with maps, directions, and store specific shopping lists among other things.

I mentioned that you get all this for  $0.99, right?  Basically, with this you purchase the most versatile cookbook ever and a grocery shopping assistant for under a buck! When I first got my iPhone BG, who had his iPhone for a year before I did, advised me to “never pay for apps.”  By that he meant to only download the free ones.  Well, I must say that this is some spare change that I have absolutely no regrets about spending.

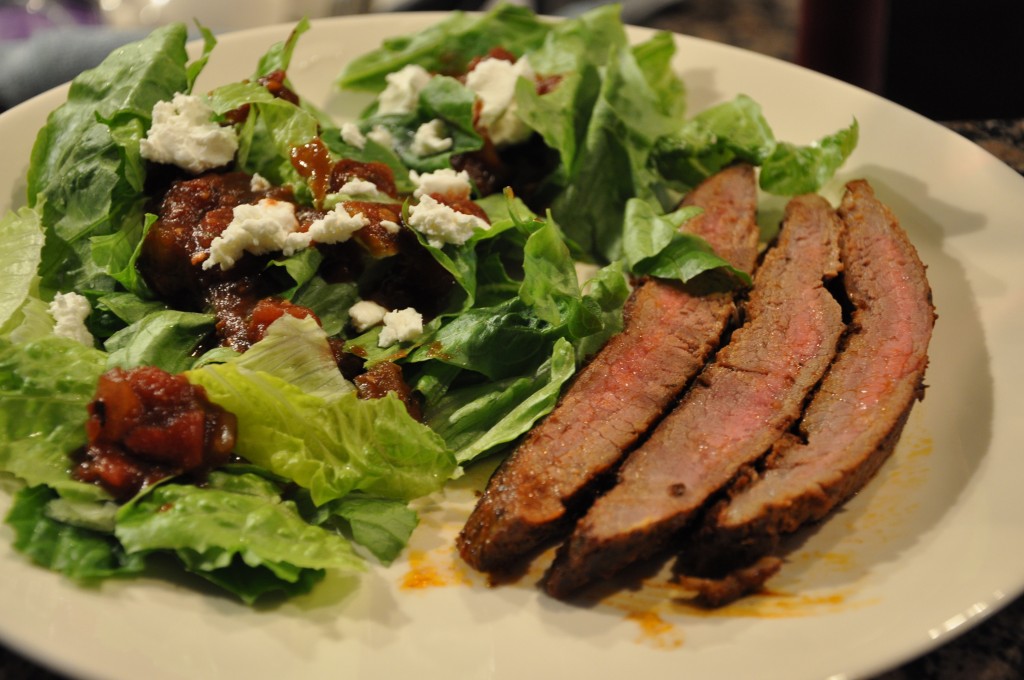
With the help of this app, I can count on one hand the times I’ve repeated a recipe in the last five months because I get a new recipe idea everyday.  If I wanted to repeat a recipe, however, it’s incredibly easy because I have them all saved on my phone!  During this time I have  made such yummy deliciousness as this Flank Steak and Arugula Salad (I’m not an Arugula fan, so I substituted Romaine)…

and this Roasted Salmon with White Wine Sauce…

these Turkey Sloppy Joes…

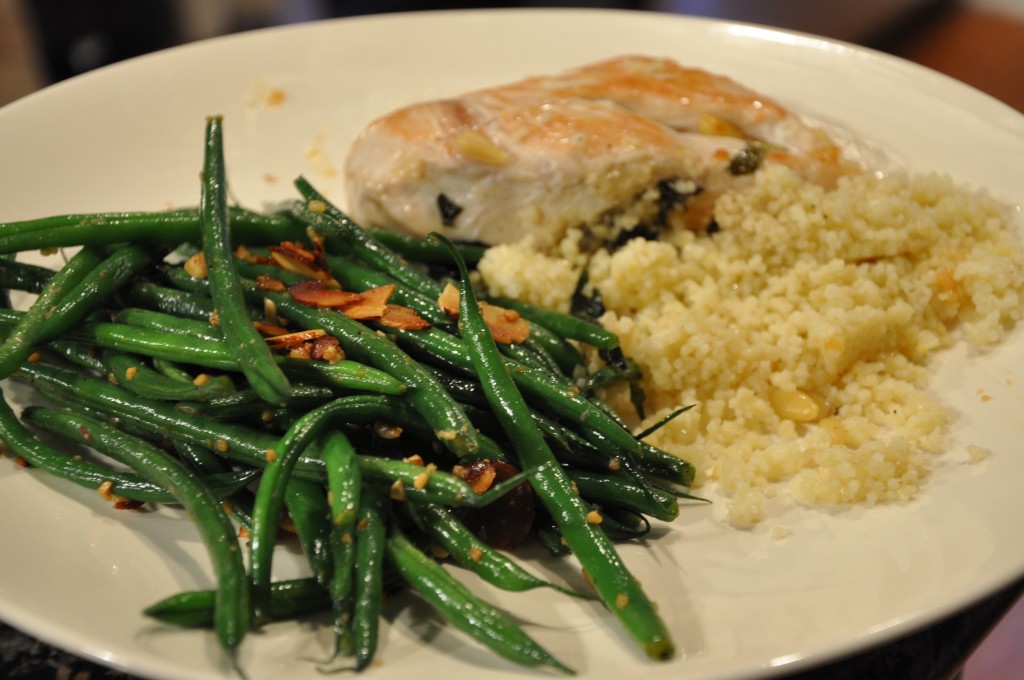
this Chicken Breast Stuffed with Herbed Couscous (those are MY awesome green beans on the side, not Martha’s)…

and this Zucchini Lasagna…

just to name a few.

Most of the recipes take only 20-40 min to prepare.  I love that the nutritional information is available for the vast majority of the recipes.  I generally try to keep it pretty healthy in our kitchen (at least during the week…there may be some weekend splurging every now and then), so if any of the recipe texts have more than 500 calories, I don’t save them.  Or, if I do save them, they are never options for regular weekly meals…only special treats.

So there you have it.  Talk about bang for your buck.  I don’t know about you, but that’s the most I’ve ever gotten for $0.99!

Cheers, y’all!
Wine Girl

Permanent link to this article: https://kitchendoesnttravel.com/archives/266

Dig This Zucchini Pizza

My new blog crush is Eat, Live, Run.  It’s author is Jenna, a food writer that’s been to culinary school, and is a relatively recent Southern transplant into Foodie-Wino Paradise (a.k.a. the San Francisco Bay area and adjacent Wine Country).  So since she writes about food and wine (two of my favorite things) and she lives in one of my favorite regions on the planet, I absolutely ADORE her blog.

A couple weeks ago she posted a recipe for “Cheesy Zucchini Pizza That Will Rock Your Face.”  It looked beautiful and super easy so I knew I had to give it a try.

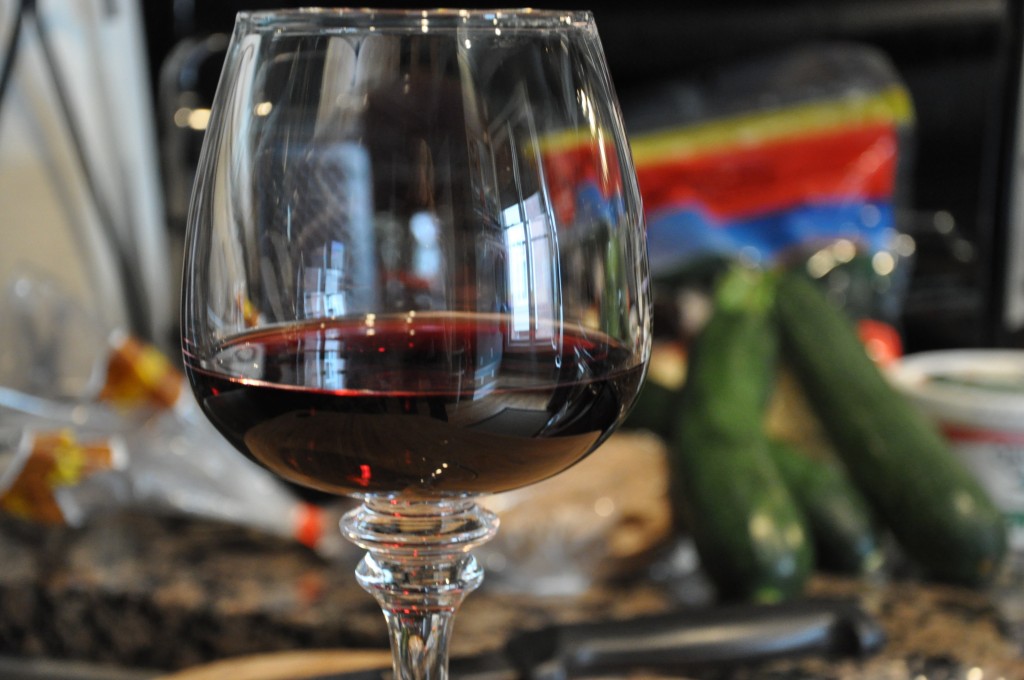
First step was to pour myself a glass of wine.  What? It’s in the recipe.  No, seriously.  It is. Click the link above to check it out for yourself.  Jenna specifically says “First, you must drink wine.”  Ok.  I’m in!

Tonight’s vintage of choice is the 2008 Estancia Pinot Noir.  Look for an Uncorked! on that later this week.

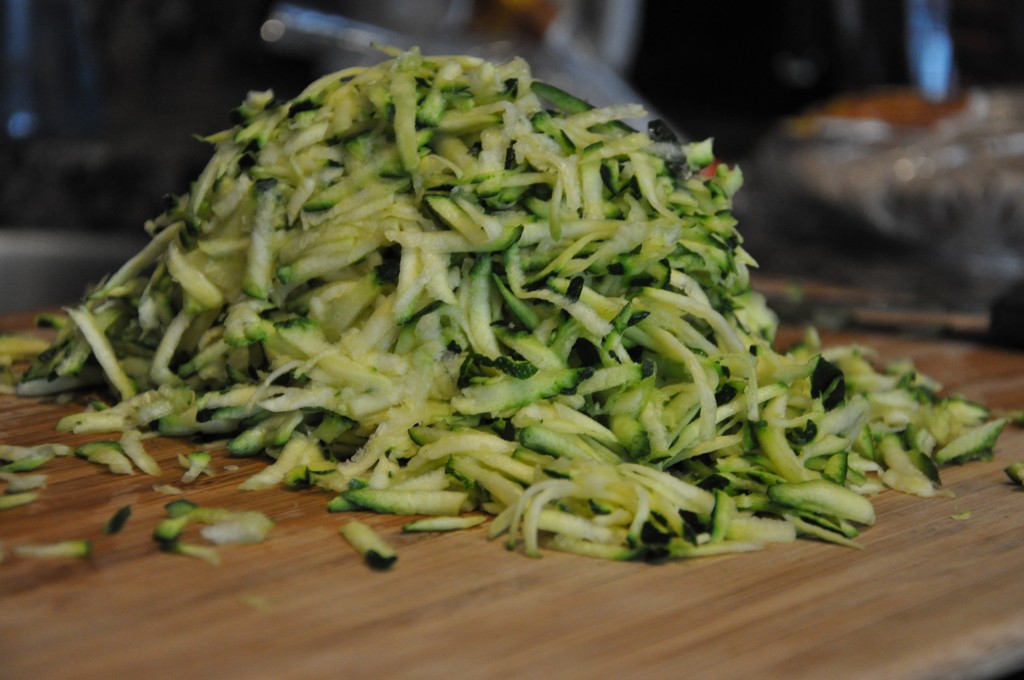
In addition to sipping a nice glass of Pinot Noir, the process includes grating the zucchini… (See.  Got the wine.)

mixing the “sauce” and toppings (with wine in tow)…

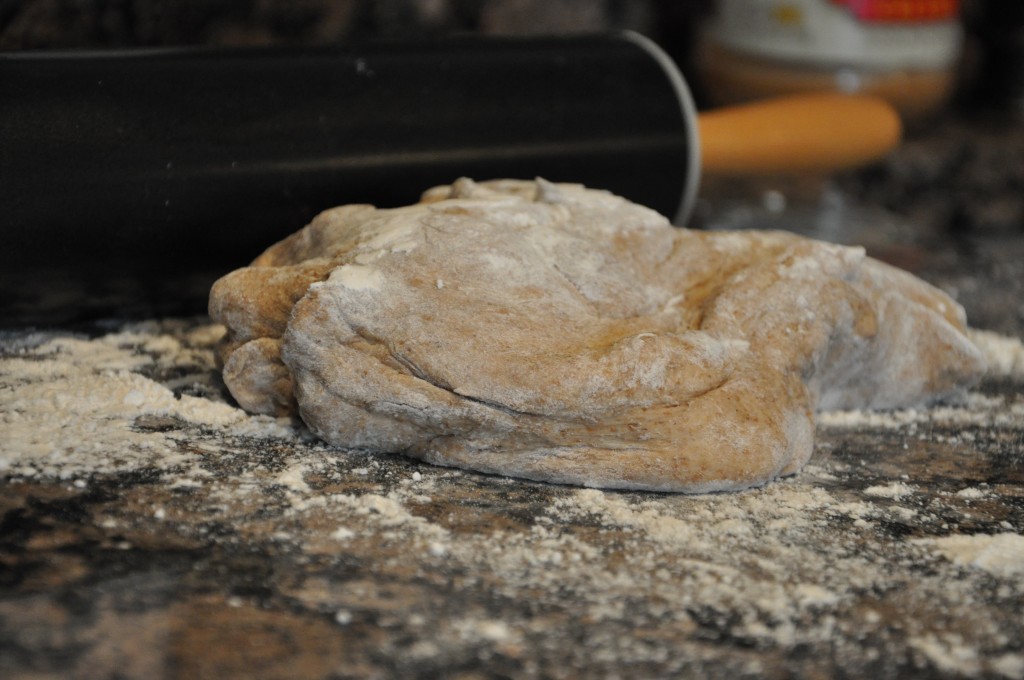
rolling out the pizza dough (not pictured, but the wine is present)…

putting it all together (wine still in the foreground)…

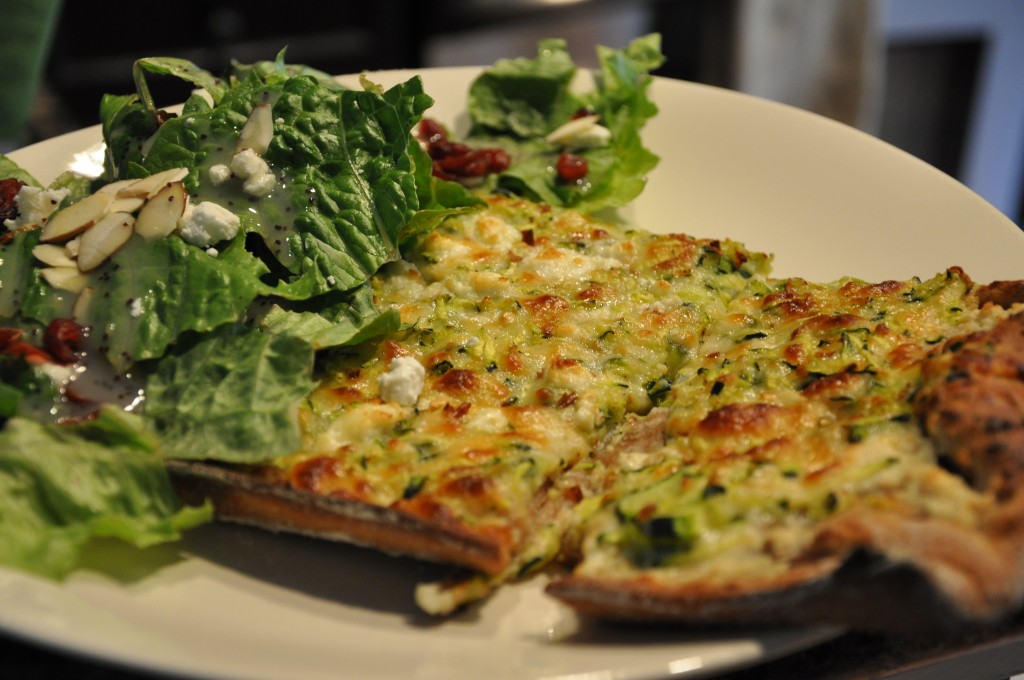
and baking it up.  Doesn’t that look SUPERB?

Jenna’s recipe did not call for it but since it’s National Goat Cheese Month, and goat cheese makes everything better, I sprinkled a little on top of mine. Mmmmm!!! Yum, yum, yum, yum, yum!!!

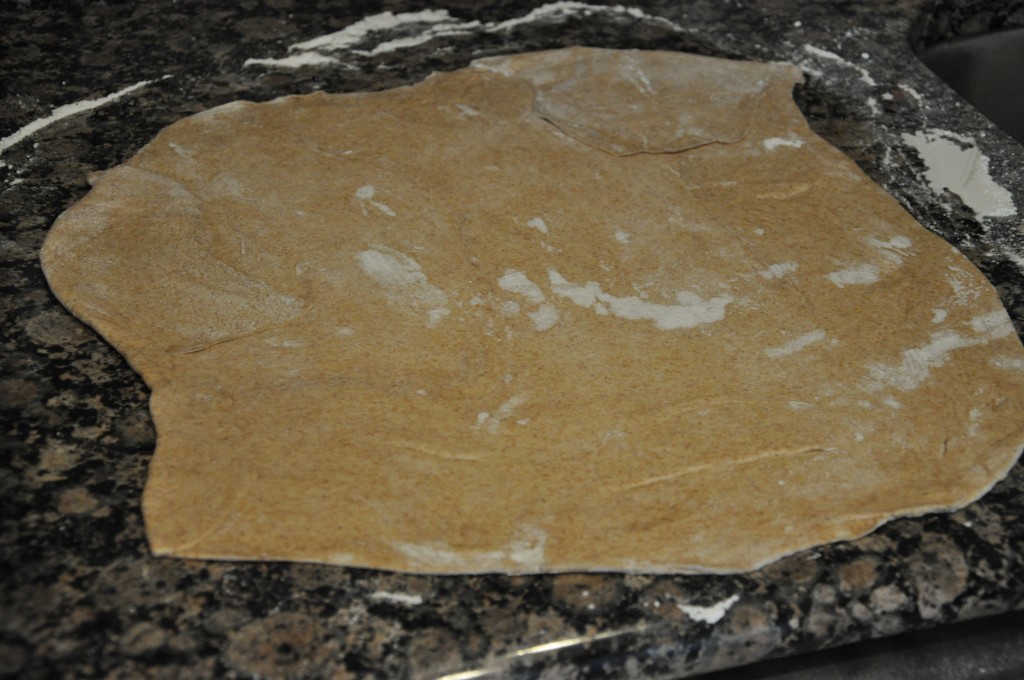
Regarding forming the crust, Jenna commented “I lack talent in the pizza dough throwing competition, so my crusts always end up looking a bit rustic, if you will.”  Well, tonight’s cheesy zucchini goodness is only my second attempt at making a homemade pizza, and in neither of these instances have I attempted to actually throw the dough.  I have a relatively new house with lovely (read CLEAN) painted ceilings and I prefer to keep it that way.  So, I used a rolling pin and my hands (I’m assuming that’s kosher in the pizza making world) and worked it into not really a circle, not really a square, not really a rectangle kind of shape.   It was sort of like a wonky parallelagram.

So  Jenna, if yours is “rustic” then mine is down right artisan! But like she said, “Ain’t no thang.”  It tasted good anyway!  In fact, it was FAB-U-LOUS!  I cut it into big ole “rustic” pieces and plated it up with a lovely little salad (topped with little clumps of goat cheese, of course).

The Beer Guy was even quite taken with it and, believe me, he is not a veggisaurus by any stretch of the imagination.  True to form, though, he did suggest that it would be “even better” with sausage!

Jenna promised that this was a “Cheesy Zucchini Pizza That Will Rock Your Face,” and I’m not going to lie to you, people.  It did.  It rocked my face! Check out Jenna’s blog for the full recipe and see for yourself.

Cheers, y’all!
Wine Girl

Permanent link to this article: https://kitchendoesnttravel.com/archives/243

Spanish Cooking Saturdays – Torrijas & Mosto

Ever wondered how to get a little red wine into your breakfast?

(crickets…crickets…)

No? Is that just me?

Well, in case you HAVE ever wondered that and just don’t want to admit it, never fear. I have found the way!

All you have to do is make Spanish Torrijas and a little Mosto to drizzle on them and that’ll get you about a bottle and a half…of red wine…for breakfast!  It goes a little something like this:

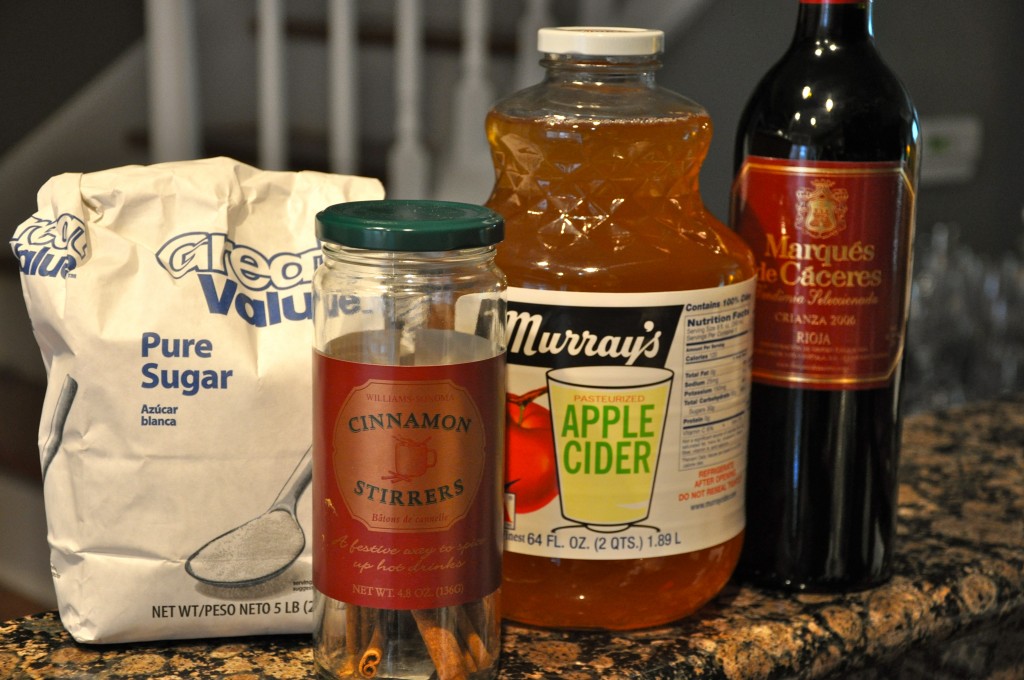
The night before you plan to eat this wine soaked breakfast go ahead and make the Mosto.  What is mosto, you ask?  According to Mario in my Spain…On the Road Again cookbook, it is a “term that refers to unfermented grape juice” (p. 28).  You basically take the following ingredients:

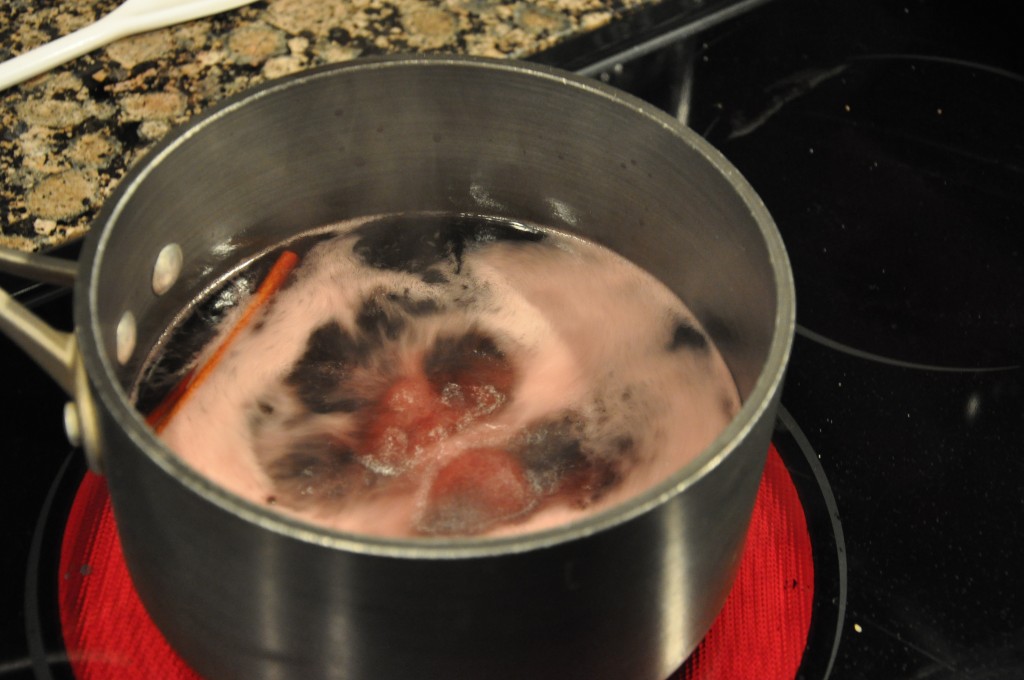
put them in a sauce pan and boil them down for about 15-20 min like so

until it reduces by 3/4.  According to Mario, it should get “thick and syrupy” by the time it has cooked down sufficiently.  My experience was not that it got to the consistency of say maple syrup, more like the consistency of cough syrup.  I recommend making it the night before so that will have plenty of time to cool down and get thicker and more syrupy before serving.  To say that it smells divine while cooking down is the understatement of the century.  (Would it be too much of a pun to say that with 3 cups of Spanish red wine, sugar, apple cider, and cinnamon the smell was intoxicating?) The only danger in making it the night before is that the Mosto will not survive the night…and by that I mean, it was all I could do not to pour it in a bowl and eat it with a spoon!

You’ll be pleased to know that I was somehow able to restrain myself and it was appropriately bottled and ready to be served the next morning when we made Torrijas for our friends H & C.

If you are not familiar with Torrijas, it’s basically the Spanish version of French toast.  Mario described it as “fried bread soaked in wine.”

Enough said.  Fried.  Bread.  Wine.  Sign me up.  I need no further convincing.

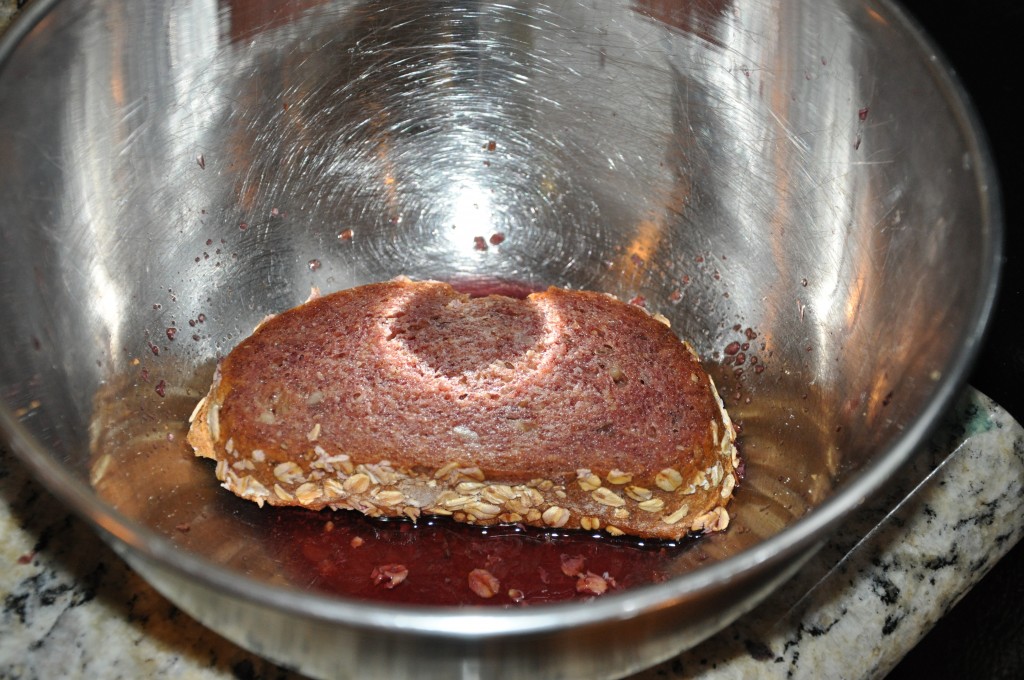
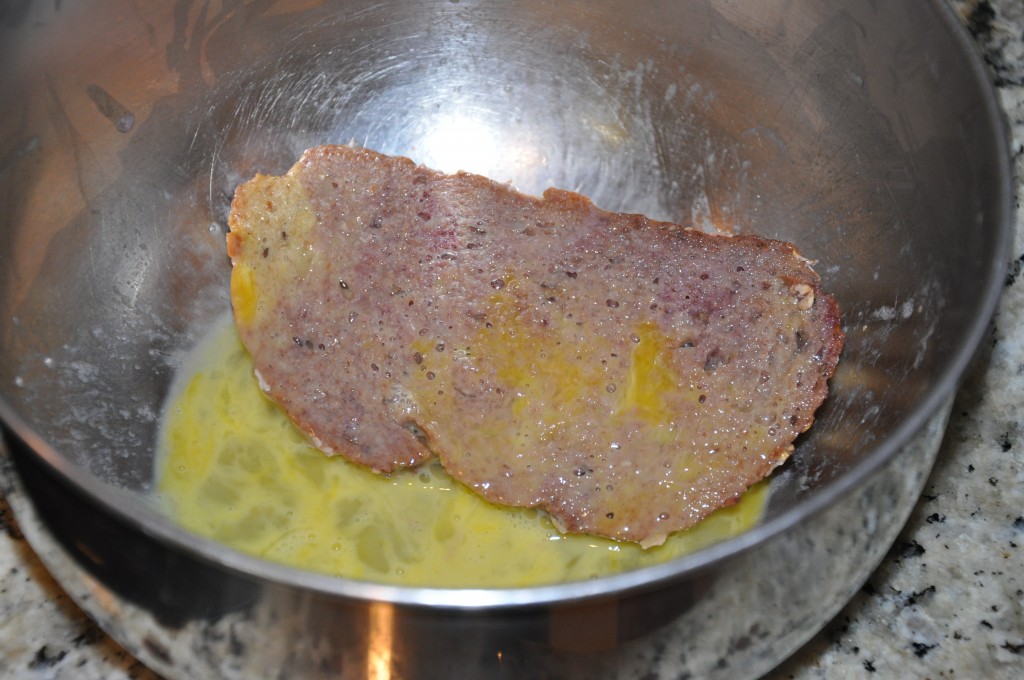
In the manner of French toast, you basically take some artisan bread and drench in the dry Spanish wine of your choice

then egg it

cook it in olive oil

drain it

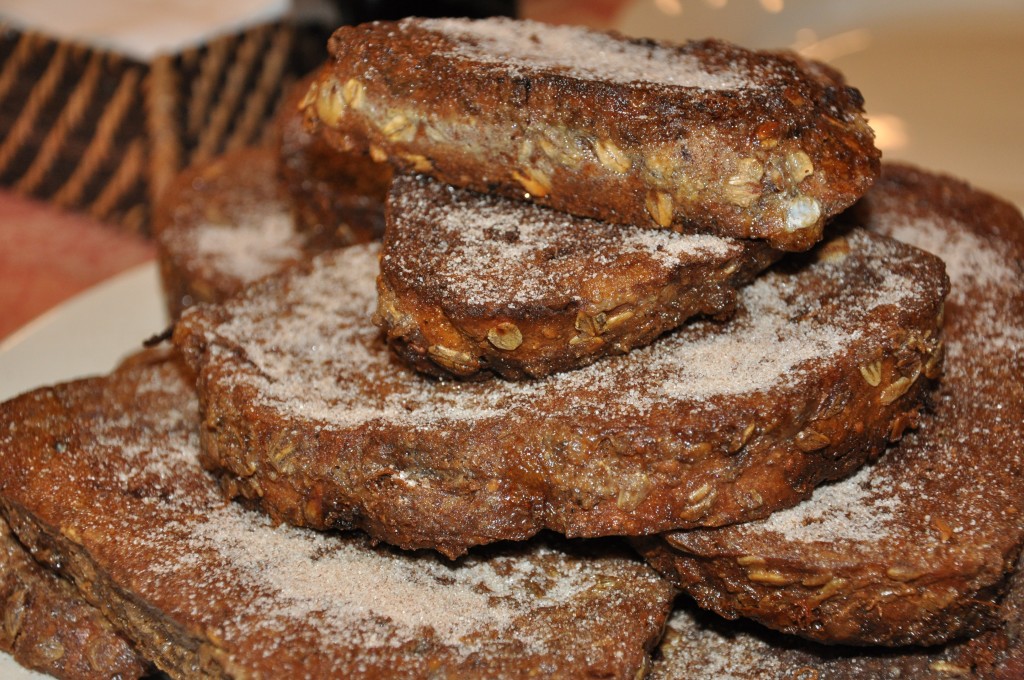
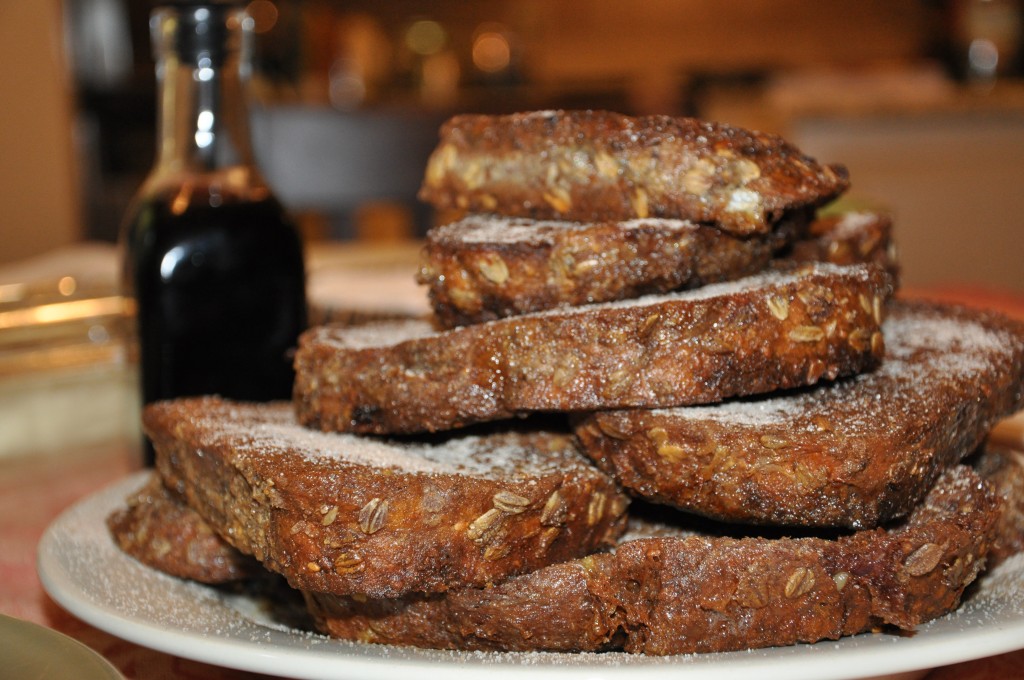
sprinkle it with cinnamon sugar

pinch yourself to make sure you haven’t died and gone to heaven

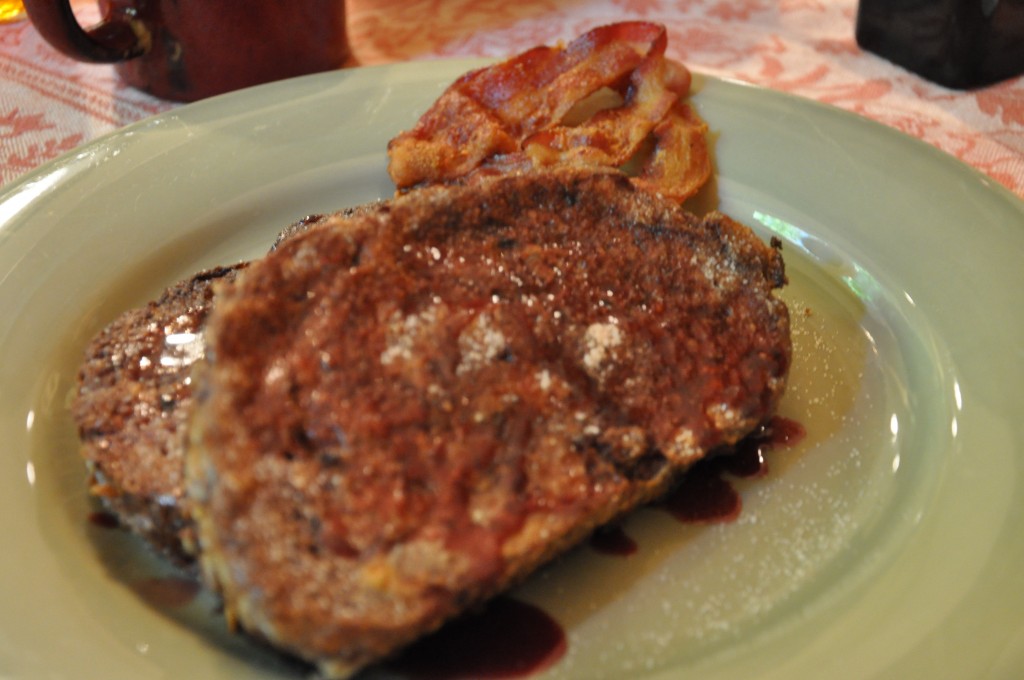
drizzle it in your Mosto

and enjoy! (Sorry that’s not a great pic.  I was too preoccupied with wanting to eat it to bother with details like focusing when I took the shot!)

From our experience, it’s best served with a side of good friends and good conversation on a lovely Sunday morning!

And THAT, my friends, is how you get red wine in your breakfast!

Cheers, y’all!
Wine Girl

Permanent link to this article: https://kitchendoesnttravel.com/archives/192

National Goat Cheese Month! What?

August is National Goat Cheese Month! I certainly didn’t know that.  Did you?  My friend, Carmen, from Keeping Up Klapper mentioned it on her blog last week and that was the first I’ve ever heard of it.  After I reading her post , exclaiming “National Goat Cheese Month?!?!” at the top of my lungs and squealing with delight I thought,”Why isn’t this being more widely publicized? Why hasn’t this been mentioned on the Today Show or been a headline in the New York Times? Where are the county fairs in its honor? Where is the parade?”  Certainly something like National Goat Cheese Month is worthy of a parade!  With all the doom and gloom that’s constantly in the news, I think a national holiday devoted to Goat Cheese would be just the thing to cheer folks up!  Don’t you?

Goat Cheese just happens to be my FAVORITE cheese!  And something like National Goat Cheese Month sounds a heck of lot like a reason to work it into my diet every day for a month.  A quick Google search of National Goat Cheese Month informs me that this holiday is celebrated by making your favorite goat cheese recipes and sharing them with your friends and family.  SIGN. ME. UP.

Well, let’s see…So far I’ve had a salad for lunch every day this week which was topped with Goat Cheese.  That’s a start.

Then I made these mini Goat Cheese Empanadas to take as an appetizer to a Women’s Quarterly Dinner with my church.

(These were a recipe I got out of Real Simple magazine.  They were alright, but didn’t live up to my hopes.  True to form, they were “real simple” to make, but they just didn’t have a lot of pizzazz.  I kept thinking they’d be better with the goat cheese that comes with the dried cranberries in it, then sprinkled with cinnamon sugar, and dipped in or topped with some sort of berry chutney.  I’ll work that one out and get back to you on that.)

How am I doing so far?  Keep in mind, I found out about National Goat Cheese Month 6 days into it, so I’m a little behind.  But where to go from here?  What’s a girl to do? Hhmmm. Should I…

A) gather Goat Cheese and some other soft cheeses and have one of my favorite dinners of cheese, crackers, fruit, nuts, and wine (of course) while watching movies with the Beer Guy?

B) make some of these Deep Chocolate Brownies with Chevre Swirls or these Goat Cheese Chocolate Truffles?

C) make this Pasta with Cheesy Pink Sauce?

D) find another reason to make and serve this Goat Cheese Bruschetta?

E) sample different local Goat Cheeses at my farmer’s market and establish a local go-to Goat Cheese favorite?

OR…

F) All of the above.

Yeah, I’m definitely thinking “F) All of the above.”  I’ll keep you posted on the “celebration” in the KDT household.  What about you?  Any suggestions or favorite Goat Cheese recipes?  I’d love to hear about them!

Cheers, y’all!
Wine Girl

Permanent link to this article: https://kitchendoesnttravel.com/archives/236

I Ask You

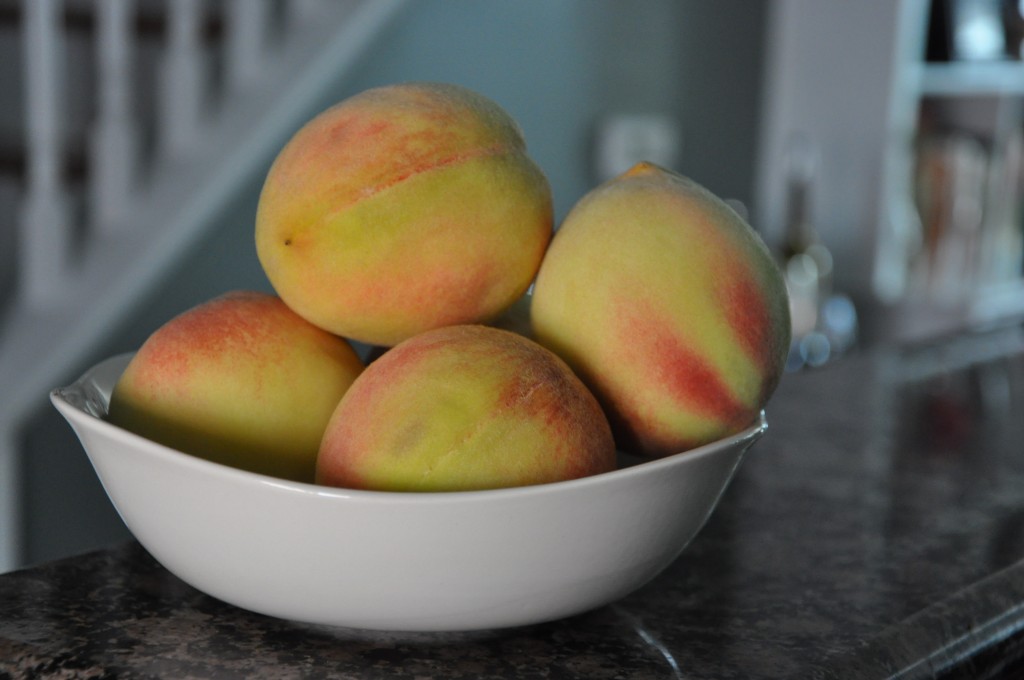
Can you possibly think of anything better on a hot summer afternoon than a good ol’ juicy South Carolina peach straight from the Farmer’s Market?  Go ahead.  I dare you to think of something better.

You can’t.  You simply can’t do it because it doesn’t exist.

I’m WAY over this heat and ready for Fall, but you’ve just got to love the fruits of summer!

Cheers, y’all!
Wine Girl

Permanent link to this article: https://kitchendoesnttravel.com/archives/206

Who Says Green Beans Can’t Be Awesome?

A couple of years ago I was at someone’s house for dinner and had some green beans tossed with some toasted almonds as part of the meal.  I just loved it, but somehow got away without asking her exactly how she prepared the green beans.  So when I got home, I decided to play around and see if I could recreate it myself.  It took a couple tries but I finally figured it out and, if I may be so bold, think that my version tops the original that initially inspired me.

Here’s what you’ll need:

1 lb of green beans (either pre-packaged or fresh from the Farmer’s Market) **I personally like the French Beans because they are thinner.

~ 1/4 c of sliced almonds

1-2 cloves of garlic, minced

~ 1 tsp of olive oil

Salt (preferably Kosher or sea salt) and pepper to taste

**I’ve never really measured any of this.  I just eye-ball it.  This is probably the only recipe you’ll ever find me saying that.  I’m generally a follow-the-directions-to-a-T kind of girl.

Here’s what you do:

You take these green beans

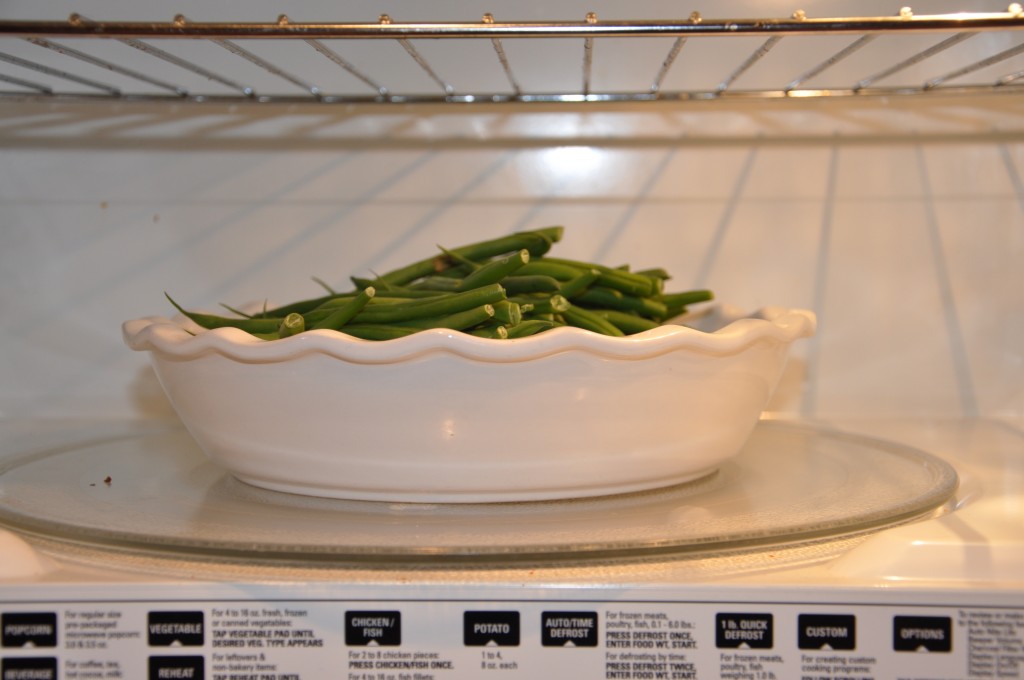
put just enough water in a microwave safe dish to cover the bottom, add the green beans, and pop them in the microwave for approximately 5 min to steam them like so:

Yes, that’s a pie plate.  It’s the perfect size for this dish and I don’t use it for anything else.  I like to cook, not bake.  So, I may as well use it for something!

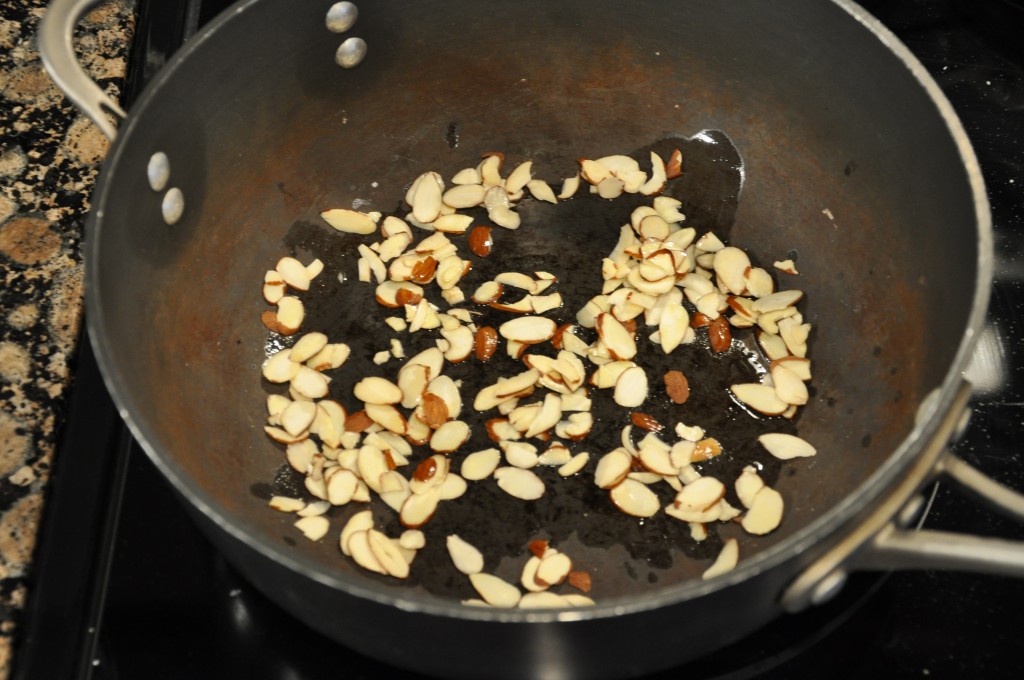
While the green beans are steaming heat the olive oil over medium heat in a skillet or saute pan.  Throw in the almonds to toast them.

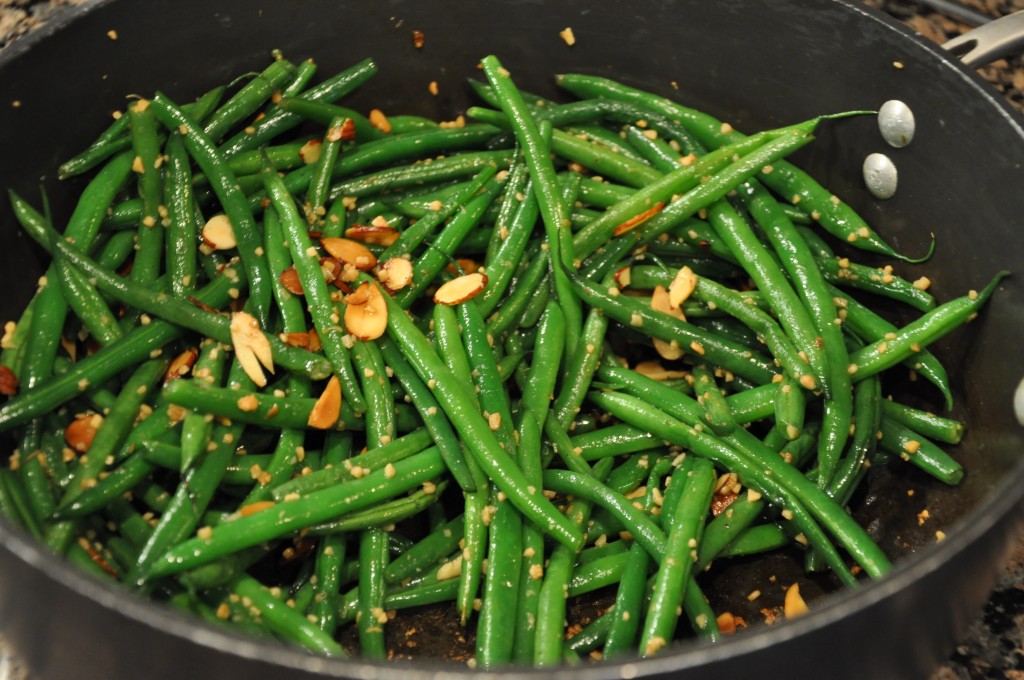
Once the green beans are done steaming, pour off the excess water, add them to the toasting almonds, and throw in garlic, salt, and pepper to taste.  (If you have a garlic press, by all means, use fresh garlic cloves.  If not, the pre-minced jarred garlic that you get in the produce section of the grocery store works just fine.)

I really like garlic.  Looking at that pic, I’m now thinking that my version may actually include 2-3 cloves.  Just use what you like according to your taste preference.

Toss to coat

and serve along side a main dish of your choice.  Tonight I had mine with Chicken Stuffed with Herbed Couscous.

The whole process takes 10 minutes tops.  See, I told you they were awesome!  Give them a try and let me know what you think!

Cheers, y’all!
Wine Girl

Permanent link to this article: https://kitchendoesnttravel.com/archives/194