November 2010 archive

Notice Anything?

Just wondering if anyone noticed the banners in the sidebar to the right…We’ve been sporting them for about a week now.

As of last Tuesday, we are officially a Featured Publisher for FoodBuzz!  That means that we are now members of a food blog community of 4000 bloggers and 10 million foodies!

We are very excited to be a part of this prestigious foodie community!

Cheers, yall!

Wine Girl

Permanent link to this article: https://kitchendoesnttravel.com/archives/529

I Solemnly Swear That I Am Up To No Good

There’s just something about staying up past midnight baking when your husband is out of town that makes it sound like you are up to no good, right?

When talking about working in the kitchen I usually say “I cook.  I don’t bake.”  I guess that’s because I don’t really have a sweet tooth.  But this week I’ve broken my mantra.  This week…I baked!

To fully appreciate this post you should know that the Beer Guy and I are HUGE Harry Potter fans. Just so you know exactly how serious we are about this, the last book was 700+ pages long, we only got one copy, and we both finished it within 48 hrs…and we did not read it simultaneously! Now that’s dedication, don’t you think?  We always went to the midnight book releases and Thursday night (Friday morning) we went to the midnight release of the movie Harry Potter and the Deathly Hallows, Part I accompanied by our friends Matt, Jen, and Carrie.  Yeah, that’s right.  We’re hard core!  In celebration of this event, I simply could not pass up this recipe for Butterbeer Cupcakes!

(If you don’t know what butterbeer is, stop reading this right now and go start the Harry Potter series.  You’ll thank me later.)

There are three parts to this recipe – cupcakes, ganache, and buttercream icing.

The ingredients for the cupcake batter are pretty standard for baking, except for two key ingredients that are essential to the buttery goodness of this recipe – creme soda and butter flavoring.

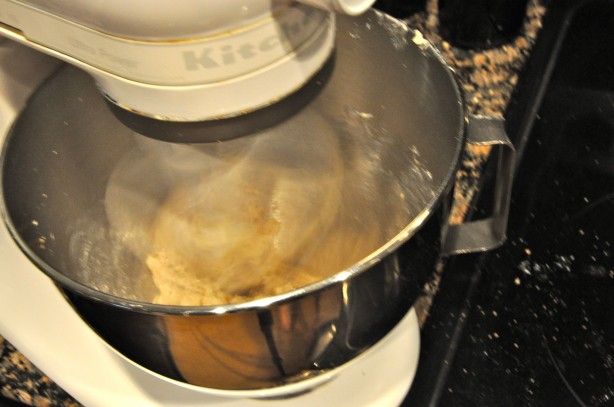
To get started on the batter you have to cream your butter then add in your sugars and eggs.  Just to illustrate how little baking I do, I had to borrow this mixer from a friend because I only have a handheld mixer myself.

(I used this task to finish part of my photography class homework assignment – shooting motion with a purpose.  Using a 1/5 sec shutter speed and a tripod allowed me to capture the motion of the mixer without making the rest of the shot blurry.)

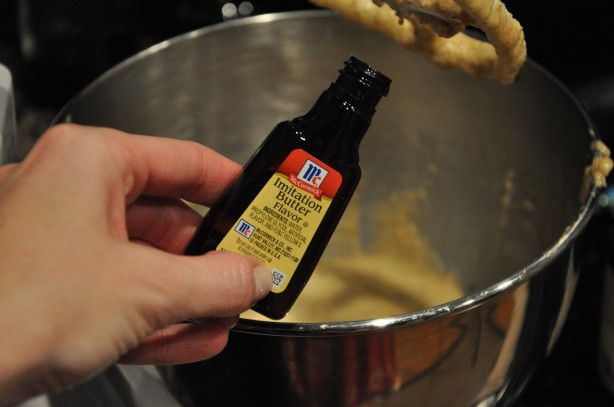
Next you add in the vanilla and all important butter flavoring.

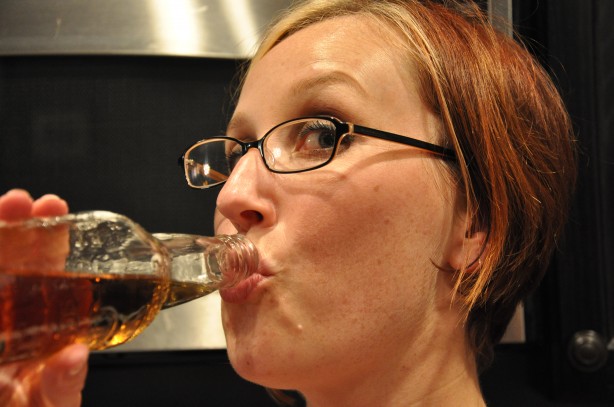
Until I decided to make this I did not know that stuff existed.  The recipe then calls for alternating into the butter mixture the dry ingredients, buttermilk, and 1/2 cup of creme soda.  You may wonder, though, what are you supposed to do with the rest of the creme soda since you’ve got a whole bottle and only need 1/2 cup?

Polish it off yourself, of course.

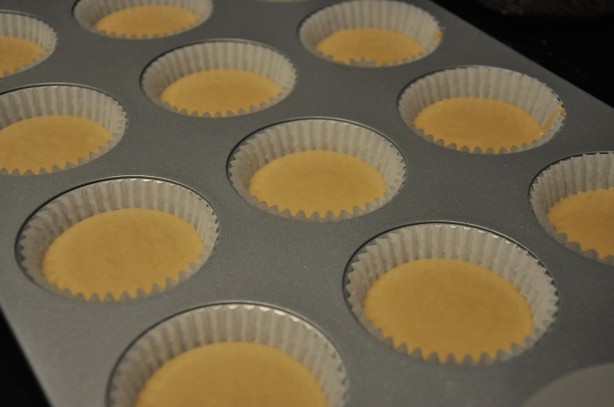
That pretty much completes the batter.  So from here you fill the cupcake tin, get them to baking….

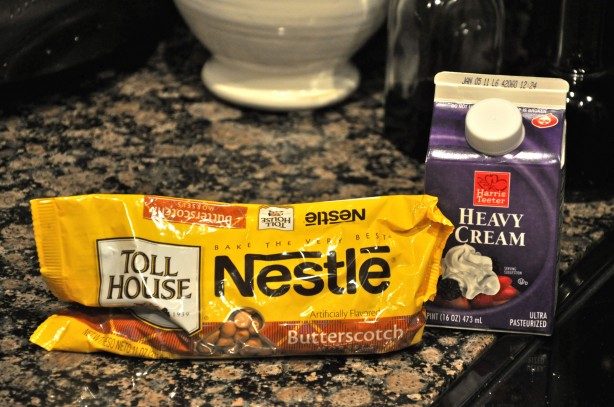
and get to working on the ganache!  That’s right.  I said ganache.  Butterscotch ganache to be exact.  The ingredients for this are simply heavy cream and butterscotch chips.

You basically put the ingredients in a double boiler and melt them down into creamy, butterscotchy goodness like so…

And, yes, I was so serious about this recipe that, even though I do not bake regularly, I went out and bought a double boiler just so I could make this ganache. Surely a double boiler has other uses besides ganache making…

After the ganache has cooled you must poor it into some sort of squirting mechanism.  I used this one from Crate & Barrel.

Is it just me, or does this remind anyone else of puff paint from the 80’s? I’m sure there is some sort of technical baker’s name for it, but I have decided to call it my Ganache Squirter, since it is unlikely that I will use it for any other task.

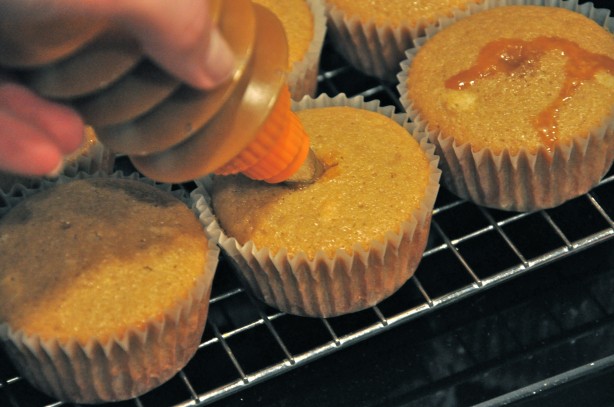
With the cupcakes cooled and the Ganache Squirter filled, now comes the REALLY fun part.  You inject the ganache into the cupcakes by inserting the Ganache Squirter about half-way into the cupcake and squeezing until you notice a little ganache oozing out the top of the cupcake.

I also noticed that the cupcake would sort of swell in my hand when it was full.  This is the first of the three uses for the ganache in this recipe.  The second is for the Butterscotch/Buttercream Frosting to top off the cupcakes.

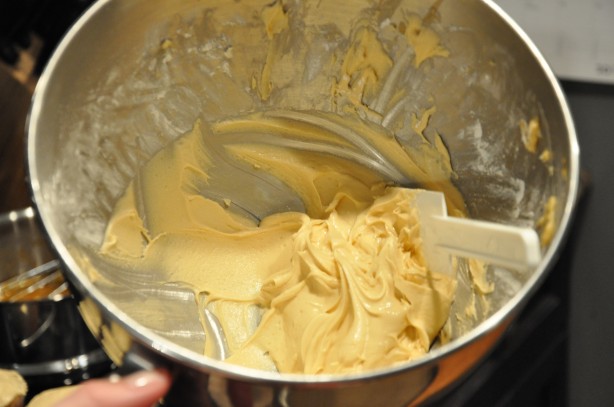
I was so engrossed with what I was doing at this point that I forgot to take pictures until I had finished the frosting and iced half my cupcakes with it.  But basically, you mix 1/3 cup of the butterscotch ganache with butter, powdered sugar, vanilla, butter flavoring, and salt together until it looks like this

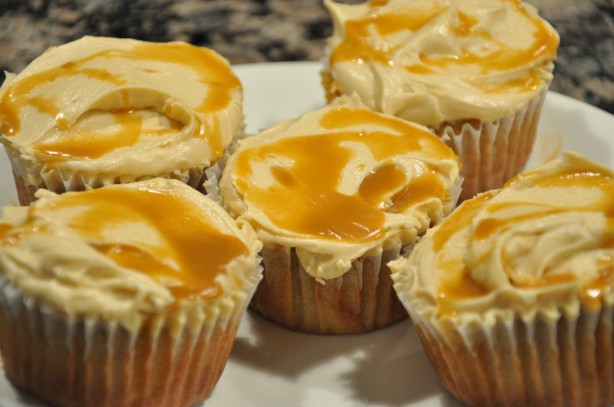
Next you slather that buttery goodness all over the tops of your cupcakes and enlist the services of your ganache for the third time by drizzling it across the tops of the now iced cupcakes.  Amy, the author of this recipe from Amy Bites, suggests that you pipe the frosting on the tops.  But, I assure you, if you don’t have a pipette/cake decorating bag and your squirter is otherwise occupied with ganache, slathering works and tastes just as well.

Voila!  Butterbeer Cupcakes!

Please feel free to drool over the finished product.

The process took me just under 3 hours to complete.  I’m sure it would have gone much faster had I not been stopping for photo ops along the way.  It was worth every minute!  (I took some to my colleague, Sam, for her birthday since she is also a big Harry Potter fan and I’m cool like that.  The rest I packed up and took to the theater so my wizarding friends and I could munch on them while waiting to be let into the movie just before midnight.  They were a huge hit all around.)

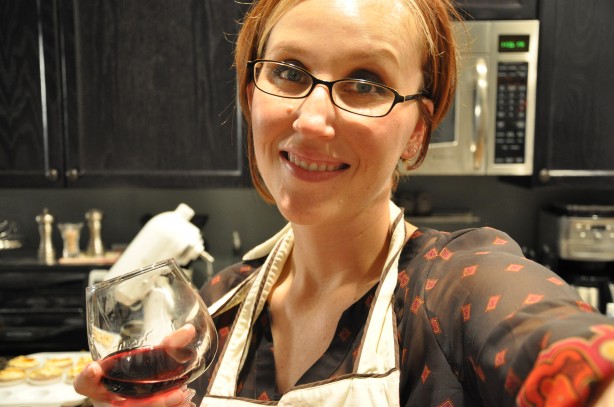
Whew!  That’s the hardest I’ve worked in a LONG time.  Momma needs a glass of wine…

For now, though…Mischief managed!

Cheers, y’all!

Wine Girl

Permanent link to this article: https://kitchendoesnttravel.com/archives/510

Would It Be So Wrong…

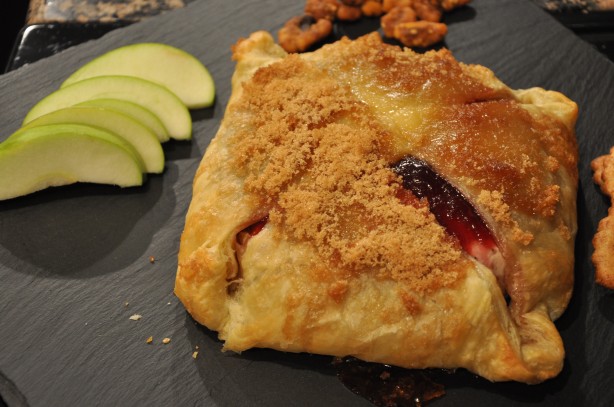
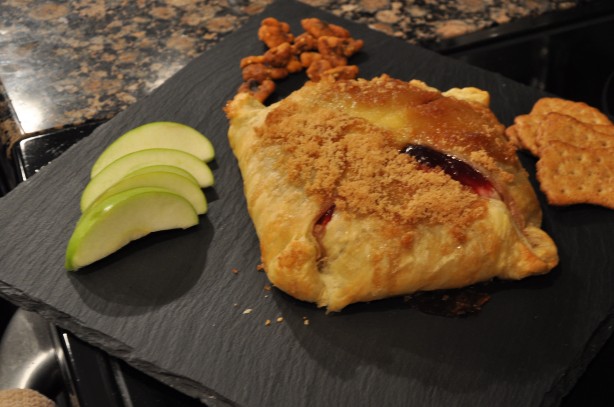
if I just stuck my face in this?

I don’t think so.  I mean, it’s a baked brie.  When you really think about it, who would blame me?

Well, my church small group might not appreciate it since I made it for them.  It was our night to bring snack and I completely forgot about it until the night before.  Once I remembered, I somehow got it in my head that I wanted to take a baked brie.  A friend gave me her recipe last year and I took it to a couple of events where it was a huge hit.  Well…I apparently lost the recipe.  So what’s  girl to do when she’s got her heart set on serving a baked brie and she’s lost her recipe?

Google to the rescue of course!  What did we ever do without it?

The first Google listing was this recipe from The Food Network.   It looked yummy but, frankly, I just didn’t have time to cut the brie in half, stuff it, trim the pastry to the circumference of the brie, and make decorations out of the pastry trimmings.  So that recipe was quickly discarded.

The second listing was from Simply Recipes.   I took one look at the recipe pic and knew this recipe wouldn’t disappoint.  It had a very simple ingredient list.

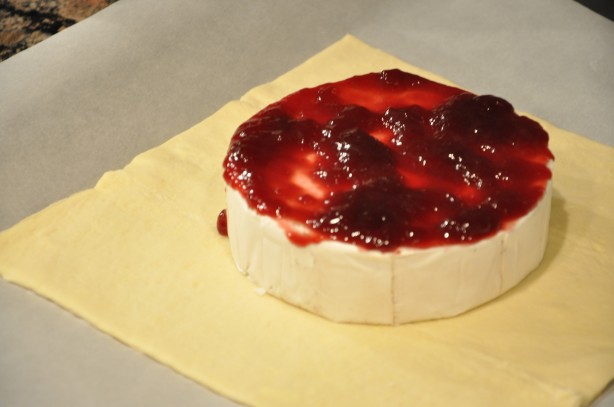
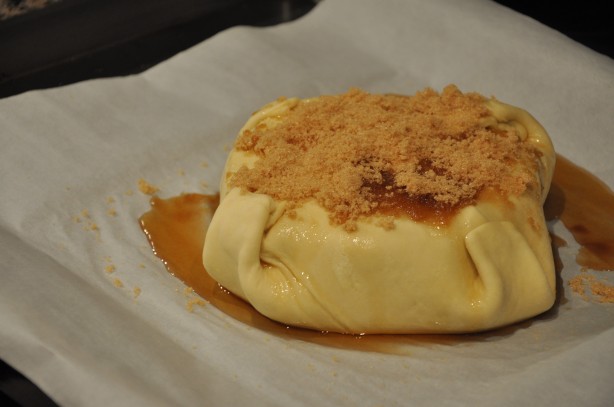
First you lay out the pastry dough and set your brie wheel right in the middle.  Then cover said brie wheel with raspberry jam.

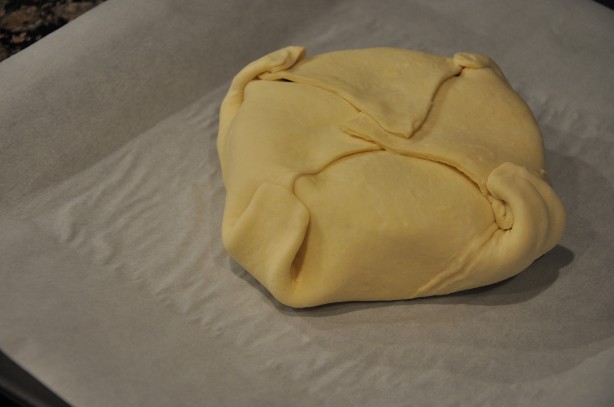
Next you fold the pastry around the cheese, like so…

Then top with maple syrup and brown sugar and bake it up.

I like to serve it with crackers or crostini and sliced apples with candied walnuts on the side.

If you are salivating like I am, pop on over to Simply Recipes and download this yummy, crowd pleasing recipe here.  People will think you slaved over it.  But, really, it only takes about 30 min.

Oh, I almost forgot the most crucial step in the process!  I can’t stress this enough –

DON’T STICK YOUR FACE IN IT BEFORE SERVING IT TO FRIENDS!

It’s tricky, but it can be done.  Trust me.

Cheers, y’all!

Wine Girl

Permanent link to this article: https://kitchendoesnttravel.com/archives/499

Shootin’ Sushi

So I mentioned that I was taking a photography class, right?  I may also have mentioned that I am totally a Penelope and nerdy with anything resembling school.

I had my first class last week. As with my actual schooling, I positioned myself front and center at the head of the class with my clean new notebook and brand new pen ready to jot down all the pearls of photography wisdom spun forth by my instructor.  Despite the fact that my brain really does work in outline form, my class notes looked like pages of indecipherable scribble…just like in high school, college, and grad school.  Therefore, just like in high school, college, and grad school, I spent time this week recopying my notes.  While it may seem redundant, it actually helps me learn to recopy them because I am a visual/tactile learner.  In fact, the more I see it written or do it with my hands, the more it sticks.  So, to help me retain more of what I’m learning, I going to share it with you.

My first class primarily focused on the 3 components of good exposure:

  1. aperture (the amount of light let into the camera)
  2. shutter speed (the length of time the shutter is open/the image is exposed to film or media)
  3. ISO (degree of film or digital sensor sensitivity)

This can all get a little long.  So since my homework this week was about aperture play, I’ll focus on that for this post.

Aperture is measured in f-stops and is one of the key components in establishing the depth of field for your shot.  What do I mean by depth of field?  It basically refers to how much of your shot in focus.  In a shallow depth of field the photographer is basically telling the audience what it should attend to in the shot.  Only the subject is in focus.  For example:

By contrast a greater depth of field means that pretty much everything in the picture is in focus. There’s a lot of detail to take in.  While Ansel Adams was a master at this, here’s my example:

So how do you achieve one type of shot versus the other?  One way is by adjusting the aperture. Here’s where things can get a little confusing.  Remember I said that aperture controls how much light the camera lets in and is measured in f-stops.  The SMALLER the f-stop number, the MORE light is let into the camera, and the more shallow the depth of field.  The LARGER the f-stop number, the LESS light is let into the camera, and the greater the depth of field.  Totally counterintuitive, right?

I know, I know.  The only way that is going to stick in my head is by rote memorization.  So say it with me:

smaller f-stop = more open = more light = shallow depth of field
smaller f-stop = more open = more light = shallow depth of field

Conversely, you could say:

larger f-stop = less open = less light = greater depth of field
larger f-stop = less open = less light = greater depth of field

If you are interested in some additional reading about all this, check out what the Pioneer Woman has to say about all this here.

Here was my homework for week 1:

“With your camera in Aperture Priority and using a long lens, gather several objects together or one object against a busy background and shoot it using EACH different aperture/f-stop your camera allows.”

Now HERE’s where things get really delicious!  I decided that the ideal subject for this project would be sushi.  It’s delicious, colorful, and has multiple textures.  So the Beer Guy and I packed up the D90 and headed out to our new favorite Charlotte sushi spot – Cyros Sushi.
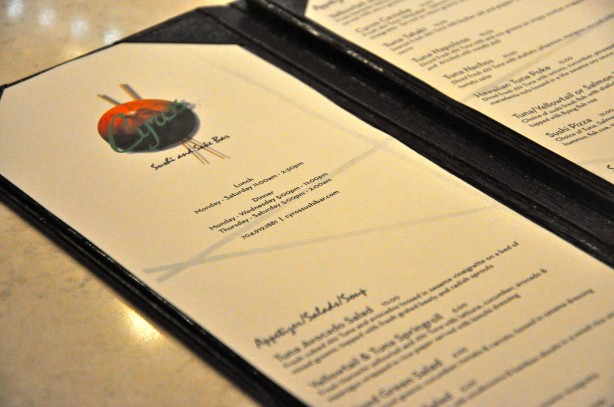
Cyros is a tiny little sushi place inside an unassuming strip mall.  This place is getting more popular and it IS tiny.  So if you go on a Friday night, you may end up eating in the atrium of the strip mall. Not cool or fun.  So we suggest going in the middle of the week or at least not at prime dinner time on the weekend so you don’t run that risk.

Ok, so it loses a couple cool points for location, but it’s really what’s inside that counts.  The decor is elegant and modern, but not so mod that it’s cold and uncozy.  The sushi is FAN-TAB-U-LOUS.  We generally have the same friendly server every time we go.  She knows us, we know her and that makes us regulars!  We love being regulars.

We ordered the Pork Shumai appetizer.  But before we could dig in, I had to whip out the D90. Remember we came here strictly for homework purposes (wink, wink).  I had to take a shot of this at each f-stop my camera would allow.  Since the D90 rocks that means I took about 20 shots of everything we ordered…but I’ll just give you the highlights:

Here it is at f5.3 with a shallow depth of field (i.e. yummy appy in crisp focus, BG’s beer fuzzy in the background)…

now at f14 with a slightly greater depth of field (i.e. appy still crisp, BG’s beer getting more focused)…
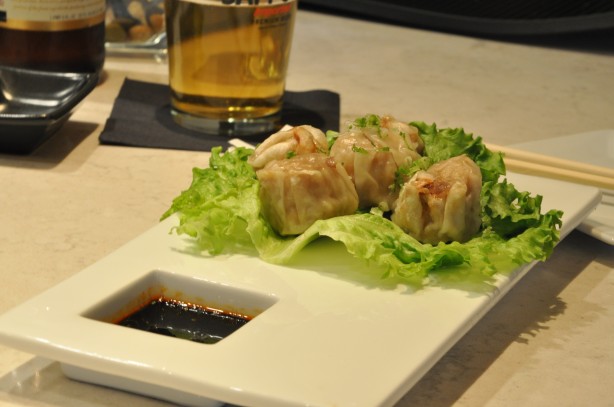
and again at f25, even greater depth of field (i.e. all the objects in the pics are basically equally in focus)

Yes, I know that everything in that last shot is slightly fuzzy.  That’s what’s called camera shake.  The longer your shutter is open, the more still your camera has to be.  This is apparently where tripods come in handy. But I was shooting in hand…and getting really hungry.  Growing faint and weary may be a better description.  I blame the camera shake on low blood sugar.  I took pics at 3 larger f-stops but I was basically foaming at the mouth at that point and the shots are complete blur! You get my point with the pics, right?

Good.  Let’s move on to the main course.  Ladies and gentlemen, meet Cyros Sushi’s Avant Garde Roll…
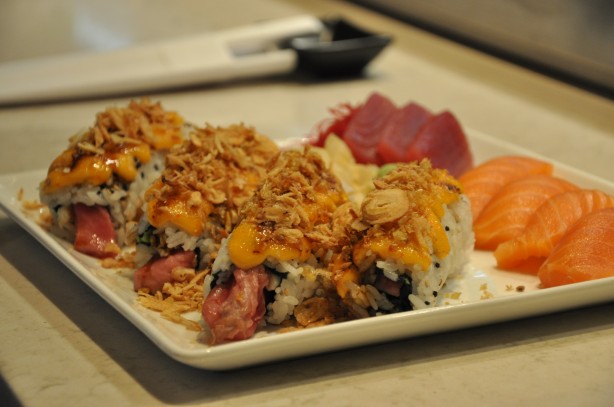
Did you just have to stop yourself from licking the computer screen?  Or was that just me…

Let me spell this out for you, people.  Tuna.  Avocado.  Cream cheese.  Covered in spicy aioli sauce and  – wait for it… fried garlic and shallot slivers.  OH – MY – GAH!!  Whew, I’m gonna need a minute…

Where were we?  Oh yeah…photography.  Just because the more you hear/see it, the more likely you are to remember it the above pic was take with an aperture of f5.3, giving a shallow depth of field (i.e. freaking awesome Avant Garde roll in focus in the front, fuzzy sashimi tuna and untensils in the background).  Here’s the same shot at f14, with a still somewhat shallow but greater depth of field than the last shot.

Notice that the sashimi tuna and utensils are still somewhat fuzzy in the background, but getting to be a little less so. And just for good measure here’s the same shot at f36…
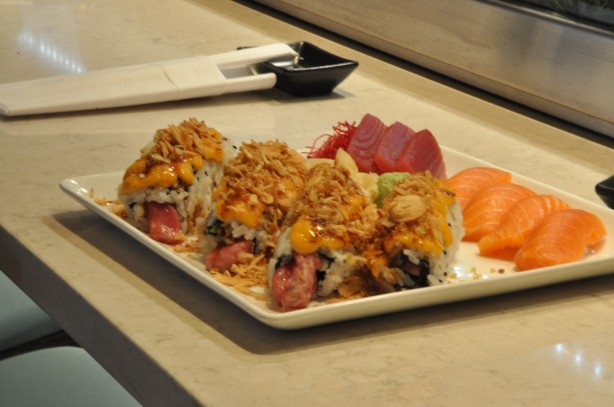
Aaaannd, I’m spent.  I’m not lying to you, people.  I dream about that roll at night.  I lose focus at work thinking about it.  Did I mention the fried garlic and shallot slivers…

Huh?  What happened?  Oh yeah, and the last pic…generally equal focus throughout…unfortunately also with a little bit of camera shake.  Again, I blame low blood sugar.

And THAT, folks, is your first lesson in aperture.  And if you are a sushi lover, live in Charlotte, or are passing through town do yourself a favor.  Go to Cyros Sushi.  Order the Avant Garde roll.  I promise you –

IT. WILL. CHANGE. YOUR. LIFE.

Cheers, y’all!

Wine Girl

Permanent link to this article: https://kitchendoesnttravel.com/archives/484

Back to Basics

What’s your favorite beer?

A friend asked me that last night, and though her question was earnest, I had trouble answering.
I settled on Delirium Tremens, which has indeed been a recent fave, since our recent visit to TAP. DT has edged out Chimay in my Belgian book.

When she said her favorite was Negro Modelo, I was torn. I really like that one too, and I’m especially glad to see it on draft. I declared that it, too, was my favorite, though from a different style. Ooh, and I’m drinking a lot of Fat Tire nowadays. And the Chub! I’ve had a recent hankering for Old Chub Scotch Ale.

Pop! One Heineken opens and then another. My friend asks another drinker “what does that taste like?” The answer – “Like Heineken!”

And then the inevitable question of whether it’s skunked or merely another different flavor. I weakly regurgitate what I’ve read about bottle color and UV light and “some mysterious compound” similar to what skunks will emit.

That started me thinking about other styles and other beer mysteries. Why won’t my father drink beer with more flavor than MGD? Is it really the water that makes Olympia special (or was it the time with my Dad and uncle?) Are my brothers-in-law being ironic when they castigate my “lager” while sipping on Bud and Miller?

Hmm. What’s a beer guy to do?
My nom de plume may imply a certain expertise with beer — I’ll go far enough to say I’m an experienced drinker — but for the skunky question, I’ll defer to the Alström Bro’s over at Beer Advocate. And then I’ll look up how to pronounce isohumulones.

We’re going back to basics here for a series of posts, looking at the brewing and ingredients in beer, the different styles of brew, and then how to review beer “properly”.

So, find yourself a designated driver and come along for the ride!

Beer Guy

Permanent link to this article: https://kitchendoesnttravel.com/archives/486

Remember when…

it was a treat to get popcorn at home?  Or are those of you who read this so young as to not remember a world where microwave popcorn always existed?

So I know that BG and I are like the last two people on the planet to get on this train, but we started watching Season 1 of Mad Men last night.  It’s in our Netflix queue, but I just HAD to start watching it this weekend.  So, for the first time in 2 yrs, we went to Blockbuster.

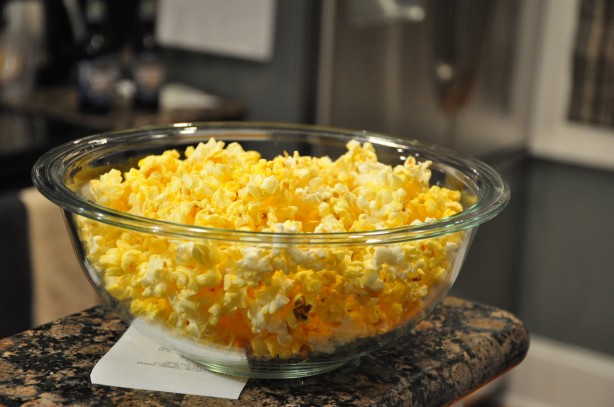
It’s been forever since I made popcorn for movie night at home, but something about actually going IN a video store made me want popcorn while we watched our DVDs.  I’d like to think it was the nostalgia of the situation that made me want the popcorn.  The act of going to the video store and standing in line there gave me flashbacks of doing the same thing on a lazy Saturday night with my family growing up… and we always had a big bowl of popcorn amongst us as we watched our chosen flick.  In reality, I’m quite sure that the plethora of popcorn, candy, and ice cream treats that surrounded us while in line at Blockbuster had considerable influence on my sudden craving.  But, the idea of wistful reminiscence just sounds so much better though…

While I munched on my popcorn and got drawn into the retro world of Mad Men I got to thinking – “Remember when popcorn was a treat?”  I don’t know about you, but I have vague memories of my mother heating the oil in the bottom of the popper and pouring the kernels into the 1970’s orange globe, then waiting for what seemed like an eternity for all the kernels to burst into the fluffy snack.  I also remember being at friends house and watching her mom cook the Jiffy Pop on the stovetop.  Because it took more than 2 minutes and required a couple ingredients and some equipment it was a treat reserved for semi-special occasions.

As I wandered back from memory lane, I became keenly aware of the film that the fake powdered butter on my popcorn was leaving on the roof of my mouth.  I don’t ever remember having that problem with popcorn from a popper.  So with popcorn, as with all foods, freshly made is always better and making it the way our mothers and grandmothers did is too. That’s just a little food for thought that “popped” in my brain.

Cheers, y’all!
Wine Girl

Permanent link to this article: https://kitchendoesnttravel.com/archives/481

Shutterbug!

The pics around here are about to get a lot better!

That’s because I started a photography class at The Light Factory tonight.  The Light Factory is a contemporary museum of photography and film here in the Queen City.  It host exhibits, shows indie films, and has a strong educational push – both adult education and within the local school system.  According to their website:

“The Light Factory’s mission is to promote the power of image, in Charlotte and beyond, by informing, challenging, and stimulating audiences through photography, film, and other light-based media to see their world through a different lens.”

I’m SUPER DUPER excited about my class.  Taking this class means I am really about start getting my money’s worth out of the D90…rather than using it as a glorified “point and shoot” like I have since we got it in April. There will be weekly homework assignments. (Yeah!  I love homework!  I’m such a school nerd!)   I can think of no better subjects than food and beverage…can you? At least I know they’ll stay still while I’m learning.  🙂

Never fear!  I’ll be sharing what I learn with you.  Stay tuned!

Cheers, yall!
Wine Girl

Permanent link to this article: https://kitchendoesnttravel.com/archives/477

TAP

So, as WineGirl mentioned, we were in Atlanta last weekend, where she did a Very Good Thing. Of course, her exertions left her famished, so thanks to OpenTable, we found a delightful restaurant — literally right around the corner.

And when I tell you that the name of the place is TAP, the following should come as no surprise. The beer menu was longer than the food menu. Draft beer, bottled beer, and Reserve Beer (Oh My!)

Continue reading

Permanent link to this article: https://kitchendoesnttravel.com/archives/463