Category: Deliciousness

All things food related

You’re Going to a What?

Crawfish Boil.  And to you Yankee readers that second word is pronounced BAW-IHL.  I was born and raised in the Deep South, but have moved around enough that I now say I’m going to get the oil (o-ee-ul) changed in my car.  But when you are cooking up crawfish, it’s just sacrilege to “boil” (bo-ee-ul).  You just have to say “boil” (baw-ihl).  There’s just no way around it.

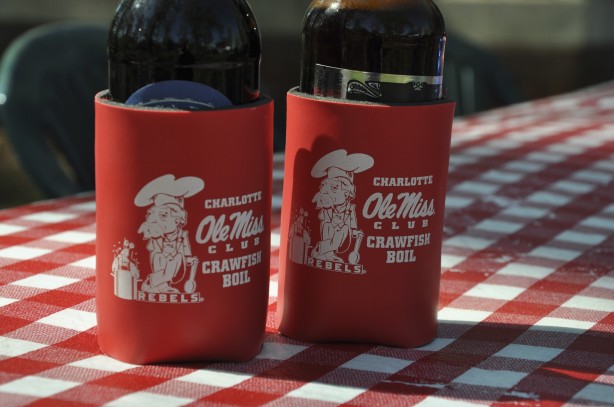
This Saturday we went to the Charlotte Ole Miss Alumni Association’s annual Crawfish Boil.  For we expat Mississippians this is a MUCH anticipated event.  But my Carolina friends…well, they just don’t seem to get it.  This is the 4th Annual Crawfish Boil for our alumni club and every year I have to explain this event to my friends.  It always goes a little something like this:

Them:  “So what are you doing this weekend?”
Me:  “Going to an Ole Miss Alumni Crawfish Boil!  Woo-hoo!”
Them: “A what?”
Me: “A crawfish boil.”
Them: “Huh?  A what?”
Me:  (You must hear me saying this sarcastically slow and loud, taking care to sound out each syllable) “A C-R-A-W-F-I-S-H B-O-I-L…”
Them: “What does that mean?”
Me: (again, sarcastically) “Well…you take some crawfish…and you boil ‘em…then you eat ‘em…and you drink a few beers along the way.  You know, a CRAWFISH BOIL.”
Them:  “What’s a crawfish?”
Me: “Excuse me…Crawfish, crayfish, crawdads, mud bugs, Cajun caviar…none of this rings a bell?”
Them: “Nope.  Never heard of it.  What exactly is a crawfish?”
Me:  “Well, they look like miniature lobsters….”

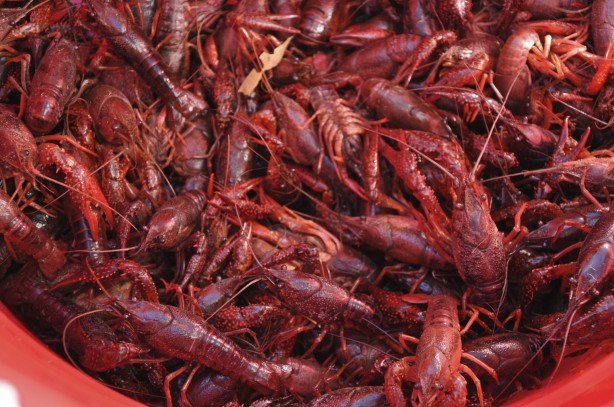
The concept is quite simple, really.  You take a whole bunch of crawfish (if you live anywhere outside of MS or LA, you FebEx them in from New Orleans the night before your event)…

You put them in a big ol’ pot with potatoes, onions, sausage, corn and mushrooms

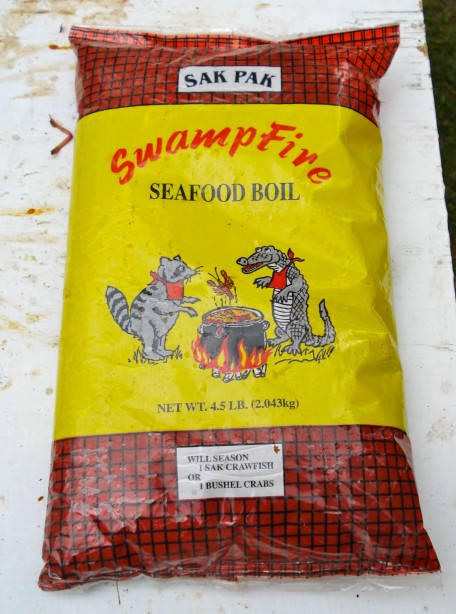
with the appropriate seasoning, of course,

and boil them until they turn bright red and all their little tails curl.  Then you dump them all out in the middle of a big table


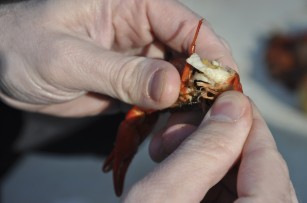
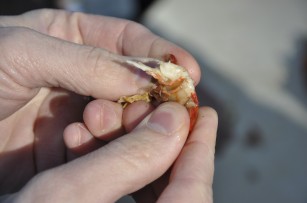
and get cracking!  Cracking open the tails, that is…

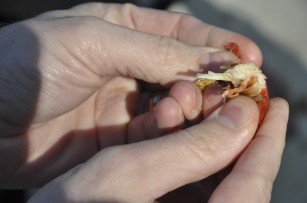
And if you are really Cajun, you suck the head.  Personally, that’s part of the crawfish boil experience that I’ve never been able to psyche myself up for.  But, to each his own, right?

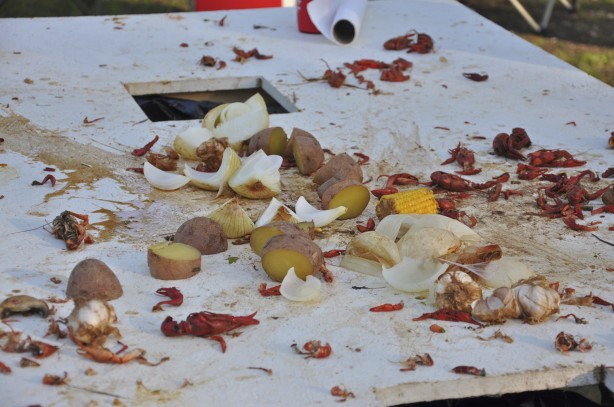
Our club dumps the onto a long table with a hole cut in each end, underneath which there are garbage cans.  Everybody stands around the table pinching off the heads, cracking open the tails, and chunking the shells and left overs into the garbage cans.

Of course, you have to rinse all this spicy goodness down with an ice cold beer.  I’ll let BG tell you about our chosen brews later.

We all stand around the big tables pinching, cracking, sucking, chunking, and rinsing until the table looks like this

Now I know to the outsider this may seem to be…well, what is the word I’m looking for here…DISGUSTING.   Sure, pulling something’s head and exoskeleton off before you eat it may be a little unsettling to some.  But I’m telling you, people. That’s good eating!  It’s a Deep South delicacy. They don’t call it Cajun Caviar for nothing!  And you haven’t tried it, you are missing out.

One word of advice, though.  Don’t bother getting a manicure before you go!

Hotty Toddy, y’all!

Wine Girl

Permanent link to this article: https://kitchendoesnttravel.com/archives/753

Tour de Kitchens

Our friend Ashley

is renovating her kitchen.  When I say “renovating” I mean “gutting”… as in knocking walls down, rewiring, moving the appliance locations, new cabinets – the works!  That means she will not have a working kitchen of her own for a least 8 weeks.  She and her roommate, Lauren, devised a brilliant plan to ensure that they won’t have to live off Ramen noodles and take out for two months.  It’s called the Tour de Kitchens.  Here’s how it works:

  1. Ashley and Lauren threw a big cookout for all their friends before the big kitchen demolition.
  2. While at said cookout, all the friends signed up for a schedule of dates to have the two lovely ladies over for dinner – touring the kitchens of their friends and blogging about it along the way.
  3. Ashley and Lauren throw a big dinner party for all these friends once the kitchen is complete.

In a sense, they feed us twice and we feed them once.  Not a bad deal.  And a super fun idea!  I highly recommend it to any of you planning a major kitchen reno in the future.

Well, Sunday was our turn to host.  I love to entertain and always want to leave my guests wanting more.  So, I always try to make my dinner parties memorable.  However, for this particular dinner party the stakes were especially high. Let me explain…

First, Ashley is a foodie.  A serious foodie.  In fact, she’s been writing a blog called The Charlotte Food Snob since 2006.  It chronicles her adventures in eating out in our fair city.  Secondly, she’s in our church community group which takes turns bringing wine and snacks to various events.  Through our years in this group, I’ve developed a reputation for bringing awesome snacks like this and great bottles of wine such as this and this to our gatherings.  Not to toot my own horn, but people tend to get really excited when they know it’s our week to bring snacks.  I mean REALLY excited.

So, I’m hosting The Charlotte Food Snob herself AND I’ve got a reputation to uphold.  That means, I had to bring my A-Game.  Nothing less would do.

I find that there are three basic elements that will make or break your dinner party, not including the guests.  I call them The Three M’s of  a Successful Dinner party – Music, aMbience, and Menu.

First, the Music.  I keep a playlist on my iPod appropriately titled “Dinner Party.”  It’s a list of nearly 70 songs ranging in artists from Coldplay, to The Beatles, to Diana Krall, to Ben Harper, to Dave Matthews Band.  They are all groovy, but unobtrusive so they play nicely in the background without being “noisy” per se.   I hit shuffle so the songs play randomly and repeat so the whole thing starts over again, should we work all the way through the play list.  I usually start playing it over the speakers in the living/dining area about 30 min before my guests arrive to start setting the mood in my head.

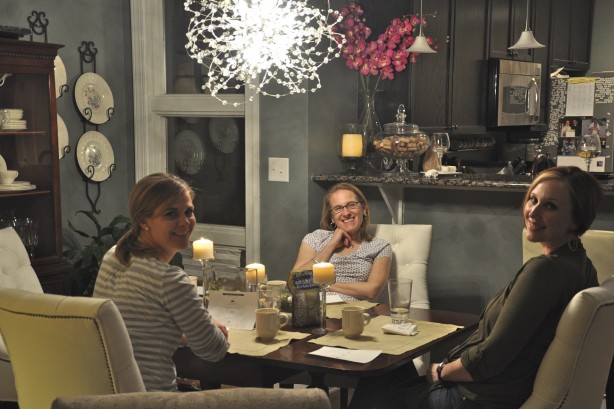
Secondly there’s aMbience…Well, you’ve got to set a lovely table

(dig my new chairs?) and lots of candles always help.

Finally, there’s the menu…Like I said, the stakes were high.  So this menu had to be FABULOUS.  It was pretty awesome, if I do say so myself.

The Menu
Appetizers – Goat Cheese Crostinis with Blackberry Ginger Balsamic Vinagrette
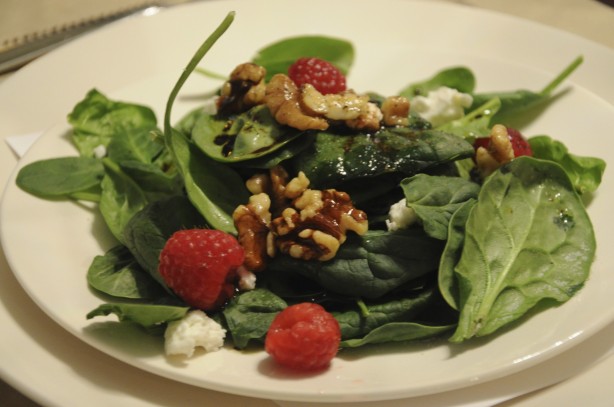
Salad – Baby Spinach with Goat Cheese, Raspberries, and Toasted Walnuts
in Warm Olive Oil and Blackberry Ginger Balsamic Vinegar

Entree – Salmon with Grits and Caper Cream Sauce and Asparagus a la Plancha
Wine – 2007 Stag’s Leap Cellars Sauvignon Blanc
Dessert – Coffee Caramel Creme Brulee

And, yes, the menu was so fabulous that I printed it up on card stock and placed it at each place setting. Like I said, I had to bring my A-Game.  And speaking of my A-Game, here’s my handiwork up close:

Well, most of it anyway.  I didn’t exactly get any pics of it, but I used an old faithful recipe, Goat Cheese Bruschetta, for the appetizer with a couple minor adjustments.  First, I used small crostini bread v. a large artisan loaf.  This gave them perfect bite-sized proportions.  Secondly, I used Blackberry-Ginger Balsamic Vinegar, rather than plain balsamic, for the vinaigrette.  Like I mentioned before…EPIC!

Next, there was a beautiful salad

The basis was a recipe for Baby Spinach with Warm Olive Oil and Toasted Walnuts that I saved from Martha Stewart Living months ago.  But, I wanted to add a little something extra to it.  Hence, the goat cheese and raspberries.  The recipe calls for white wine vinegar, but…I just happened to have this delicious Blackberry-Ginger Balsamic Vinegar from Mountain Town Olive Oil Co. in Park City.  So why go with white wine vinegar when I’ve got a bottle of that within reach?  Much more interesting!

I have to give a shout out to my colleague, Sam, who gave me a head’s up on the entree recipe from Epicurious.  Ladies and gentlemen, Salmon with Grits and Caper Cream Sauce

Sorry that the pic is kind of dark.  I was ready to dig in and did not have the patience for the subtleties of fine photography.   Nevertheless, it was as delicious and as it was easy to prepare, despite how fancy it sounds. However, in an effort to deliver the courses in a timely manner, I made the grits before our salad course and they weren’t quite as warm as I would have liked, despite keeping them in the “warming zone” of my range.  The grits cooked up very quickly.  Next time, I’ll just let the salad settle while I cook up both the grits AND the salmon.

Oh, I almost forgot about the asparagus.  It’s now one of my staples from my Spain cookbook.  So fresh!  So easy!  So YUMMY! (And it sounds super fancy if you are, I don’t know, say…printing it up on menu cards for your guests.  Just a thought…)  You basically drizzle a little olive oil and fresh lemon juice on some beautiful asparagus, salt & pepper them, then grill them up for 2-3 min on each side.  You can use an actual grill or a grill pan.  I, personally, like to use my Cuisinart Griddler.

Of course, no dinner party is complete without The Wine.  Ashley and Lauren brought a bottle of 2009 La Crema Sonoma Coast Chardonnay.


We sipped on that during apps and salads.  Epicurious especially recommended the 2007 Stag’s Leap Cellars Sauvignon Blanc to accompany my chosen entree.

Plus, there was a little bit of it in the Caper Cream Sauce.  It was a perfect pairing.  Needless to say, both bottles were empty before the evening was over.   And for the Piece de Resistance (drum roll please…)

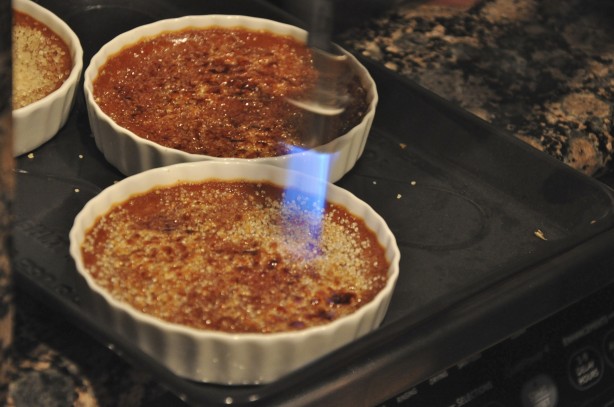
Homemade Caramel Coffee Creme Brulee!

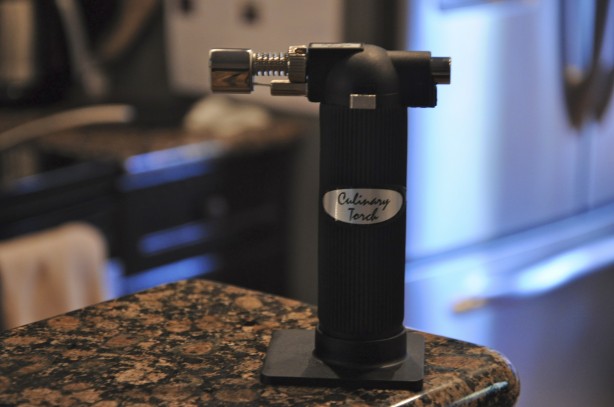
Yes, to make this dish at home did require the purchase of a small blow torch.

What?  There’s a rumor going around that this whole Tour de Kitchens thing is a competition.  So, a girl’s gotta do what a girl’s gotta do.  And if that means buying a blow torch…

then so be it! Seriously, though.  We had a blast hosting these ladies.

To hear their take on the evening, hop on over the The Charlotte Food Snob!  We’re looking forward to seeing how the rest of their Tour pans out.  And if this IS a competition, then I think we might just have this one in the bag! 😉

Cheers, y’all!

Wine Girl

Permanent link to this article: https://kitchendoesnttravel.com/archives/734

Brrrrr!

Well I don’t know about your neck of the woods, but it has been C-O-L-D in Charlotte.  The snow started falling in the wee hours of Monday morning and did not stop all day.  That is, of course, until the sleet and freezing rain started just in time for rush hour.

Luckily, this is the South…so there was no “rush hour” during the icy/snowy days. You Yankees readers will probably laugh, but at the slightest mention of a snow flurry, Southerners raid the grocery stores, stock up on bread, milk, and eggs like their life depends on it, and will cancel anything and everything for a mere inch of accumulation.  (Weirdly, when we lived in San Diego, I noticed that Southern Californians seemed to do the same thing with predictions of rain .) Oh, and BANANAS!  Bananas are apparently a necessity if you are going to be frozen into your house for 3 days.  I went to three grocery stores and I’m telling you – there’s not a banana in sight.

Today was the first day this week that the high’s here in the Queen City have risen above the 20’s.  As such, all that sleet and freezing rain left us with 1/4″ of ice on top of the snow.  If there is anything Southerners fear more than snow in the winter, it’s ICE!  So basically, I had all day Monday and half the day Tuesday off work.  And what’s a girl to do when she’s cooped up inside because because it looks like this outside…

Make SOUP! What else?

I recently came across the blog 101 Cookbooks.  I’m a REALLY late comer to Heidi’s blog, but I’m loving it so far. I loved it so much that I put her cookbook on my Christmas list this year…and got it!  I’m reading through it right now and hope to show off some recipes soon.  On New Year’s Day, though, Heidi posted this recipe for New Year’s Noodle Soup and I knew I had to try it…slightly modified to my taste, of course.  Being snowed in on Monday was the perfect opportunity.

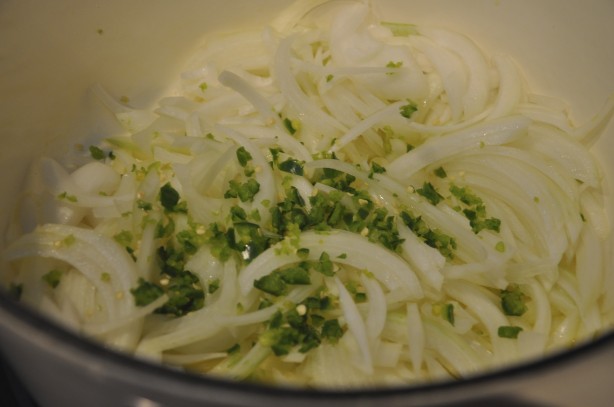
Thankfully, I planned ahead and soaked my dried lentils and beans overnight so they were ready go when I was.    While heating olive oil in my big new Martha Stewart 7-quart Cast Iron casserole pot, I chopped a big yellow onion

and minced a serrano pepper in my mini Cuisinart food processor then added them both to the pot.

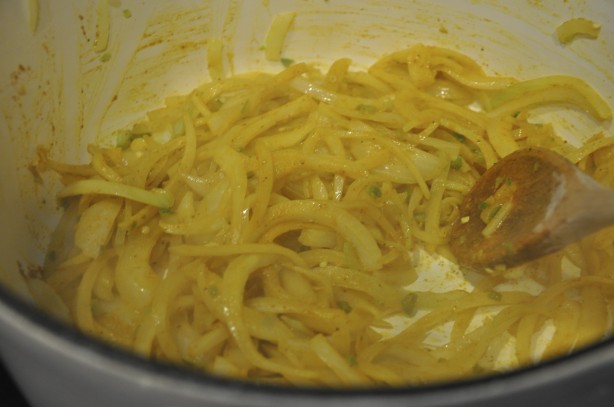
Next you throw in some tumeric, cumin, and freshly ground black pepper and mix it until the onions turn this gorgeous golden yellow color.

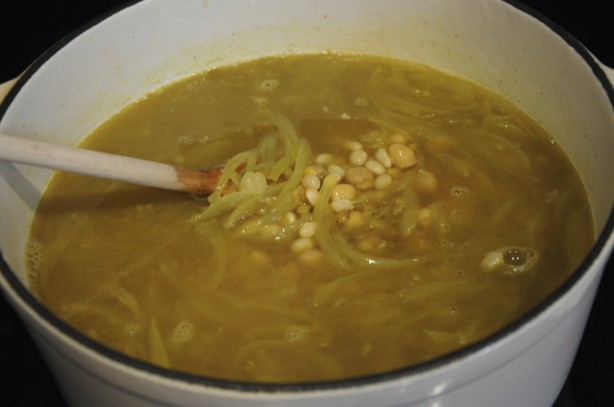
Then it’s time for the vegetable stock, lentils, chick peas, and beans.  Heidi’s recipe calls for borlotti beans, but I couldn’t find any to save my life – dried or canned.  So I substituted navy beans, and I think it turned out pretty well.

Let all that cook together for about 25-30 min, then add thin egg noodles.

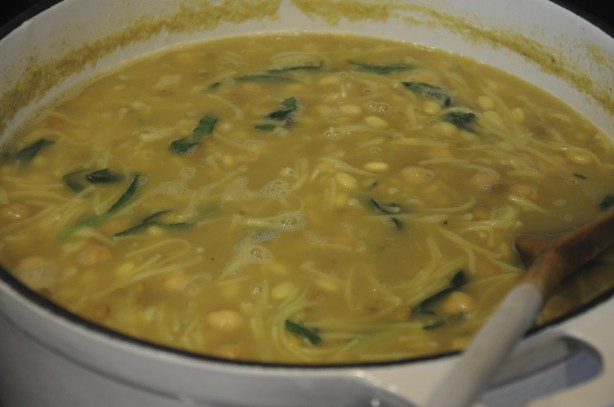
**Side NoteThe recipe called for 120 g of noodles, which was about 1/2 of the bag I purchased.  With a little slip of the hand I accidentally emptied the entire bag of noodles into my pot.  All those extra noodles basically absorbed most of my soup liquid.  So, my “soup” actually turned out to be more like the consistency of Spaghetti-O’s…even after I added an extra quart of stock.  But it still tasted great and hit the spot during these last few icy cold days.

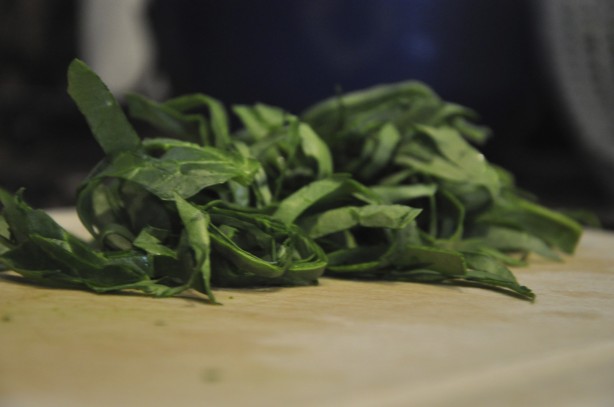
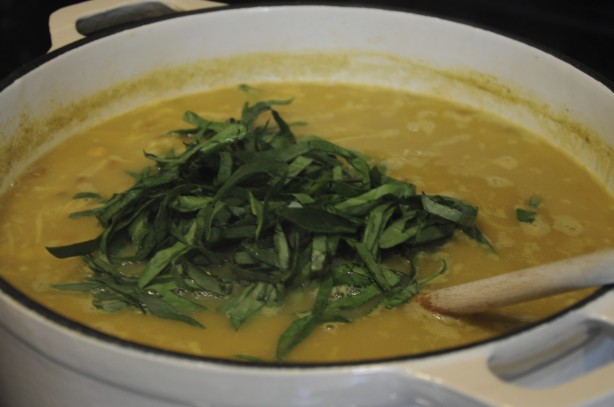
Just before serving, you add about 3 1/2 oz of spinach leaves.  I decided to chiffonade my spinach leaves because, frankly, the idea of encountering a huge wilty spinach leaf in a spoonful of my soup kinda freaked me out.

It’s not that I dislike spinach.  I’ll gladly eat it in a salad.  But I just can not bring myself to eat it cooked.  That pile of wilty spinach on my plate just grosses me out.  It grossed me out when Popeye squirted it out of the can, and it grosses me out now.

So I made sure than any wilty spinach I encountered in my soup would be as small and delicate a piece as possible, blending nicely the with noodles, legumes, and onions.  See…D-E-L-I-C-A-T-E…

You hardly notice it once you stir it in.  But doesn’t the green spinach look beautiful against lovely golden color of the soup!

Finally, the recipe calls for the addition of 1/2 cup of fresh cilantro and 2 tbsp of fresh dill.  These are both flavors that send a shiver up my spine and, for me at least, can ruin a meal.  I didn’t want to leave them out completely and leave the soup devoid of all flavor.  So I added them, but used dried in stead of fresh and cut WAY back on the amounts.  I think I may have added 3 tsp of each to the 7-qt pot o’ soup.  As such, I could discern a hint of each of those flavors in the finished product, but was not overwhelmed by them in the least.  For me, that was perfect.  If you enjoy these flavors, by all means, follow the original recipe and pile them in.

Lastly, Heidi suggests topping your bowl off with caramelized onions, creme fraiche, sour cream, or toasted and chopped walnuts.  I went for the walnuts and LOVED them.  I tasted the soup both with and without them.  While it was delicious either way, the walnuts added a completely new dimension of flavor.  And, because I’m a good Southern girl, I served it with a side of warm, buttery cornbread!  PERFECTION!

It was scrumptious and JUST wanted I wanted in this cold, cold weather…even if it was more like a pasta dish than an actual soup.  I will definitely be making this again.  Next time, though, I’ll go a little lighter on the noodles and I think I may add some shiitake mushrooms.

Cheers, y’all!

Wine Girl

Permanent link to this article: https://kitchendoesnttravel.com/archives/633

Dinner with Friends

Last night we had a dinner party! Is it a party if it was just us and one other couple? I certainly think so! We hosted these guys for dinner.

I’ve got to get in a better rhythm with this blogging in real time thing. I got so caught up in the cooking and the conversation that I forgot to take pics of all of us hanging out. So, a pic of Jon and LP from this summer will have to suffice.

LP and I enjoyed a Christmas cocktail first.

(Truth be told, I started sipping on mine while cooking before our distinguished guests arrived.)

Meanwhile, the boys sipped on a little something from Santa’s Private Reserve.

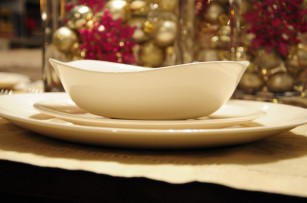
I set a pretty table for the evening.

To go with the pretty table I also planned a pretty menu. Once again I turned to the Barefoot Contessa for inspiration.

The Menu
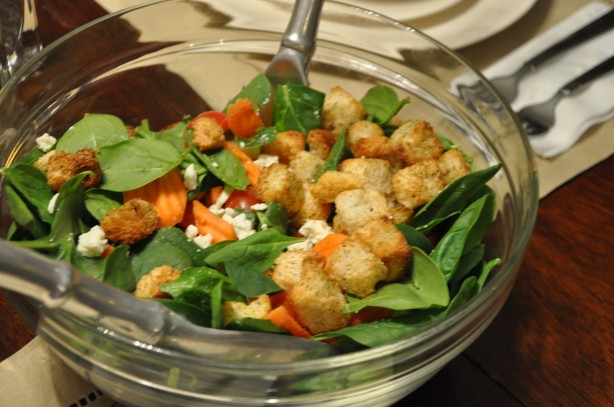
Salad
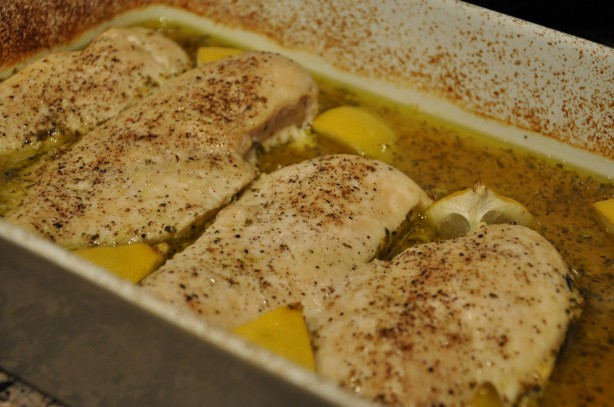
Barefoot Contessa’s Lemon Chicken Breasts
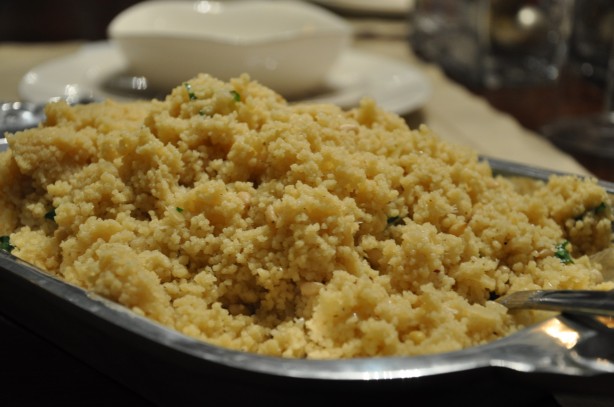
Barefoot Contessa’s Couscous with Toasted Pine Nuts
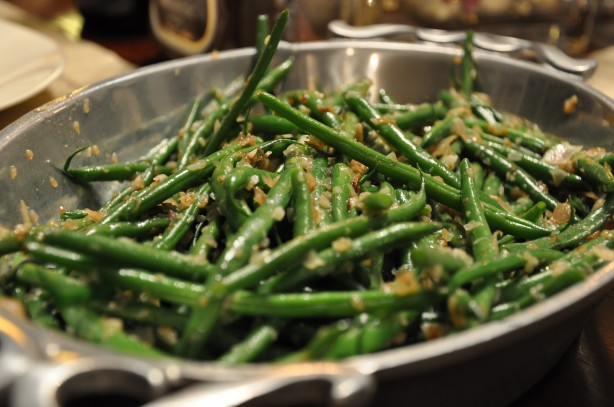
Barefoot Contessa’s Haricort Verts e Shallot

Here’s what it all looked like.

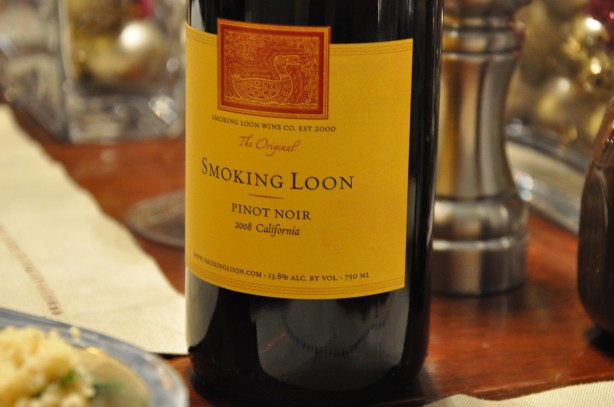
And it all tasted even better than it looked! Check out the recipes for the chicken, cousous, and string beans here, here, and here.  Jon & LP supplied the salad and the vino!

After dinner we sipped on a little mulled apple cider

and had our funny bones tickled by a Christmas classic.

What a way to kick off the weekend!

Cheers, y’all!

Wine Girl

Permanent link to this article: https://kitchendoesnttravel.com/archives/575

Grandaddy of All Ham & Cheese

So last week, after working at the hospital from 7a-3:30p all day Saturday, running around to do a little Christmas shopping, then spending 3 hours decorating the Christmas tree, I collapsed into a heap on the couch.  Firmly ensconced in my warm blanket with mulled apple cider in hand, I began to mindlessly flip through the channels and came across It’s Complicated on HBO.  Great movie.  I love Nancy Meyers movies.  If you haven’t seen it, you should.  But I digress…

First, it must be said that Meryl Streep’s kitchen in that movie is A-MA-ZING!

Seriously, this is my DREAM kitchen.  But the kitchen is not the point of this post…it’s what is being eaten in this fabulous kitchen!  There is a scene where Meryl Streep and Steve Martin are eating a meal of what looked to be a large piece of cheesy bread, salad and some Chardonnay.  Now, the first time I saw this movie WHAT was being eaten didn’t catch my attention.  But this time, I went – “Huh, wonder what THAT is?”  Through the miracle that is the DVR, I was able to rewind and memorize the French name Meryl Streep called it…

Croque Monsieur!

When curious about making a French dish, there is but one “go to gal” – The Barefoot Contessa herself, Ina Garten.  A little search around the Food Network website informed me that this dish is basically a French Ham & Cheese sandwich.  Hmmm….and I just happen to have fresh homemade bread on my counter. What’s a girl to do?  Why whip some up, of course!

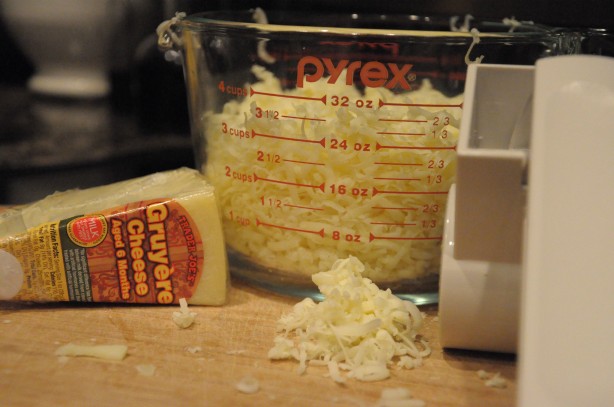
Check out the Barefoot Contessa’s full Croque Monsieur recipe here.  First you have to grate a lot of cheese – I mean a lot.  We’re talking 12 oz/5 cups of Gruyere

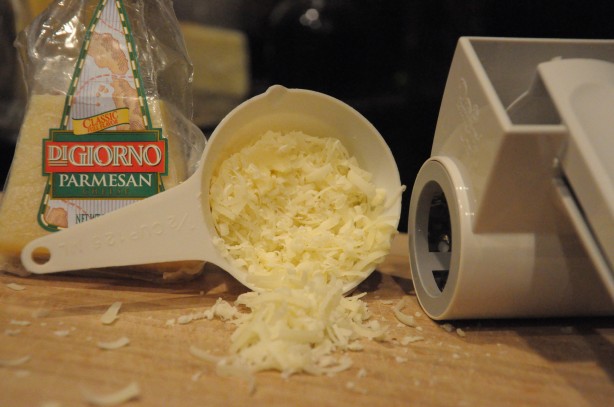
and a 1/2 cup of Parmesan.

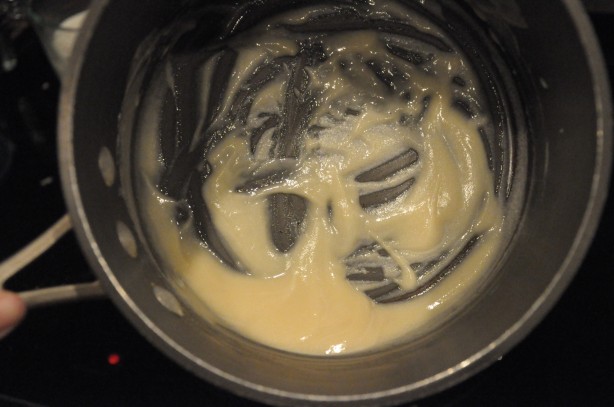
(Now, my Pampered Chef gadget definitely made this grating easier.) Then you melt some butter and stir in some flour until it looks like this.

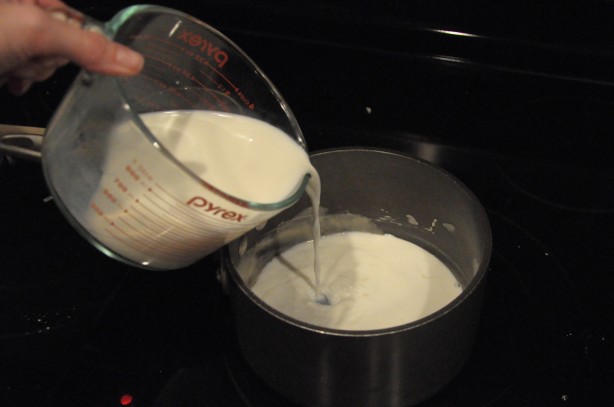
Did I just make a roux?  To finish off the sauce, stir in 2 cups of hot milk

followed by the Parmesan, a 1/2 cup of the Gruyere, salt, pepper, and nutmeg and stir it until it is a big ol’ saucepan of creamy, cheesy goodness.  And now, NOW is when we get to put that Beer Bread to good use…

First you slice it up, then toast it up, and cover it in Dijon mustard, sliced ham, and grated Gruyere

top if off with another slice of bread,

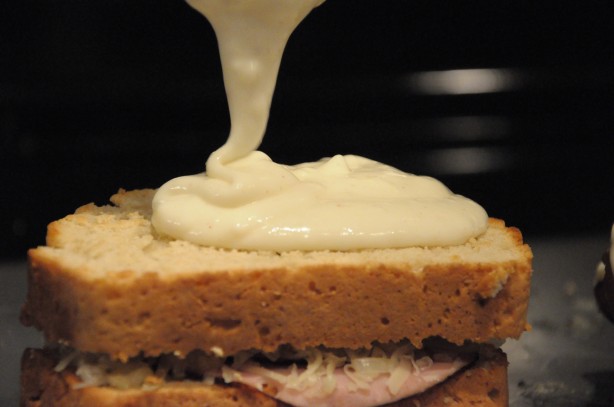
and cover it with the cheese sauce.

GET. A. LOAD. OF. THAT!!!!  Any recipe that allows me to ladle cheese sauce on to, well, quite frankly anything, is a winner in my book!

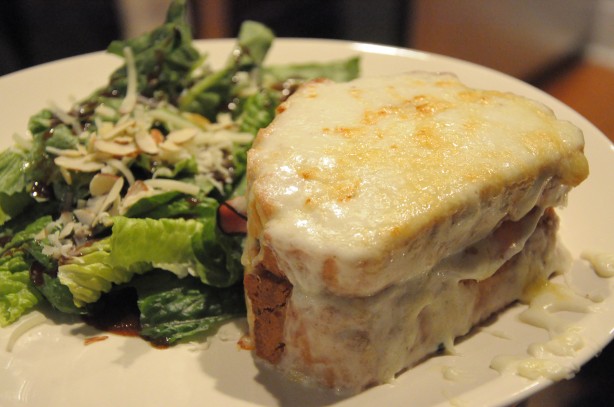
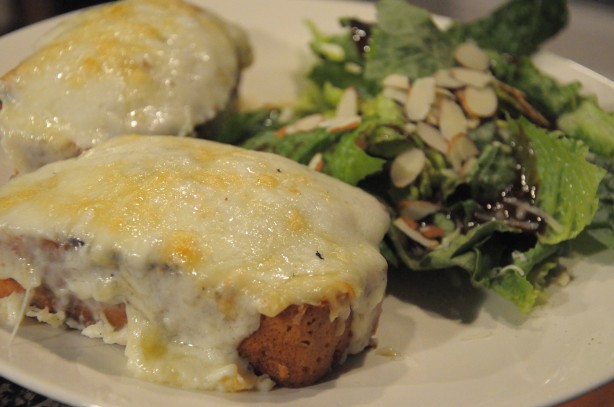
Believe it or not, you then sprinkle MORE Gruyere on top then bake and broil it until it looks like this

Now, BG was not about to let any of the cheesy goodness go to waste.

I mentioned that the fastest way to his heart was to combine his two favorite things – beer and bread.  Well, you add cheese to that and he is on Cloud Nine!

In all honesty I sliced the bread too thickly.  So, the next night I made it in an open faced version and much preferred that.  It’s much prettier that way, don’t you think?

BG declared that this was the “best damn ham and cheese ever” and I have to admit, I whole-heartedly agree with him!

Cheers, y’all!

Wine Girl

Permanent link to this article: https://kitchendoesnttravel.com/archives/545

The Way to a Man’s Heart

They say they way to a man’s heart is through his stomach, right?  But what about a man that loves beer…and bread?  Well, the way to his heart is still through his stomach, but you get there a lot faster if you combine his two favorite things.

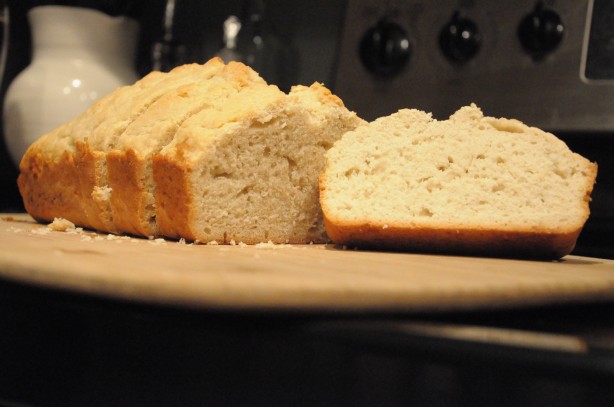
Ladies and gentlemen, I give you Beer Bread!

I like how the light in that shot sort of makes the bread look like it was sent from heaven…because I kinda think it was.

Before I go any further, I would like to point out that before tonight, I have never made bread before.  As in EVER.  Never made bread before tonight.  I’ve told you before that I like to cook, not bake.  And frankly, the idea of bread making intimidated me – what with all the yeast, and rising, and kneading, etc, etc, etc…But, as Gabi from Honest Fare points out, the use of beer in the recipe neatly avoids all that jazz because – what is one of the key ingredients in beer…

YEAST!

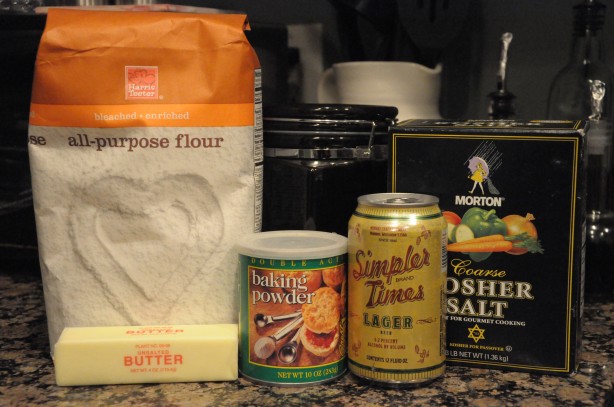
The recipe was super easy.  In under an hour, I went from someone who never made bread to having fresh homemade bread on my table! The ingredients list was super simple.

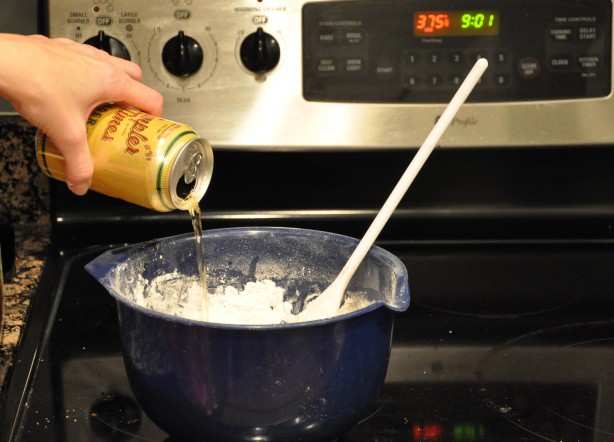
First you mix and sift the dry ingredients, then add the “secret ingredient”…

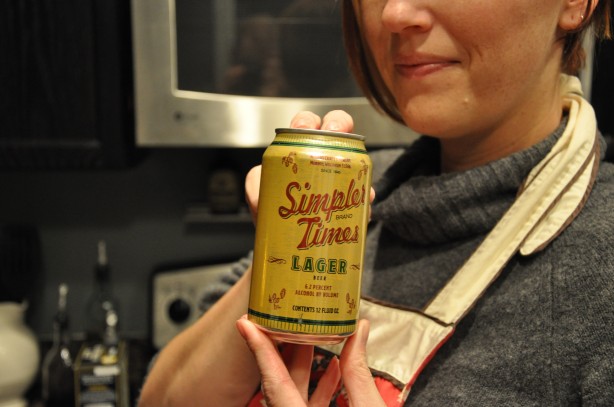
I have no idea what kind of beer that is.  Gabi seemed to feel that “cheap” beer was best.  So I sent BG out for a single can of “cheap plain beer” and this is what he brought back.  It’s probably the kind of thing a beer snob like him wouldn’t ever be caught dead drinking.

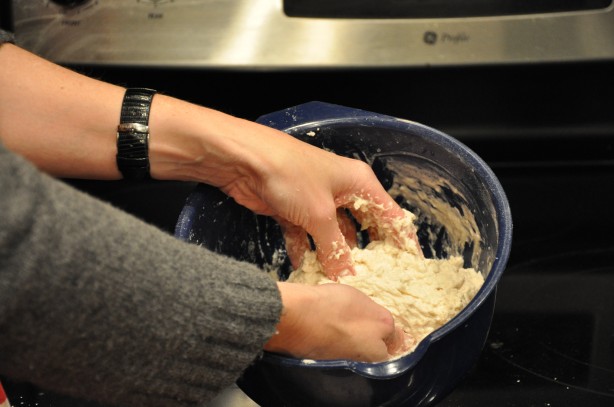
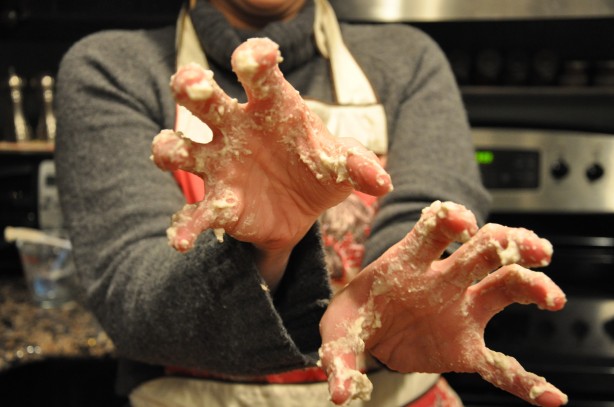
Once the secret ingredient has been added, mix until a “stiff batter” is formed.  Gabi recommends that you use your hands once it starts to stiffen so that you don’t over mix it.  Here goes nothing!

Yuck!

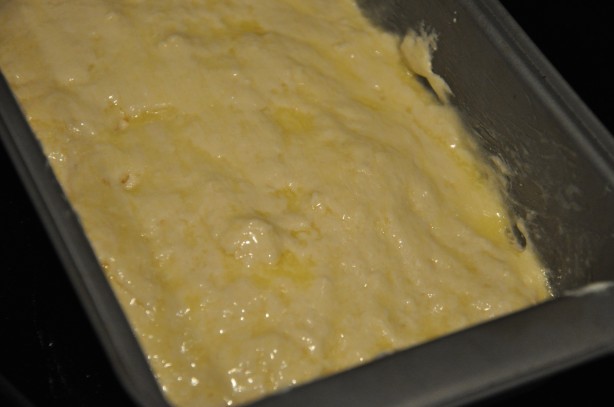
After you wash the sticky, yeasty goo off your hands, scrape the batter into a loaf pan, brush on melted butter and bake away!

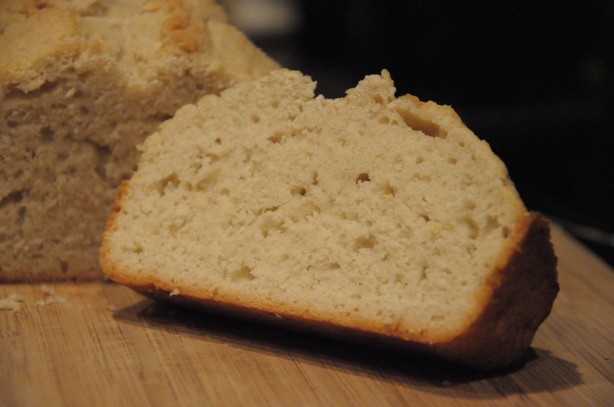
Voila!  Fresh, homemade bread in under an hour!

Get me!  I made bread! It was so yummy with a biscuity texture.  Delicious!  So very, very delicious.  Some of the commenters on Gabi’s blog discussed their successes with different flavors of beer and adding various herbs.  That’s the beauty of recipe as simple as this.  The potential variations are endless.

Bread this yummy would have been perfectly lovely eaten with just butter or dipped in olive oil.  But with fresh bread in the house, we had to get fancier than that.  Tune in tomorrow to see what we did with it!

Cheers, y’all!

Wine Girl

Permanent link to this article: https://kitchendoesnttravel.com/archives/544

What the Heck Is Pone?

Every family has their holiday food traditions, right? How much to you want to bet you’ve never heard of anything like mine?

Any thoughts…

No? Ok, then. I’ll clue you in. But first, I must ask – Has anybody out there (outside of my immediate family) ever heard of anything called Sweet Potato Pone?

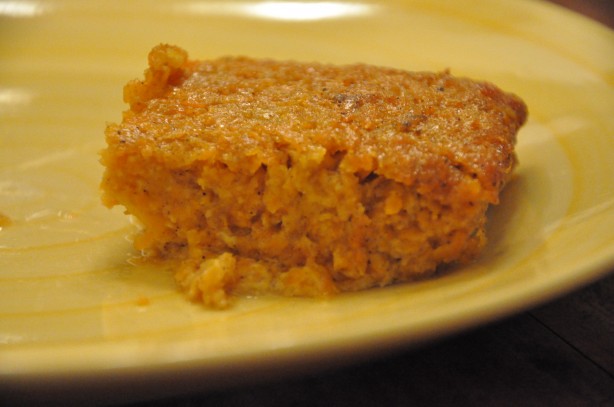
I didn’t think so. I’ve never said those words to any non-immediate family member who didn’t utter “Huh? A sweet potato what?” in response. But that’s it. That’s our It’s-Just-Not-Thanksgiving-or-Christmas-Dinner-If-We-Don’t-Have-This-Dish dish. Sweet Potato Pone. What is it exactly? You mean, aside from the most awesome way to eat sweet potatoes? Well, it’s sort of a cross between a sweet potato casserole and a sweet potato bread.

The idea of trying to explain this dish to the internet at large prompted me to do a quick Google search for “pone.” Pone is apparently some sort of bread my by Native Americans with cornmeal, basically the ancestor of what we now call cornbread.

Ok. So that makes sense to me as, again, this Sweet Potato Pone is a hybrid of a casserole and a bread. Generally, it’s pretty easy to make…that is once you get past the very first step. I’m not going to lie to you, folks, the first step is a pain in the A**!!

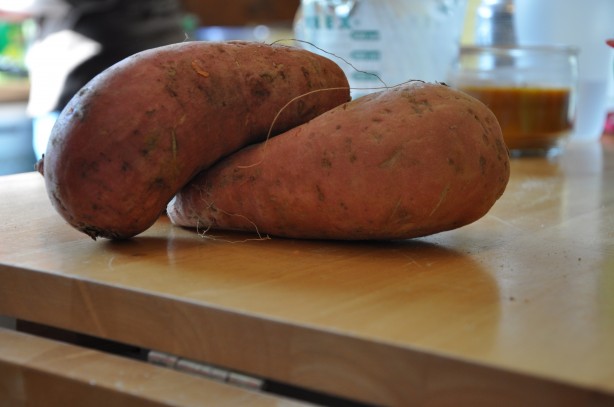
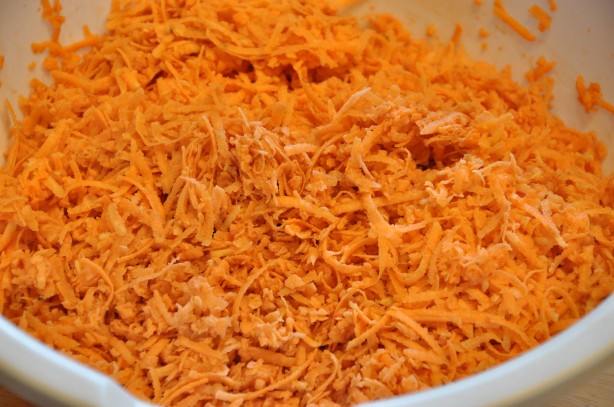
What is this wretched step, you ask? It’s grating 3 cups of sweet potatoes. You’ve basically got to turn this

into this

Since my family scarfs this stuff, we usually double the recipe…meaning we need 6 cups of grated sweet potatoes, which amounts to grating up about 6 sweet potatoes.  My baby sister and I had to take it in shifts, so that we didn’t wind up with shriveled claws for hands!

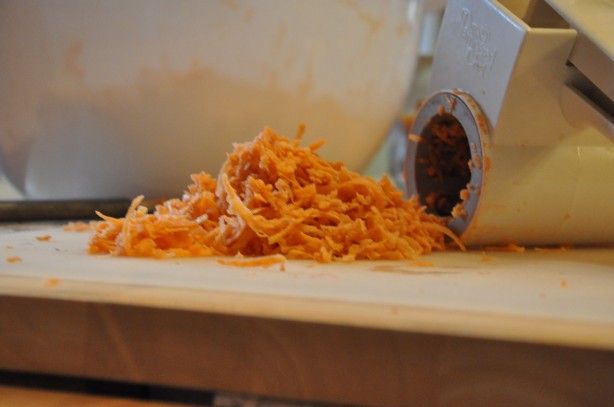
In the past I’ve always used your standard issue cheese grater. This year I decided to try my Pampered Chef Rotary Grater. I don’t know that I would say that this device made the grating easier, but it certainly did reduce the likelihood that I would shave off slivers of my finger or knuckles into the sweet potatoes as I grated…and grated…and grated…

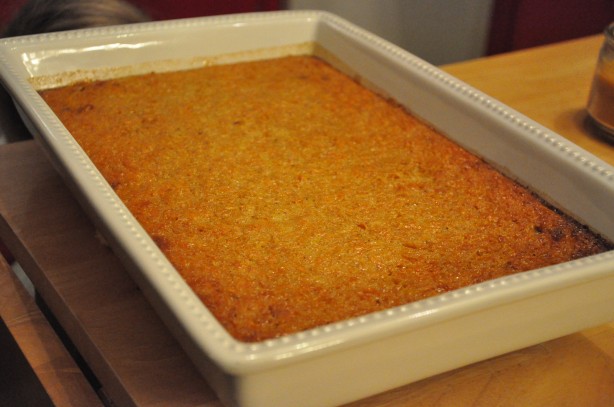
After that, it’s a piece o’ cake…just mixing your standard baking ingredients and popping it in the oven.

I can not stress enough the importance of the inclusion of flour in the recipe…particularly self-rising flour.  This is a minor detail my grandmother failed to include when I attempted to make this for BG’s family the first Thanksgiving we were married.  As a result, I basically served them sweet potato soup.  I kept trying to explain to them that this was wrong…so very, very wrong.  They ate it anyway with weird grimacing smiles, but I haven’t been asked to bring it back to any of the subsequent holidays we’ve shared over the last 11 yrs.

Trust me, though, when you include all the appropriate ingredients – BAM! So very, very yummy!

Here’s the official recipe:

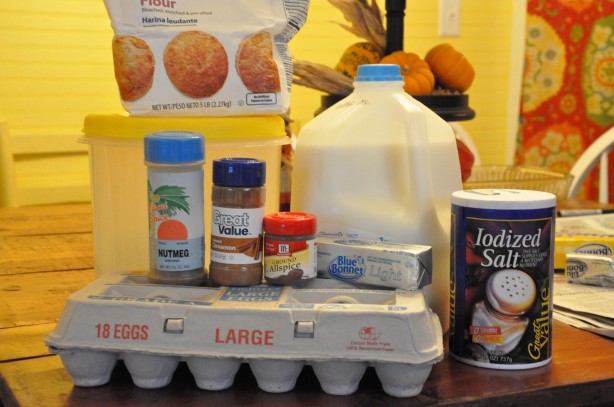
  • 3 cups grated raw sweet potatoes
  • 1 1/2 c sugar
  • 1/2 c melted butter
  • 4 eggs
  • 3 tbsp self-rising flour
  • 1/4 tsp nutmeg
  • 1/4 tsp allspice
  • 1/4 tsp salt

Mix in the order listed above. Bake at 350-375 degrees for ~45-60 min until a toothpick inserted into the center comes out clean.


Enjoy!  What about you?  In this holiday season, what are your family food traditions…or mishaps?  I’d love to hear them!

Cheers, y’all!

Wine Girl

Permanent link to this article: https://kitchendoesnttravel.com/archives/531

I Solemnly Swear That I Am Up To No Good

There’s just something about staying up past midnight baking when your husband is out of town that makes it sound like you are up to no good, right?

When talking about working in the kitchen I usually say “I cook.  I don’t bake.”  I guess that’s because I don’t really have a sweet tooth.  But this week I’ve broken my mantra.  This week…I baked!

To fully appreciate this post you should know that the Beer Guy and I are HUGE Harry Potter fans. Just so you know exactly how serious we are about this, the last book was 700+ pages long, we only got one copy, and we both finished it within 48 hrs…and we did not read it simultaneously! Now that’s dedication, don’t you think?  We always went to the midnight book releases and Thursday night (Friday morning) we went to the midnight release of the movie Harry Potter and the Deathly Hallows, Part I accompanied by our friends Matt, Jen, and Carrie.  Yeah, that’s right.  We’re hard core!  In celebration of this event, I simply could not pass up this recipe for Butterbeer Cupcakes!

(If you don’t know what butterbeer is, stop reading this right now and go start the Harry Potter series.  You’ll thank me later.)

There are three parts to this recipe – cupcakes, ganache, and buttercream icing.

The ingredients for the cupcake batter are pretty standard for baking, except for two key ingredients that are essential to the buttery goodness of this recipe – creme soda and butter flavoring.

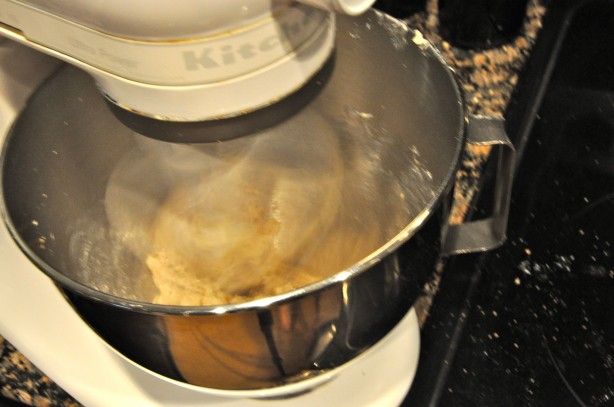
To get started on the batter you have to cream your butter then add in your sugars and eggs.  Just to illustrate how little baking I do, I had to borrow this mixer from a friend because I only have a handheld mixer myself.

(I used this task to finish part of my photography class homework assignment – shooting motion with a purpose.  Using a 1/5 sec shutter speed and a tripod allowed me to capture the motion of the mixer without making the rest of the shot blurry.)

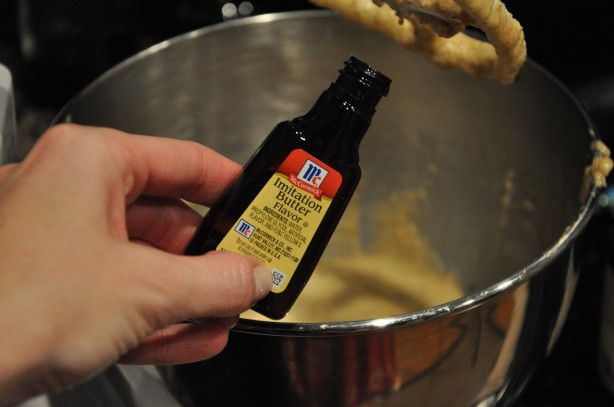
Next you add in the vanilla and all important butter flavoring.

Until I decided to make this I did not know that stuff existed.  The recipe then calls for alternating into the butter mixture the dry ingredients, buttermilk, and 1/2 cup of creme soda.  You may wonder, though, what are you supposed to do with the rest of the creme soda since you’ve got a whole bottle and only need 1/2 cup?

Polish it off yourself, of course.

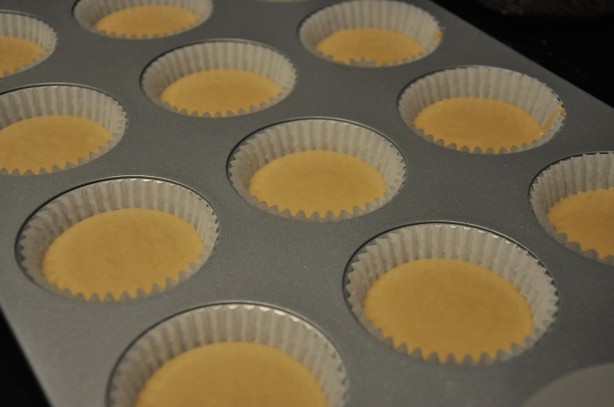
That pretty much completes the batter.  So from here you fill the cupcake tin, get them to baking….

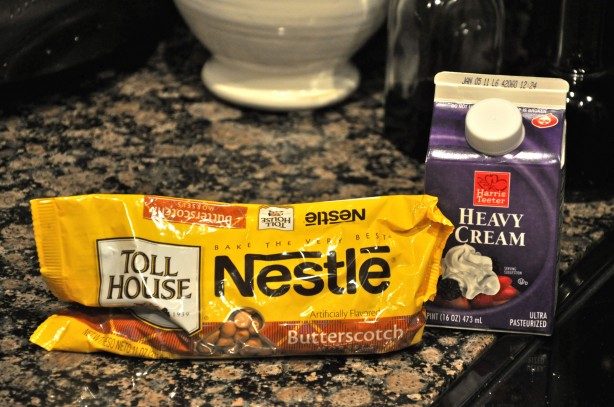
and get to working on the ganache!  That’s right.  I said ganache.  Butterscotch ganache to be exact.  The ingredients for this are simply heavy cream and butterscotch chips.

You basically put the ingredients in a double boiler and melt them down into creamy, butterscotchy goodness like so…

And, yes, I was so serious about this recipe that, even though I do not bake regularly, I went out and bought a double boiler just so I could make this ganache. Surely a double boiler has other uses besides ganache making…

After the ganache has cooled you must poor it into some sort of squirting mechanism.  I used this one from Crate & Barrel.

Is it just me, or does this remind anyone else of puff paint from the 80’s? I’m sure there is some sort of technical baker’s name for it, but I have decided to call it my Ganache Squirter, since it is unlikely that I will use it for any other task.

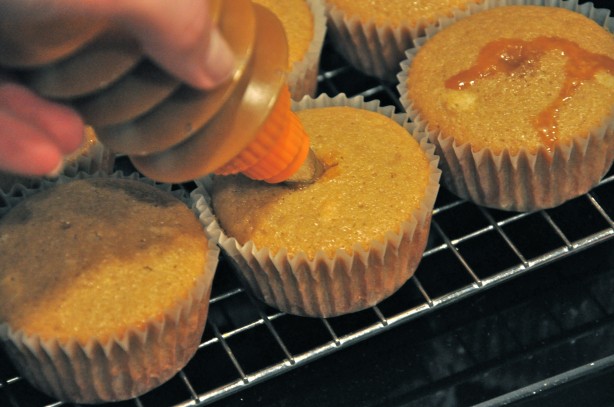
With the cupcakes cooled and the Ganache Squirter filled, now comes the REALLY fun part.  You inject the ganache into the cupcakes by inserting the Ganache Squirter about half-way into the cupcake and squeezing until you notice a little ganache oozing out the top of the cupcake.

I also noticed that the cupcake would sort of swell in my hand when it was full.  This is the first of the three uses for the ganache in this recipe.  The second is for the Butterscotch/Buttercream Frosting to top off the cupcakes.

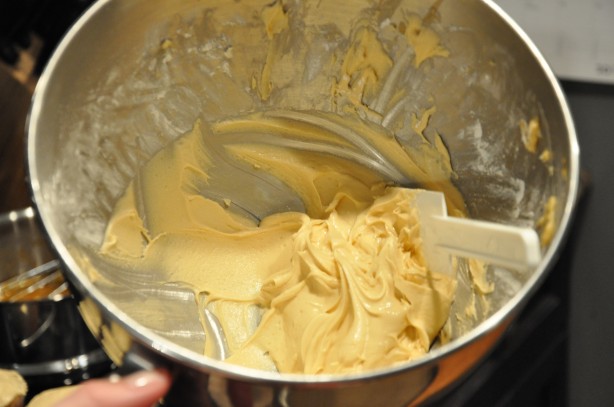
I was so engrossed with what I was doing at this point that I forgot to take pictures until I had finished the frosting and iced half my cupcakes with it.  But basically, you mix 1/3 cup of the butterscotch ganache with butter, powdered sugar, vanilla, butter flavoring, and salt together until it looks like this

Next you slather that buttery goodness all over the tops of your cupcakes and enlist the services of your ganache for the third time by drizzling it across the tops of the now iced cupcakes.  Amy, the author of this recipe from Amy Bites, suggests that you pipe the frosting on the tops.  But, I assure you, if you don’t have a pipette/cake decorating bag and your squirter is otherwise occupied with ganache, slathering works and tastes just as well.

Voila!  Butterbeer Cupcakes!

Please feel free to drool over the finished product.

The process took me just under 3 hours to complete.  I’m sure it would have gone much faster had I not been stopping for photo ops along the way.  It was worth every minute!  (I took some to my colleague, Sam, for her birthday since she is also a big Harry Potter fan and I’m cool like that.  The rest I packed up and took to the theater so my wizarding friends and I could munch on them while waiting to be let into the movie just before midnight.  They were a huge hit all around.)

Whew!  That’s the hardest I’ve worked in a LONG time.  Momma needs a glass of wine…

For now, though…Mischief managed!

Cheers, y’all!

Wine Girl

Permanent link to this article: https://kitchendoesnttravel.com/archives/510

Would It Be So Wrong…

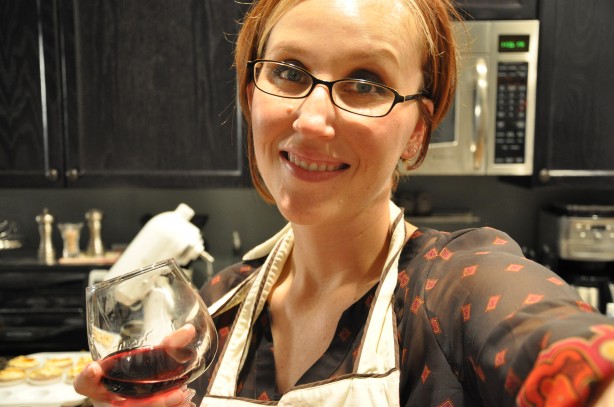
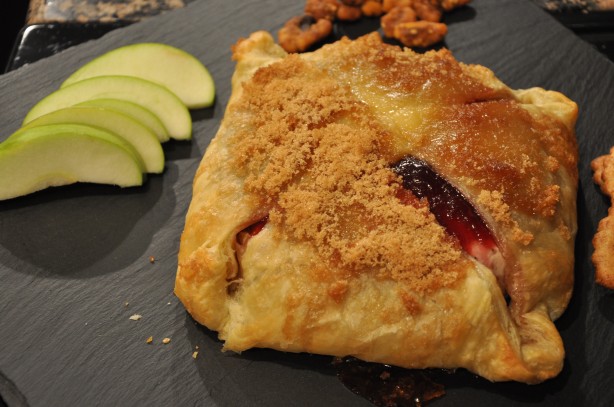
if I just stuck my face in this?

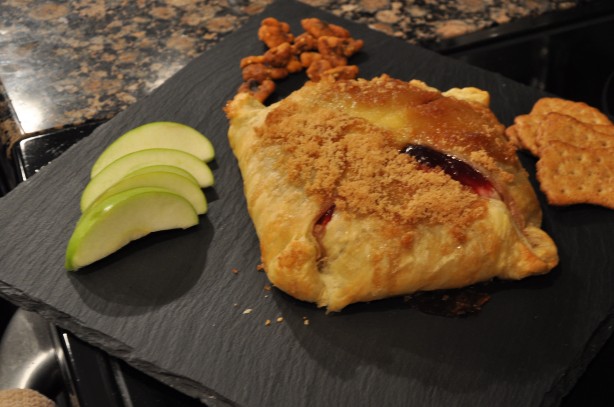
I don’t think so.  I mean, it’s a baked brie.  When you really think about it, who would blame me?

Well, my church small group might not appreciate it since I made it for them.  It was our night to bring snack and I completely forgot about it until the night before.  Once I remembered, I somehow got it in my head that I wanted to take a baked brie.  A friend gave me her recipe last year and I took it to a couple of events where it was a huge hit.  Well…I apparently lost the recipe.  So what’s  girl to do when she’s got her heart set on serving a baked brie and she’s lost her recipe?

Google to the rescue of course!  What did we ever do without it?

The first Google listing was this recipe from The Food Network.   It looked yummy but, frankly, I just didn’t have time to cut the brie in half, stuff it, trim the pastry to the circumference of the brie, and make decorations out of the pastry trimmings.  So that recipe was quickly discarded.

The second listing was from Simply Recipes.   I took one look at the recipe pic and knew this recipe wouldn’t disappoint.  It had a very simple ingredient list.

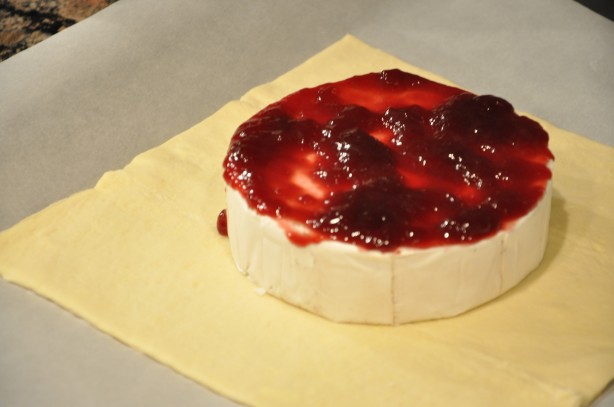
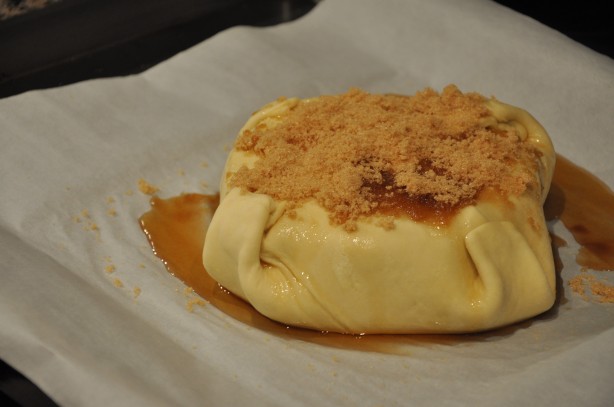
First you lay out the pastry dough and set your brie wheel right in the middle.  Then cover said brie wheel with raspberry jam.

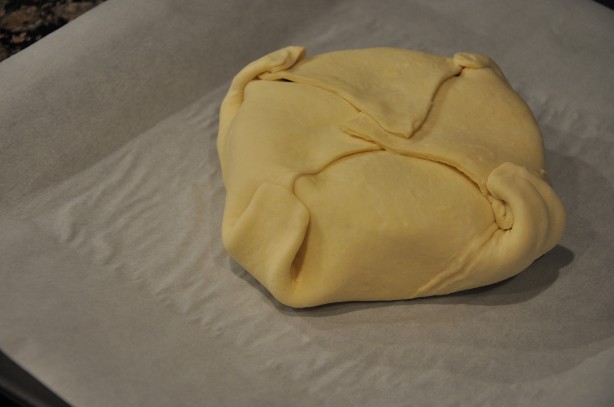
Next you fold the pastry around the cheese, like so…

Then top with maple syrup and brown sugar and bake it up.

I like to serve it with crackers or crostini and sliced apples with candied walnuts on the side.

If you are salivating like I am, pop on over to Simply Recipes and download this yummy, crowd pleasing recipe here.  People will think you slaved over it.  But, really, it only takes about 30 min.

Oh, I almost forgot the most crucial step in the process!  I can’t stress this enough –

DON’T STICK YOUR FACE IN IT BEFORE SERVING IT TO FRIENDS!

It’s tricky, but it can be done.  Trust me.

Cheers, y’all!

Wine Girl

Permanent link to this article: https://kitchendoesnttravel.com/archives/499

Shootin’ Sushi

So I mentioned that I was taking a photography class, right?  I may also have mentioned that I am totally a Penelope and nerdy with anything resembling school.

I had my first class last week. As with my actual schooling, I positioned myself front and center at the head of the class with my clean new notebook and brand new pen ready to jot down all the pearls of photography wisdom spun forth by my instructor.  Despite the fact that my brain really does work in outline form, my class notes looked like pages of indecipherable scribble…just like in high school, college, and grad school.  Therefore, just like in high school, college, and grad school, I spent time this week recopying my notes.  While it may seem redundant, it actually helps me learn to recopy them because I am a visual/tactile learner.  In fact, the more I see it written or do it with my hands, the more it sticks.  So, to help me retain more of what I’m learning, I going to share it with you.

My first class primarily focused on the 3 components of good exposure:

  1. aperture (the amount of light let into the camera)
  2. shutter speed (the length of time the shutter is open/the image is exposed to film or media)
  3. ISO (degree of film or digital sensor sensitivity)

This can all get a little long.  So since my homework this week was about aperture play, I’ll focus on that for this post.

Aperture is measured in f-stops and is one of the key components in establishing the depth of field for your shot.  What do I mean by depth of field?  It basically refers to how much of your shot in focus.  In a shallow depth of field the photographer is basically telling the audience what it should attend to in the shot.  Only the subject is in focus.  For example:

By contrast a greater depth of field means that pretty much everything in the picture is in focus. There’s a lot of detail to take in.  While Ansel Adams was a master at this, here’s my example:

So how do you achieve one type of shot versus the other?  One way is by adjusting the aperture. Here’s where things can get a little confusing.  Remember I said that aperture controls how much light the camera lets in and is measured in f-stops.  The SMALLER the f-stop number, the MORE light is let into the camera, and the more shallow the depth of field.  The LARGER the f-stop number, the LESS light is let into the camera, and the greater the depth of field.  Totally counterintuitive, right?

I know, I know.  The only way that is going to stick in my head is by rote memorization.  So say it with me:

smaller f-stop = more open = more light = shallow depth of field
smaller f-stop = more open = more light = shallow depth of field

Conversely, you could say:

larger f-stop = less open = less light = greater depth of field
larger f-stop = less open = less light = greater depth of field

If you are interested in some additional reading about all this, check out what the Pioneer Woman has to say about all this here.

Here was my homework for week 1:

“With your camera in Aperture Priority and using a long lens, gather several objects together or one object against a busy background and shoot it using EACH different aperture/f-stop your camera allows.”

Now HERE’s where things get really delicious!  I decided that the ideal subject for this project would be sushi.  It’s delicious, colorful, and has multiple textures.  So the Beer Guy and I packed up the D90 and headed out to our new favorite Charlotte sushi spot – Cyros Sushi.
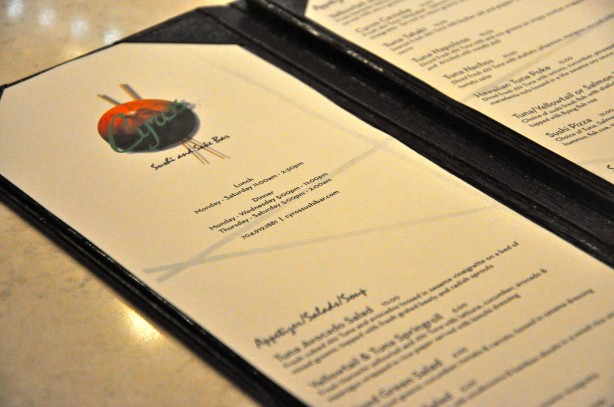
Cyros is a tiny little sushi place inside an unassuming strip mall.  This place is getting more popular and it IS tiny.  So if you go on a Friday night, you may end up eating in the atrium of the strip mall. Not cool or fun.  So we suggest going in the middle of the week or at least not at prime dinner time on the weekend so you don’t run that risk.

Ok, so it loses a couple cool points for location, but it’s really what’s inside that counts.  The decor is elegant and modern, but not so mod that it’s cold and uncozy.  The sushi is FAN-TAB-U-LOUS.  We generally have the same friendly server every time we go.  She knows us, we know her and that makes us regulars!  We love being regulars.

We ordered the Pork Shumai appetizer.  But before we could dig in, I had to whip out the D90. Remember we came here strictly for homework purposes (wink, wink).  I had to take a shot of this at each f-stop my camera would allow.  Since the D90 rocks that means I took about 20 shots of everything we ordered…but I’ll just give you the highlights:

Here it is at f5.3 with a shallow depth of field (i.e. yummy appy in crisp focus, BG’s beer fuzzy in the background)…

now at f14 with a slightly greater depth of field (i.e. appy still crisp, BG’s beer getting more focused)…
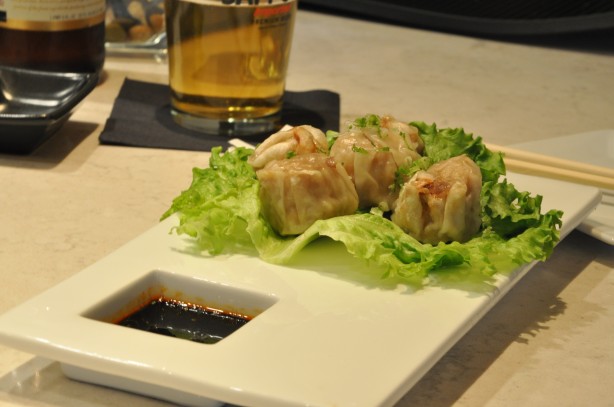
and again at f25, even greater depth of field (i.e. all the objects in the pics are basically equally in focus)

Yes, I know that everything in that last shot is slightly fuzzy.  That’s what’s called camera shake.  The longer your shutter is open, the more still your camera has to be.  This is apparently where tripods come in handy. But I was shooting in hand…and getting really hungry.  Growing faint and weary may be a better description.  I blame the camera shake on low blood sugar.  I took pics at 3 larger f-stops but I was basically foaming at the mouth at that point and the shots are complete blur! You get my point with the pics, right?

Good.  Let’s move on to the main course.  Ladies and gentlemen, meet Cyros Sushi’s Avant Garde Roll…
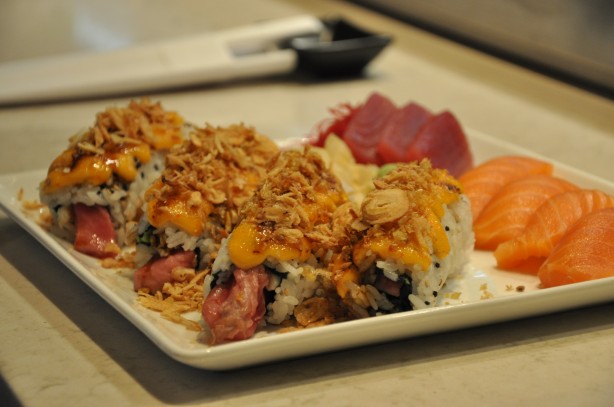
Did you just have to stop yourself from licking the computer screen?  Or was that just me…

Let me spell this out for you, people.  Tuna.  Avocado.  Cream cheese.  Covered in spicy aioli sauce and  – wait for it… fried garlic and shallot slivers.  OH – MY – GAH!!  Whew, I’m gonna need a minute…

Where were we?  Oh yeah…photography.  Just because the more you hear/see it, the more likely you are to remember it the above pic was take with an aperture of f5.3, giving a shallow depth of field (i.e. freaking awesome Avant Garde roll in focus in the front, fuzzy sashimi tuna and untensils in the background).  Here’s the same shot at f14, with a still somewhat shallow but greater depth of field than the last shot.

Notice that the sashimi tuna and utensils are still somewhat fuzzy in the background, but getting to be a little less so. And just for good measure here’s the same shot at f36…
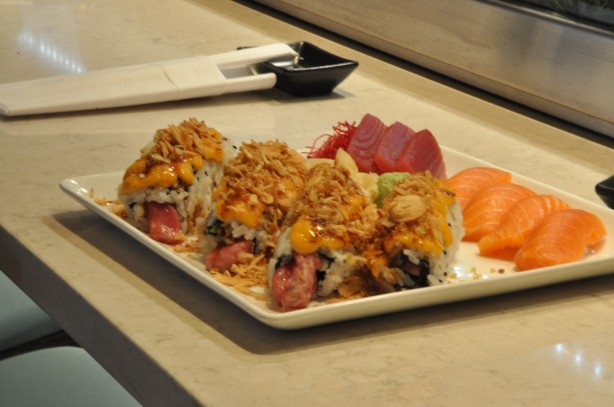
Aaaannd, I’m spent.  I’m not lying to you, people.  I dream about that roll at night.  I lose focus at work thinking about it.  Did I mention the fried garlic and shallot slivers…

Huh?  What happened?  Oh yeah, and the last pic…generally equal focus throughout…unfortunately also with a little bit of camera shake.  Again, I blame low blood sugar.

And THAT, folks, is your first lesson in aperture.  And if you are a sushi lover, live in Charlotte, or are passing through town do yourself a favor.  Go to Cyros Sushi.  Order the Avant Garde roll.  I promise you –

IT. WILL. CHANGE. YOUR. LIFE.

Cheers, y’all!

Wine Girl

Permanent link to this article: https://kitchendoesnttravel.com/archives/484