Tag: Recipes

quickie quiche

Little factoid for  ya – I HATE eggs…but I LOVE a good quiche.  Weird, huh?  That falls along the lines of other food idiosyncrasies such as the fact that I love a good salad, but will not eat lettuce on any kind of sandwich/burger.  I can’t stand how papery the lettuce feels in my teeth between the bread.  Similarly, I love coconut flavor, but will not touch anything with coconut shavings on it. (This quirk is useful when trying to avoid various forms of wedding and German chocolate cake.) Again, it’s a texture thing.  Can’t stand how the coconut shavings feel between my teeth when I chew them.  Oh, and don’t even get me started on water chestnuts!

I’m not really sure what it is about the eggs.  My parents said I’ve hated them since the first time they tried to give them to me as a toddler.  We’re talking total meltdown here.  As in, a reschedule-an-appointment-for-those-Olan-Mills-one-year-old-portraits meltdown.  (If you were born in the 70’s you know the portraits I’m referencing.)   I’m not so sure that it’s a texture thing with the eggs because I’ve tried to eat them pretty much every way they come – scrambled, fried, poached, over easy, omelet.  You name it.  Nope. Nada.  Nothing doing.  Can’t get them down.  I can’t tell you how many times I’ve been at brunch and watched someone order a fabulous omelet, and ask to try a bite, only to end up (discreetly) spitting that bite out into a napkin.  Classy, I know.  But for some reason a quiche works.

This baby is no exception!

DSC_0159

Another weird factoid – I HATE cold lunch.  Oh…and I’m the teensiest OCD about being organized.  Not that there is anything wrong with that…especially when your spice cabinet is alphabetized. 🙂 (I’ll have to show you that one later!)

By now, I bet you are thinking – Where is she going with this?  Here it is…

I like to make one big lunch item for the week on Sunday afternoons and divvy it up into daily portions.  That way all my lunches for the week are ready at once and all I have to do each day is replenish my lunch box each evening when I get home from work.  I hate cold lunch.  So this never involves me pre-making five sandwiches or pasta salad.

A few weeks ago a friend of mine posted a quiche recipe on Facebook.  I had never made a quiche before because, for some reason, I assumed it would be this really complicated thing.  But, after looking at my friend’s recipe I realized how easy it actually was.  She posted a basic recipe and commented that you could fill it with anything that struck your fancy.   I knew that one quiche would yield about 6-8 servings, which would give me a hot lunch to take to work for a week.   That got the old wheels a turnin’.  Hmmm….

My for my first try I used broccoli, Trader Joe’s Sweet Italian Chicken Sausage, and whatever cheese I happened to have in my fridge at the time.  I think it was part Parmesan, part Pecorino Romano.  It was okay, but nothing to write home about.  So the next week while perusing the meat/poultry aisle at Trader Joe’s, I found new inspiration – Sun-Dried Tomato Chicken Sausage!

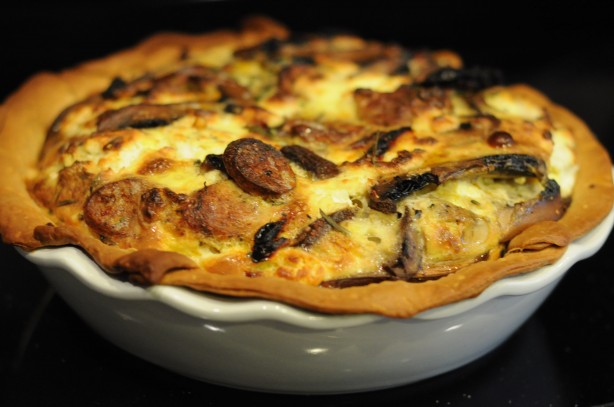
And this Sun-Dried Tomato Quiche was born!

Here’s what you’ll need:

  • 6 eggs
  • 1 1/2 c half & half
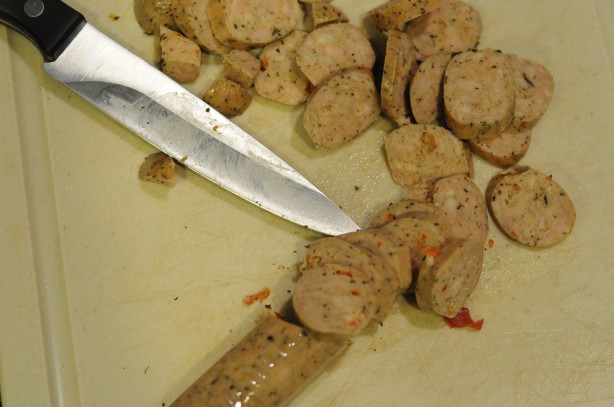
  • ~6 oz Sun-Dried Tomato Chicken Sausage
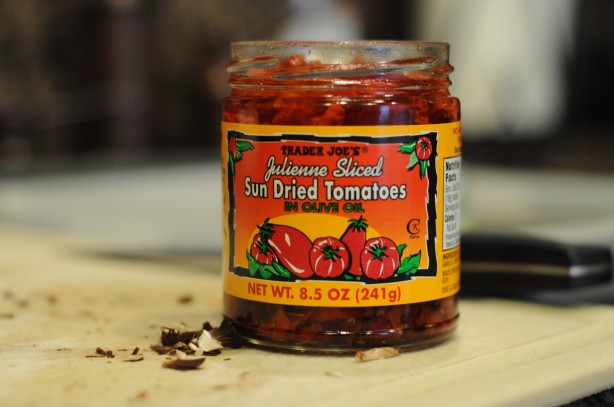
  • ~6 oz of Sun-Dried Tomatoes in olive oil
  • ~2 oz of goat cheese
  • 2 portabella mushroom caps
  • fresh herbs (to taste)
  • kosher salt and pepper (to taste)
  • pre-made pie crust

Preheat the oven to 375.  Slice the sausage (on the bias) and mushrooms and brown in a little bit of olive oil.

DSC_0138

DSC_0140

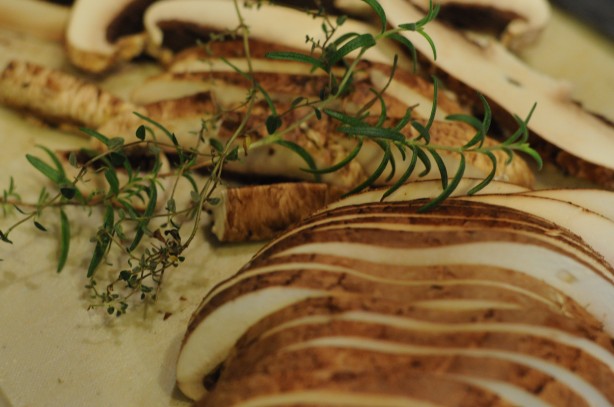
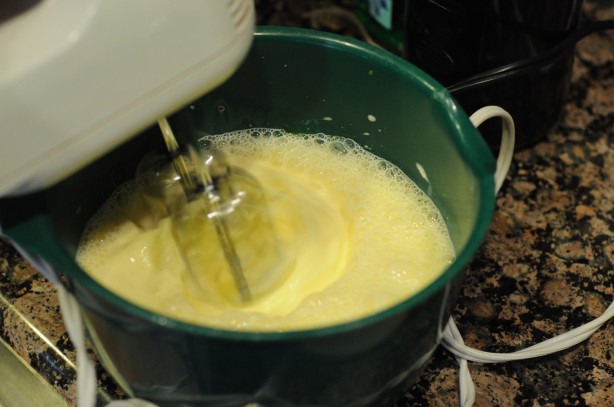
Meanwhile mix the eggs, half & half, salt, pepper, and herbs thoroughly using a hand-held mixer.  (On my first try with this, I tried mixing the goat cheese in at this stage thinking it would blend into the egg mixture.  It didn’t. I was left with a clump of wet eggy goat cheese at the bottom of my mixing bowl. So, I don’t recommend that.)  I have some fresh herbs growing in a window sill.  So I just grabbed a little thyme and rosemary, but you can use what ever you have on hand.

DSC_0141

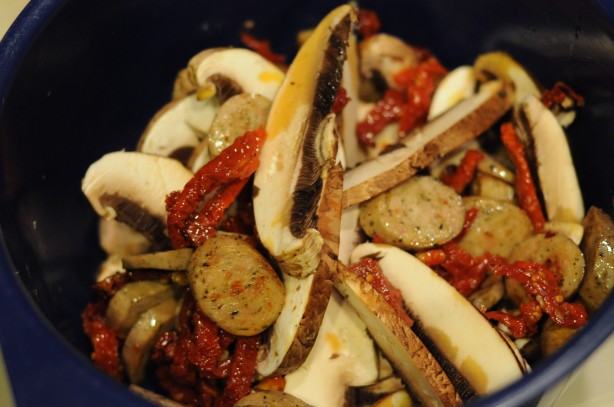
Mix browned sausage and mushrooms in a bowl with the sun-dried tomatoes.
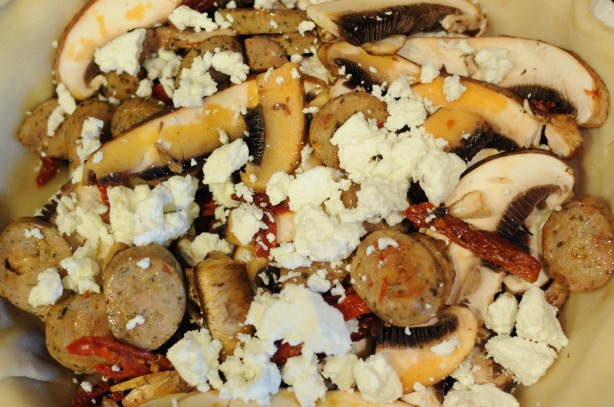
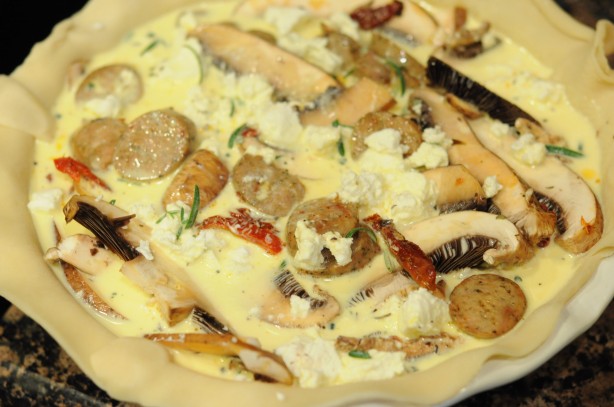
DSC_0144

DSC_0145

Place your pie crust in pie pan.  Add your sausage, mushroom, tomato mixture.  Crumble goat cheese on top.

DSC_0152

Pour egg mixture over the filling.  Bake for 30-60 min until firm and the middle is no longer jiggly.  (My oven takes ~ 45 min.)

DSC_0155

Let cool, then cut into 6 even slices.

Out of curiosity, I used this recipe calculator to figure out the nutritional stats on this yumminess.  As best I can figure, each serving is worth the following:

  • Calories 243.5
  • Total Fat 16.3g
  • Total Carbohydrate 5.3g
  • Protein 14.9g

I like to serve mine with a side salad and some fruit.

DSC_0163

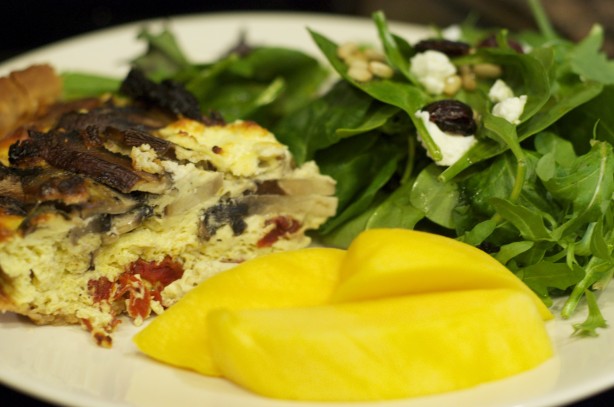
Now, how’s THAT for brown bagging it!

newmrssig


Permanent link to this article: https://kitchendoesnttravel.com/archives/1047

poTAYto/poTAHto

Last Sunday BG and I attended an appreciation cookout as supporters of a friend’s ministry.  She was providing the main course and the rest of us were to bring sides.  I’ve mentioned that I have a reputation a foodie and cook amongst my Charlotte friends, so I wanted to make sure my side was especially scrumptious.  I settled on Sara Foster’s Potato Gratin with Tomatoes, Chevre, and Thyme from The Foster’s Market Cookbook.

I first made this about 5 yrs ago when taking a meal to my dear friend who was just home from the hospital with her first baby.  I mentioned to her then that it was all I could do to avoid sticking my face directly in the pan while I was making it.  You see, I’ve never met a potato I didn’t like.  Baked, scalloped, stuffed, mashed, whipped,  roasted, au gratin, or twice baked – you name it, I like it devour it.   But back to my original story…

The last three weeks in the Beer Guy/Wine Girl household have been ridiculously busy.  And, in keeping with that, I had another event I had to attend prior the aforementioned appreciation cookout.  This potato dish is quite rich and I don’t even want to know the calorie count, so this is not a dish I make on a regular basis…despite its orgasmic deliciousness.  This is a special occasion dish and, as such, I haven’t made it in a couple years.  Meaning…I totally forgot how long it takes to build and cook it!

Our cookout started at 5p.  I got home from my first event at 2:30p and meandered towards the kitchen at about 2:45p to start prepping my dish.  I set to work slicing my potatoes

and melting my butter.

The recipe recommends that you slice the potatoes (~1/8 inch thick) as needed while you build the layers. Something about the starch in the potatoes holding it together.  The butter is to brush along the surface of the baking dish as well as on top of each layer of sliced potatoes.

So I’m slicing, layering, buttering while throwing in some goat cheese, parmigiano reggiano, and thyme in the mix…

then layering in the tomatoes…

(Note to self – Buy a mandoline before making this again.) all the while, merely glancing at the portion of the recipe that said to “bake 30-40 minutes.”  Well, at 4:40p, I moved out of the slicing and layering zone, and looked at the recipe to refresh my memory on the final steps.  At this point I knew we were going to be late but, as I was thinking it only had to bake for 30-40 minutes, I thought it would be a fashionable 15-20 min late.  That’s when I saw it… the instructions to “bake, covered, 45-50 minutes” then “uncover and bake 30-40 min MORE!”

In a panic, I let a few choice words fly, slammed the layered concoction into the fridge, and yelled to BG upstairs that we had to go NOW!  We ended up taking a sad little store-bought side to the cookout, which was a total let down.  Luckily the good food (provided by other people) and even better company at the cookout lifted my spirits.  Then we came home and that’s when I really started to grin…

You see, I had already spent the money to purchase the necessary ingredients for this side as well as a lot of time putting it together.  I couldn’t just throw it out because I hadn’t finished it or taken it to the party.  I had to press on and see it through to the end.  It’s a dirty job, but somebody’s gotta do it.  Really at this point all I had to do was add the toppings and bake (albeit for nearly an hour and a half).  The recipe calls for pouring half-and-half over the ensemble, but I just happened to have some whipping cream left over from my recent creme brulee adventure.  So…

I went with that, then topped it off with some homemade bread crumbs, and baked it until it looked like this.

BG just so happened to be flying out on (yet another) business trip the next morning…and I would be at home…alone…all week…with my creamy, goat cheesy, potato gratin!  Hmmm…

Don’t mind if I do!

Like I said, I never met a potato I didn’t like.  It will be a miracle if this dish survives the next three days!

So was this an honest mistake or an evil brilliant plan?  You decide!

Cheers y’all!

Wine Girl

Permanent link to this article: https://kitchendoesnttravel.com/archives/754

Brrrrr!

Well I don’t know about your neck of the woods, but it has been C-O-L-D in Charlotte.  The snow started falling in the wee hours of Monday morning and did not stop all day.  That is, of course, until the sleet and freezing rain started just in time for rush hour.

Luckily, this is the South…so there was no “rush hour” during the icy/snowy days. You Yankees readers will probably laugh, but at the slightest mention of a snow flurry, Southerners raid the grocery stores, stock up on bread, milk, and eggs like their life depends on it, and will cancel anything and everything for a mere inch of accumulation.  (Weirdly, when we lived in San Diego, I noticed that Southern Californians seemed to do the same thing with predictions of rain .) Oh, and BANANAS!  Bananas are apparently a necessity if you are going to be frozen into your house for 3 days.  I went to three grocery stores and I’m telling you – there’s not a banana in sight.

Today was the first day this week that the high’s here in the Queen City have risen above the 20’s.  As such, all that sleet and freezing rain left us with 1/4″ of ice on top of the snow.  If there is anything Southerners fear more than snow in the winter, it’s ICE!  So basically, I had all day Monday and half the day Tuesday off work.  And what’s a girl to do when she’s cooped up inside because because it looks like this outside…

Make SOUP! What else?

I recently came across the blog 101 Cookbooks.  I’m a REALLY late comer to Heidi’s blog, but I’m loving it so far. I loved it so much that I put her cookbook on my Christmas list this year…and got it!  I’m reading through it right now and hope to show off some recipes soon.  On New Year’s Day, though, Heidi posted this recipe for New Year’s Noodle Soup and I knew I had to try it…slightly modified to my taste, of course.  Being snowed in on Monday was the perfect opportunity.

Thankfully, I planned ahead and soaked my dried lentils and beans overnight so they were ready go when I was.    While heating olive oil in my big new Martha Stewart 7-quart Cast Iron casserole pot, I chopped a big yellow onion

and minced a serrano pepper in my mini Cuisinart food processor then added them both to the pot.

Next you throw in some tumeric, cumin, and freshly ground black pepper and mix it until the onions turn this gorgeous golden yellow color.

Then it’s time for the vegetable stock, lentils, chick peas, and beans.  Heidi’s recipe calls for borlotti beans, but I couldn’t find any to save my life – dried or canned.  So I substituted navy beans, and I think it turned out pretty well.

Let all that cook together for about 25-30 min, then add thin egg noodles.

**Side NoteThe recipe called for 120 g of noodles, which was about 1/2 of the bag I purchased.  With a little slip of the hand I accidentally emptied the entire bag of noodles into my pot.  All those extra noodles basically absorbed most of my soup liquid.  So, my “soup” actually turned out to be more like the consistency of Spaghetti-O’s…even after I added an extra quart of stock.  But it still tasted great and hit the spot during these last few icy cold days.

Just before serving, you add about 3 1/2 oz of spinach leaves.  I decided to chiffonade my spinach leaves because, frankly, the idea of encountering a huge wilty spinach leaf in a spoonful of my soup kinda freaked me out.

It’s not that I dislike spinach.  I’ll gladly eat it in a salad.  But I just can not bring myself to eat it cooked.  That pile of wilty spinach on my plate just grosses me out.  It grossed me out when Popeye squirted it out of the can, and it grosses me out now.

So I made sure than any wilty spinach I encountered in my soup would be as small and delicate a piece as possible, blending nicely the with noodles, legumes, and onions.  See…D-E-L-I-C-A-T-E…

You hardly notice it once you stir it in.  But doesn’t the green spinach look beautiful against lovely golden color of the soup!

Finally, the recipe calls for the addition of 1/2 cup of fresh cilantro and 2 tbsp of fresh dill.  These are both flavors that send a shiver up my spine and, for me at least, can ruin a meal.  I didn’t want to leave them out completely and leave the soup devoid of all flavor.  So I added them, but used dried in stead of fresh and cut WAY back on the amounts.  I think I may have added 3 tsp of each to the 7-qt pot o’ soup.  As such, I could discern a hint of each of those flavors in the finished product, but was not overwhelmed by them in the least.  For me, that was perfect.  If you enjoy these flavors, by all means, follow the original recipe and pile them in.

Lastly, Heidi suggests topping your bowl off with caramelized onions, creme fraiche, sour cream, or toasted and chopped walnuts.  I went for the walnuts and LOVED them.  I tasted the soup both with and without them.  While it was delicious either way, the walnuts added a completely new dimension of flavor.  And, because I’m a good Southern girl, I served it with a side of warm, buttery cornbread!  PERFECTION!

It was scrumptious and JUST wanted I wanted in this cold, cold weather…even if it was more like a pasta dish than an actual soup.  I will definitely be making this again.  Next time, though, I’ll go a little lighter on the noodles and I think I may add some shiitake mushrooms.

Cheers, y’all!

Wine Girl

Permanent link to this article: https://kitchendoesnttravel.com/archives/633

Grandaddy of All Ham & Cheese

So last week, after working at the hospital from 7a-3:30p all day Saturday, running around to do a little Christmas shopping, then spending 3 hours decorating the Christmas tree, I collapsed into a heap on the couch.  Firmly ensconced in my warm blanket with mulled apple cider in hand, I began to mindlessly flip through the channels and came across It’s Complicated on HBO.  Great movie.  I love Nancy Meyers movies.  If you haven’t seen it, you should.  But I digress…

First, it must be said that Meryl Streep’s kitchen in that movie is A-MA-ZING!

Seriously, this is my DREAM kitchen.  But the kitchen is not the point of this post…it’s what is being eaten in this fabulous kitchen!  There is a scene where Meryl Streep and Steve Martin are eating a meal of what looked to be a large piece of cheesy bread, salad and some Chardonnay.  Now, the first time I saw this movie WHAT was being eaten didn’t catch my attention.  But this time, I went – “Huh, wonder what THAT is?”  Through the miracle that is the DVR, I was able to rewind and memorize the French name Meryl Streep called it…

Croque Monsieur!

When curious about making a French dish, there is but one “go to gal” – The Barefoot Contessa herself, Ina Garten.  A little search around the Food Network website informed me that this dish is basically a French Ham & Cheese sandwich.  Hmmm….and I just happen to have fresh homemade bread on my counter. What’s a girl to do?  Why whip some up, of course!

Check out the Barefoot Contessa’s full Croque Monsieur recipe here.  First you have to grate a lot of cheese – I mean a lot.  We’re talking 12 oz/5 cups of Gruyere

and a 1/2 cup of Parmesan.

(Now, my Pampered Chef gadget definitely made this grating easier.) Then you melt some butter and stir in some flour until it looks like this.

Did I just make a roux?  To finish off the sauce, stir in 2 cups of hot milk

followed by the Parmesan, a 1/2 cup of the Gruyere, salt, pepper, and nutmeg and stir it until it is a big ol’ saucepan of creamy, cheesy goodness.  And now, NOW is when we get to put that Beer Bread to good use…

First you slice it up, then toast it up, and cover it in Dijon mustard, sliced ham, and grated Gruyere

top if off with another slice of bread,

and cover it with the cheese sauce.

GET. A. LOAD. OF. THAT!!!!  Any recipe that allows me to ladle cheese sauce on to, well, quite frankly anything, is a winner in my book!

Believe it or not, you then sprinkle MORE Gruyere on top then bake and broil it until it looks like this

Now, BG was not about to let any of the cheesy goodness go to waste.

I mentioned that the fastest way to his heart was to combine his two favorite things – beer and bread.  Well, you add cheese to that and he is on Cloud Nine!

In all honesty I sliced the bread too thickly.  So, the next night I made it in an open faced version and much preferred that.  It’s much prettier that way, don’t you think?

BG declared that this was the “best damn ham and cheese ever” and I have to admit, I whole-heartedly agree with him!

Cheers, y’all!

Wine Girl

Permanent link to this article: https://kitchendoesnttravel.com/archives/545

The Way to a Man’s Heart

They say they way to a man’s heart is through his stomach, right?  But what about a man that loves beer…and bread?  Well, the way to his heart is still through his stomach, but you get there a lot faster if you combine his two favorite things.

Ladies and gentlemen, I give you Beer Bread!

I like how the light in that shot sort of makes the bread look like it was sent from heaven…because I kinda think it was.

Before I go any further, I would like to point out that before tonight, I have never made bread before.  As in EVER.  Never made bread before tonight.  I’ve told you before that I like to cook, not bake.  And frankly, the idea of bread making intimidated me – what with all the yeast, and rising, and kneading, etc, etc, etc…But, as Gabi from Honest Fare points out, the use of beer in the recipe neatly avoids all that jazz because – what is one of the key ingredients in beer…

YEAST!

The recipe was super easy.  In under an hour, I went from someone who never made bread to having fresh homemade bread on my table! The ingredients list was super simple.

First you mix and sift the dry ingredients, then add the “secret ingredient”…

I have no idea what kind of beer that is.  Gabi seemed to feel that “cheap” beer was best.  So I sent BG out for a single can of “cheap plain beer” and this is what he brought back.  It’s probably the kind of thing a beer snob like him wouldn’t ever be caught dead drinking.

Once the secret ingredient has been added, mix until a “stiff batter” is formed.  Gabi recommends that you use your hands once it starts to stiffen so that you don’t over mix it.  Here goes nothing!

Yuck!

After you wash the sticky, yeasty goo off your hands, scrape the batter into a loaf pan, brush on melted butter and bake away!

Voila!  Fresh, homemade bread in under an hour!

Get me!  I made bread! It was so yummy with a biscuity texture.  Delicious!  So very, very delicious.  Some of the commenters on Gabi’s blog discussed their successes with different flavors of beer and adding various herbs.  That’s the beauty of recipe as simple as this.  The potential variations are endless.

Bread this yummy would have been perfectly lovely eaten with just butter or dipped in olive oil.  But with fresh bread in the house, we had to get fancier than that.  Tune in tomorrow to see what we did with it!

Cheers, y’all!

Wine Girl

Permanent link to this article: https://kitchendoesnttravel.com/archives/544

What the Heck Is Pone?

Every family has their holiday food traditions, right? How much to you want to bet you’ve never heard of anything like mine?

Any thoughts…

No? Ok, then. I’ll clue you in. But first, I must ask – Has anybody out there (outside of my immediate family) ever heard of anything called Sweet Potato Pone?

I didn’t think so. I’ve never said those words to any non-immediate family member who didn’t utter “Huh? A sweet potato what?” in response. But that’s it. That’s our It’s-Just-Not-Thanksgiving-or-Christmas-Dinner-If-We-Don’t-Have-This-Dish dish. Sweet Potato Pone. What is it exactly? You mean, aside from the most awesome way to eat sweet potatoes? Well, it’s sort of a cross between a sweet potato casserole and a sweet potato bread.

The idea of trying to explain this dish to the internet at large prompted me to do a quick Google search for “pone.” Pone is apparently some sort of bread my by Native Americans with cornmeal, basically the ancestor of what we now call cornbread.

Ok. So that makes sense to me as, again, this Sweet Potato Pone is a hybrid of a casserole and a bread. Generally, it’s pretty easy to make…that is once you get past the very first step. I’m not going to lie to you, folks, the first step is a pain in the A**!!

What is this wretched step, you ask? It’s grating 3 cups of sweet potatoes. You’ve basically got to turn this

into this

Since my family scarfs this stuff, we usually double the recipe…meaning we need 6 cups of grated sweet potatoes, which amounts to grating up about 6 sweet potatoes.  My baby sister and I had to take it in shifts, so that we didn’t wind up with shriveled claws for hands!

In the past I’ve always used your standard issue cheese grater. This year I decided to try my Pampered Chef Rotary Grater. I don’t know that I would say that this device made the grating easier, but it certainly did reduce the likelihood that I would shave off slivers of my finger or knuckles into the sweet potatoes as I grated…and grated…and grated…

After that, it’s a piece o’ cake…just mixing your standard baking ingredients and popping it in the oven.

I can not stress enough the importance of the inclusion of flour in the recipe…particularly self-rising flour.  This is a minor detail my grandmother failed to include when I attempted to make this for BG’s family the first Thanksgiving we were married.  As a result, I basically served them sweet potato soup.  I kept trying to explain to them that this was wrong…so very, very wrong.  They ate it anyway with weird grimacing smiles, but I haven’t been asked to bring it back to any of the subsequent holidays we’ve shared over the last 11 yrs.

Trust me, though, when you include all the appropriate ingredients – BAM! So very, very yummy!

Here’s the official recipe:

  • 3 cups grated raw sweet potatoes
  • 1 1/2 c sugar
  • 1/2 c melted butter
  • 4 eggs
  • 3 tbsp self-rising flour
  • 1/4 tsp nutmeg
  • 1/4 tsp allspice
  • 1/4 tsp salt

Mix in the order listed above. Bake at 350-375 degrees for ~45-60 min until a toothpick inserted into the center comes out clean.


Enjoy!  What about you?  In this holiday season, what are your family food traditions…or mishaps?  I’d love to hear them!

Cheers, y’all!

Wine Girl

Permanent link to this article: https://kitchendoesnttravel.com/archives/531

It’s Chili Weather

It’s in the air.  You’ve no doubt felt it, as have I.  I’ve been waiting for it since it left last spring.  You know what I mean, right?  The CHILL in the air.  It was 37 degrees in the Queen City yesterday morning.  The leaves are turning.  Football is in full swing.  The jeans and light sweaters have been resurrected from the back of the closet.  It’s officially CHILLY outside.  That means…

It’s time for CHILI inside!

Here’s how to make My Momma’s Chili…which just happens to be the best EVER!

First you start browning the beef

If that looks like a lot it’s because I double the recipe.  (It’s always better the next day because the flavors really mesh.  So I like to make sure we’ve got a few days worth prepared.) Meanwhile chop the bell pepper and the onion

(I hate chopping onions and I don’t like big chunks of onion in anything so I cheat and use the Cuisinart Food Processor)

When about half the beef is browned add peppers, onion, and minced garlic and continue to cook until all the beef is browned, then drain.

My mom always cooked this recipe in a soup pot on the stovetop.  In recent years I have found that a slow cooker works just as well…if not better.  So, next transfer the drained beef and veggie mixture to a slow cooker or soup pot, whichever you have or prefer.

Next up are the canned ingredients

(I have dreams of going all Martha, starting a community garden and eventually using my own canned tomatoes for this, but for now TJ’s will do.) First the diced tomatoes

Then the tomato sauce

Then the beans

My mom’s recipe calls for kidney beans, but I am just not a fan of those.  I much prefer black beans so I substitute those.   (I also think that the contrast of the black against the red of the chili base looks prettier.  So it’s really a win-win.)

Next up are the spices

the water (remember, I’m doubling the recipe.)

and the tomato paste.

Then give it a good stir, cover it, and let it cook.  If you are using a slow cooker, put it on the low heat setting.  If you are cooking it on the stovetop, then simmer.  Either way it needs to cook for a couple hours, stirring occasionally, so that all the flavors meld together.  You’ll know it’s ready when it smells fantastic and all the ingredients look homogenized rather than separated in the pot…like this

To serve it you’ll need corn chips and cheese.  I realize that the addition of corn chips is a little “low brow,” but, trust me, it’s worth it.

Cover the bottom of your bowl with the chips, top with a couple ladles of chili, then sprinkle with the shredded cheese.  Personally, I like a few corn chips on the side for added crunch.

Of course you’ll also need a good brew to rinse it down.  I sent the Beer Guy on a beer run and he came back with this deliciousness – Rogue Chipotle Ale.

Many of our favorite beers are from the Rogue Brewing Company and this one has just been added to the list.  I must say, it’s smoky flavor, crisp mouth feel, and slightly heated finish were the perfect accompaniment to the Chili Dinner and the Chilly Weather.

Go ahead make this dinner for yourself and look for this great beer in your area.  Here’s the full recipe

My Momma’s Chili

  • 1lb ground beef
  • 1 can crushed or diced tomatoes
  • 1 can tomato sauce
  • 2 tsp chili powder
  • 1 tsp salt
  • 1/8 tsp cayenne red pepper (or more for spicier chili)
  • 1/8 tsp paprika
  • 1 medium onion (chopped)
  • 1 green bell pepper (chopped)
  • 1 clove garlic (minced)
  • 1 1/2 c water
  • 1 small can tomato paste

Brown meat, onion, pepper, and garlic in a skillet.  Drain.  Add all ingredients into a soup pot or slow cooker one at a time.  Mix well.  Bring to a medium boil. Stir often.  Turn down to low heat.  Simmer.  Cook until all tastes have blended together.  This can simmer all day, just make sure that it is not too fast or too high or it will scorch.  Add salt and pepper to taste.

Enjoy the warm chili in your tummy while the weather is chilly outside!

Cheers, y’all!
Wine Girl

Permanent link to this article: https://kitchendoesnttravel.com/archives/401

Who Says Green Beans Can’t Be Awesome?

A couple of years ago I was at someone’s house for dinner and had some green beans tossed with some toasted almonds as part of the meal.  I just loved it, but somehow got away without asking her exactly how she prepared the green beans.  So when I got home, I decided to play around and see if I could recreate it myself.  It took a couple tries but I finally figured it out and, if I may be so bold, think that my version tops the original that initially inspired me.

Here’s what you’ll need:

1 lb of green beans (either pre-packaged or fresh from the Farmer’s Market) **I personally like the French Beans because they are thinner.

~ 1/4 c of sliced almonds

1-2 cloves of garlic, minced

~ 1 tsp of olive oil

Salt (preferably Kosher or sea salt) and pepper to taste

**I’ve never really measured any of this.  I just eye-ball it.  This is probably the only recipe you’ll ever find me saying that.  I’m generally a follow-the-directions-to-a-T kind of girl.

Here’s what you do:

You take these green beans

put just enough water in a microwave safe dish to cover the bottom, add the green beans, and pop them in the microwave for approximately 5 min to steam them like so:

Yes, that’s a pie plate.  It’s the perfect size for this dish and I don’t use it for anything else.  I like to cook, not bake.  So, I may as well use it for something!

While the green beans are steaming heat the olive oil over medium heat in a skillet or saute pan.  Throw in the almonds to toast them.

Once the green beans are done steaming, pour off the excess water, add them to the toasting almonds, and throw in garlic, salt, and pepper to taste.  (If you have a garlic press, by all means, use fresh garlic cloves.  If not, the pre-minced jarred garlic that you get in the produce section of the grocery store works just fine.)

I really like garlic.  Looking at that pic, I’m now thinking that my version may actually include 2-3 cloves.  Just use what you like according to your taste preference.

Toss to coat

and serve along side a main dish of your choice.  Tonight I had mine with Chicken Stuffed with Herbed Couscous.

The whole process takes 10 minutes tops.  See, I told you they were awesome!  Give them a try and let me know what you think!

Cheers, y’all!
Wine Girl

Permanent link to this article: https://kitchendoesnttravel.com/archives/194